

Build a Token-based Authentication System in Laravel Sanctum with REST APIs


Being a Web Developer, I have interacted with many authentication systems for building APIs. Some of them are quite popular in production-grade applications like OAuth Systems. Laravel Sanctum provides a simple yet secure wrapper architecture around Token-based Authentication Systems. One can think of it like this, it is the Token-based authentication system with everything needed, packed in one place! Before continuing any further, let's just have an idea of how Token-based Auth Systems work.
In a Token-based Auth System, A user registers with all the information at a specific route of the application, let's say /register. Now after the user's record is stored in the application's database and the user hits /login endpoint, the server generates a Token for that user for a limited time, stores it in the database and shares it back to the user. A token is usually a long string (typically 32/64 characters) of alphanumeric characters. Once this token is generated, the user can access the resources of that application's server based on his authorization. The user has to pass the token back to the server in each API call in the form of a "Request Header || Request Body || Request Params". The server verifies the token and serves the requested resource. This is how a typical Token-based Auth System works.
We are going to implement this token-based auth system using Laravel Sanctum in a short project of REST APIs. I already discussed REST APIs in my last article, please visit that one if you haven't done it yet. Remember, in a production-grade system, if anyone wants more advanced security, one should use OAuth Systems. They are more of a complex one, but worthy in terms of security and robustness. Laravel has Passport package to implement these OAuth Systems in the server.
Our Goal :
We are going to use Laravel Sanctum to implement a Token-based Authentication System for a REST API Project named, Random Joke API. In this project, users will be able to register themselves and generate an access token for them. Verified logged-in users will be able to upload a new joke to the application's database. Then this application will fetch a random joke from its database once you hit the root endpoint and return it as a response in JSON.
Platform :
Throughout the article, I will share code examples keeping Windows OS in mind. But surely, all of the things can be done in Unix/Linux-based OSs as well. Steps will be similar, commands might be a little different in some cases in other operating systems.
What We Need :
- XAMPP should be installed in the system.
- Composer CLI has to be in the system.
- Postman for testing the APIs.
- Any code editor like VSCode, Sublime, Atom etc.
Project Setup :
Let's set up a new Laravel project and build the REST APIs. Later on, we are going to implement the Sanctum-based Auth System for the APIs.
Now, open a terminal/cmd window in the same folder where you want to keep your project folder. We can create a Laravel app with standard project structure and files in two ways. By using composer directly or by using Laravel command line installer.
Assuming composer is already installed in the system (If not, follow the documentation given in the official website), we can fire the below command to create a Laravel sample project :
composer create-project laravel/laravel random_joke_api
After this command is done executing, we shall see a folder named random_joke_api in the same location where terminal/cmd window is open. In this folder, we have our basic boilerplate code of a Laravel App.
Alternatively, we can also install the Laravel Installer first, then create a project. To install the Laravel Installer CLI, fire this :
composer global require laravel/installer
After this is done, we can create the same basic Laravel App with this command :
laravel new random_joke_api
Again we shall see the same project folder like before, containing all the files and folders. Let's go inside our project root in terminal/cmd. Fire this :
cd random_joke_api
Now, we can fire the below command and test if our basic downloaded application is up and running :
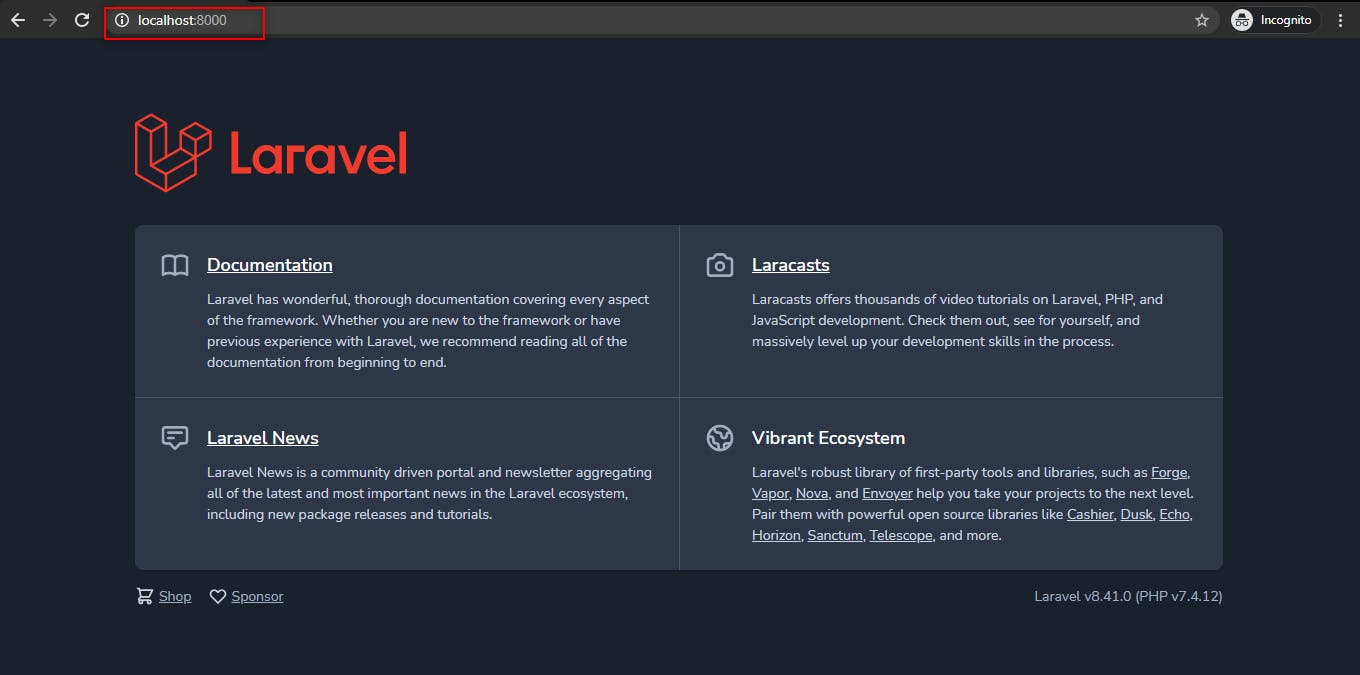
php artisan serve
Our Application should be running at localhost:8000. Let's visit this URL from the browser and we should see a page like below.
Database Setup :
Our basic project is up and running, now let's create the database for it. Assuming XAMPP is already installed in the system, start the Apache and MySQL server from the interface (Just hit the Start button next to each service).
After Apache and MySQL are up and running, open the project folder(random_joke_api) in any text editor of your choice and open the .env file in the editor. You should see a key named DB_DATABASE. Here you should use the proper DB name that you will use for your application. I will be using random_joke_api as my database name here. You can pick any database name of your choice, but make sure that the database exists in the MySQL server. You should also see two more keys in the .env file after DB_DATABASE, DB_USERNAME and DB_PASSWORD. You can use the appropriate values there, based on your MySQL configuration in the system. In my case, the username is root, and the password is blank.
Now open localhost/phpmyadmin in the browser and create a new database for our application. You should use the same name for the database, as you used in the DB_DATABASE key of the .env file in the project. Here I will create a database named, random_joke_api from the PHPMyAdmin interface.

After the DB is created, we need to migrate our table schemas to the random_joke_api database. Come to the terminal/cmd where the Laravel Development Server is running. Hit Ctrl+C multiple times, to stop the server. Now fire this command to create tables in the recently created database :
php artisan migrate
After this is complete, our initial setup with the application is done.
Develop REST APIs :
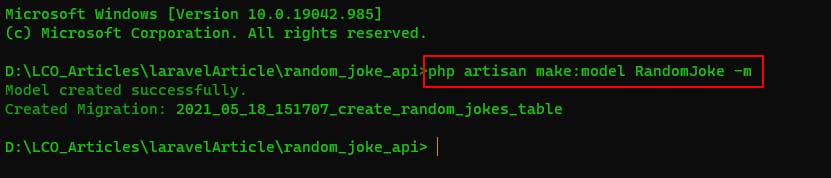
Let's create a table for our Random Joke APIs. First, we need to create a migration and model for our table. So open another terminal/cmd window in our project root and fire the below command to create a model and migration for our random_jokes table :
php artisan make:model RandomJoke -m
It will look something like this :
Now let's open the migration file related to the model RandomJoke in our text editor. It will be named something similar to this : 2021_05_18_151707_create_random_jokes_table.php (Initial timestamp will be different for your case).
In the up function of the migration, add these :
public function up()
    {
        Schema::create('random_jokes', function (Blueprint $table) {
            $table->id();
            $table->string('joke');
            $table->timestamps();
        });
    }
Here the joke column will store our random jokes data. So it will be of the typed string.
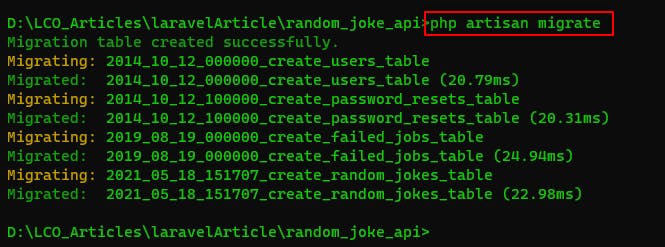
Now hit migrate and apply these changes to our database :
php artisan migrate
It will look similar to this :
After this is done, open the RandomJoke.php model file located in the Models directory and add these lines :
<?php

namespace App\Models;

use Illuminate\Database\Eloquent\Factories\HasFactory;
use Illuminate\Database\Eloquent\Model;

class RandomJoke extends Model
{
    use HasFactory;

    protected $fillable = [
        'joke'
    ];

}
We have configured the Models with our database tables. Now let's create all the routes of this application to access the APIs. Open api.php located in the routes directory and create these lines :
Route::middleware([])->prefix('randomjoke')->group(function () {
    Route::get('/', 'RandomJokeController@random');
    Route::post('/', 'RandomJokeController@store');
    Route::get('/{joke}', 'RandomJokeController@show');
    Route::put('/{joke}', 'RandomJokeController@update');
    Route::delete('/{joke}', 'RandomJokeController@destroy');
});
Now, all the routes located in api.php will already have an API prefix to them. After that, we are adding our own prefix randomjoke to it. So the first route in this list will become : localhost:8000/api/randomjoke
Also, as we can see, we are using /{joke} parameter binding in the routes. This is called Route Model Binding. Take a look at here to know more about this. Let's set this up correctly. Open RouteServiceProvider.php located in app\Providers directory and add these lines to the end of the boot function :
Route::bind('joke', function ($value) {
      $joke = RandomJoke::find($value);

      if(is_null($joke)){
                return [
                    'error' => 'Resource not found'
                ];
      }

      return $joke;
      });
Also, we need to import the RandomJoke model at the top.
use App\Models\RandomJoke;
Now that we have done that, let's create our Controller and add the functions for each of the routes. So pick up your terminal where you left it off and fire this at the project root :
php artisan make:controller RandomJokeController
Open this newly created Controller file from the app\Http\Controller directory and add these functions to it :
<?php

namespace App\Http\Controllers;

use Illuminate\Http\Request;
use Illuminate\Support\Facades\Validator;

use App\Models\RandomJoke;


class RandomJokeController extends Controller
{

    public function random() {

        try {

            $joke = RandomJoke::inRandomOrder()->first();

            return response()->json($joke);

        } catch ( \Exception $e ) {
            return response()->json(['error'=>$e->getMessage()], 500);
        }
    }


    public function show($joke) {

        try {

            if (isset($joke['error'])) {
                return response()->json($joke, 404);
            }

            return response()->json($joke);

        } catch ( \Exception $e ) {
            return response()->json(['error'=>$e->getMessage()], 500);
        }
    }

    public function store(Request $request) {

        try {

            $validator = Validator::make(request()->all(), [
                'joke' => 'required|string|min:1|max:255'
            ]);

            if ($validator->fails()) {
                return response()->json($validator->messages(), 400);
            }

            $joke = RandomJoke::create(['joke' => $request->joke]);

            return response()->json($joke);

        } catch ( \Exception $e ) {
            return response()->json(['error'=>$e->getMessage()], 500);
        }
    }

    public function update($joke, Request $request) {

        try {

            $validator = Validator::make(request()->all(), [
                'joke' => 'required|string|min:1|max:255'
            ]);

            if ($validator->fails()) {
                return response()->json($validator->messages(), 400);
            }

            $joke->joke = $request->joke;
            $joke->update();

            return response()->json($joke);

        } catch ( \Exception $e ) {
            return response()->json(['error'=>$e->getMessage()], 500);
        }
    }

    public function destroy($joke) {

        try {

            $joke->delete();

            return response()->json($joke);

        } catch ( \Exception $e ) {
            return response()->json(['error'=>$e->getMessage()], 500);
        }

    }
}
These controller functions are pretty much straightforward. We are simply doing a basic validation for the store and update method with Laravel's default Validator Facade then we are storing or updating the data. For show/destroy methods, it is doing what the name suggests. Only the random function is returning any random record from the database as a JSON response.
Now our application APIs are ready to interact with the database. Let's test the POST API in Postman to see if it actually works!
If we hit the POST route to store a Random Joke Data, it will look something like this :
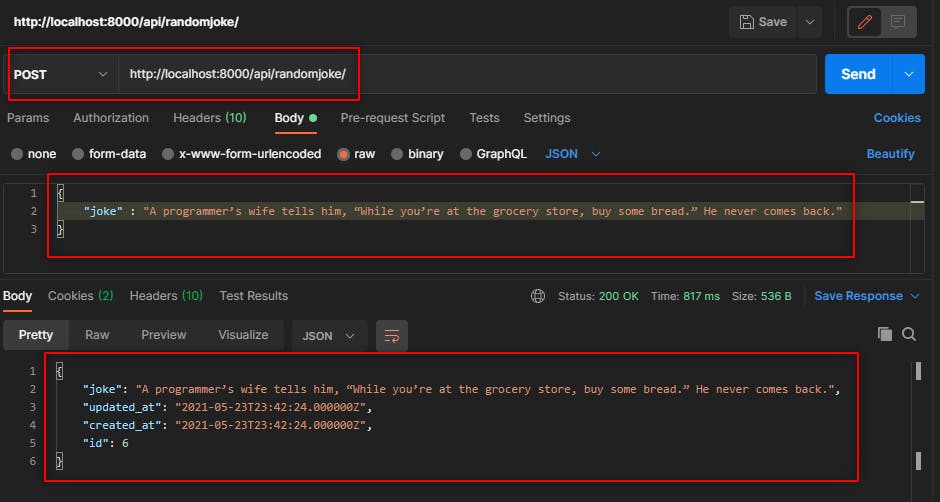 Well, so it works! So far so good. We have created the REST APIs to manipulate the random_jokes table data. Although there is one problem remaining in our API, it is not using any authentication for the users. Now we have to implement Laravel Sanctum Token-based Auth System to secure our APIs. Let's do that next.
Configure Laravel Sanctum :
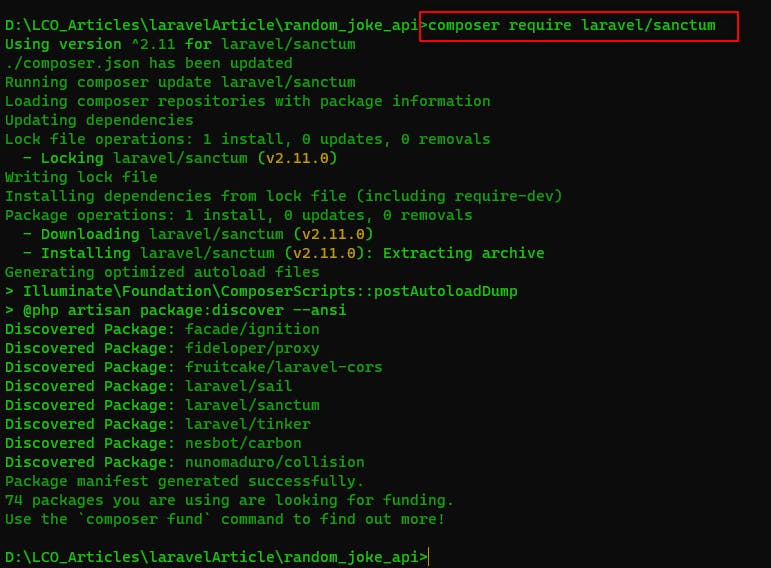
Finally, the main part of the article, let's configure Laravel Sanctum in our project. Open another terminal/cmd window in our project directory and fire this :
composer require laravel/sanctum
Something similar to this :
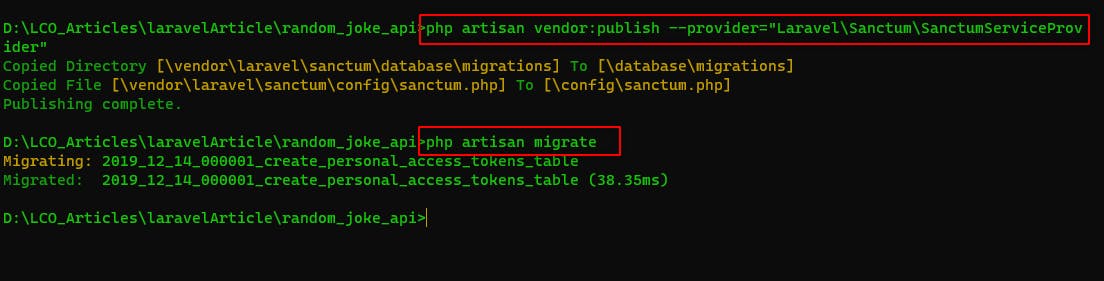
After this is done, we need to publish Sanctum's configuration and migration files. To do that, fire the below command.
php artisan vendor:publish --provider="Laravel\Sanctum\SanctumServiceProvider"
It will be done within seconds. Once it is done, hit migrate to create the tables for Sanctum to store access tokens and other stuff.
Here is the POC of that :
So, we have successfully installed and configured the Laravel Sanctum for our project.
Now we have to issue these access tokens to the user, and also we need to put the route middleware into our API routes which is already provided by Sanctum. To do that, we need to create three more endpoints, /login, /register and /logout.
Let's create a UserController first to implement them. Inside our controller, we are going to put all the methods for login, register, and logout. Fire the below command in terminal/cmd to create a UserController :
php artisan make:controller UserController
After our controller is created, let's add the routes in routes\api.php for all three endpoints. At the top of our previous code in api.php file, add these lines :
Route::post('/register', 'UserController@register');
Route::post('/login', 'UserController@login');
Route::post('/logout', 'UserController@logout');
So our api.php file will look something like this :
<?php

use Illuminate\Http\Request;
use Illuminate\Support\Facades\Route;


Route::post('/register', 'UserController@register');
Route::post('/login', 'UserController@login');
Route::post('/logout', 'UserController@logout');

Route::middleware([])->prefix('randomjoke')->group(function () {
    Route::get('/', 'RandomJokeController@random');
    Route::post('/', 'RandomJokeController@store');
    Route::get('/{joke}', 'RandomJokeController@show');
    Route::put('/{joke}', 'RandomJokeController@update');
    Route::delete('/{joke}', 'RandomJokeController@destroy');
});
Notice, we are leaving the Middleware array blank for the Joke API endpoints. It is because, we are going to add Sanctum's middleware thereafter we create our login, register, and logout endpoints.
Now that we have added the routes, let's add the controller functions for them. Open App\Http\Controllers\UserController in your editor and add the register function first :
public function register(Request $request)
    {
        try {

            $validator = Validator::make(request()->all(), [
                'name' => 'required|string|min:1',
                'email' => 'required|email',
                'password' => 'required|string|min:1'
            ]);

            if ($validator->fails()) {
                return response()->json($validator->messages(), 400);
            }

            $user = new User();

            $user->name = $request->name;
            $user->email = $request->email;
            $user->password = Hash::make($request->password);

            $user->save();

            return response()->json($user);

        } catch ( \Exception $e ) {
            return response()->json(['error'=>$e->getMessage()], 500);
        }
    }
Here, we are using the same Validator Facade to validate the user input, then we are storing the data to the user table using our User Model. It's pretty much straightforward.
Let's add the login function now :
public function login(Request $request) {
        try {

            $validator = Validator::make($request->all(), [
                'email' => 'required|email',
                'password' => 'required|string|min:1'
            ]);

            if ($validator->fails()) {
                return response()->json($validator->messages(), 400);
            }

            $user = User::where('email', $request->email)->first();

            if (! $user || ! Hash::check($request->password, $user->password)) {
                return response()->json(['error'=>'The email or password is incorrect, please try again'], 422);
            }

            $token = $user->createToken(Str::random(40));


            return response()->json(['token'=> $token->plainTextToken]);

        } catch ( \Exception $e ) {
            return response()->json(['error'=>$e->getMessage()], 500);
        }
    }
Now, a couple of things to discuss, we are leaving the validator part here. We already talked about them. After we validate the inputs, we are checking if the user with the given mail id and password, exists in our database or not. If it exists, we are issuing a random token of 40 alpha-numeric characters. This createToken() function stores the token in the hashed format in the database, but for the user, we are returning the simple plain text value of the token in JSON response.
This createToken() function doesn't exist by default. For this to work, we need to add a trait to our User model from this Sanctum package. Let's add it in the User model :
use Laravel\Sanctum\HasApiTokens;

class User extends Authenticatable
{
    use HasApiTokens, HasFactory, Notifiable;
}
Leave the rest of the things as it is in the User model.
Now, the login() function is ready. Let's add the final function logout() to our UserController :
public function logout(Request $request)
    {
        try {

            $validator = Validator::make($request->all(), [
                'email' => 'required|email|exists:users,email'
            ]);

            if ($validator->fails()) {
                return response()->json($validator->messages(), 400);
            }

            $user = User::where('email', $request->email)->first();

            $user->tokens()->delete();

            return response()->json(['success'=>'Logged Out Successfully!']);

        } catch ( \Exception $e ) {
            return response()->json(['error'=>$e->getMessage()], 500);
        }
    }
Again it is easily understandable as well. We are just revoking the tokens from the user which matches with the requested mail id.
Finally, Let's add the import statements for all these three methods to work in our UserController. It will look something like this :
<?php

namespace App\Http\Controllers;

use Illuminate\Http\Request;
use Illuminate\Support\Facades\Validator;
use Illuminate\Support\Facades\Hash;
use Illuminate\Support\Str;
use App\Models\User;


class UserController extends Controller
{

    public function register(Request $request)
    {
        try {

            $validator = Validator::make(request()->all(), [
                'name' => 'required|string|min:1',
                'email' => 'required|email',
                'password' => 'required|string|min:1'
            ]);

            if ($validator->fails()) {
                return response()->json($validator->messages(), 400);
            }

            $user = new User();

            $user->name = $request->name;
            $user->email = $request->email;
            $user->password = Hash::make($request->password);

            $user->save();

            return response()->json($user);

        } catch ( \Exception $e ) {
            return response()->json(['error'=>$e->getMessage()], 500);
        }
    }

    public function login(Request $request) {
        try {

            $validator = Validator::make($request->all(), [
                'email' => 'required|email',
                'password' => 'required|string|min:1'
            ]);

            if ($validator->fails()) {
                return response()->json($validator->messages(), 400);
            }

            $user = User::where('email', $request->email)->first();

            if (! $user || ! Hash::check($request->password, $user->password)) {
                return response()->json(['error'=>'The email or password is incorrect, please try again'], 422);
            }

            $token = $user->createToken(Str::random(40));


            return response()->json(['token'=> $token->plainTextToken]);

        } catch ( \Exception $e ) {
            return response()->json(['error'=>$e->getMessage()], 500);
        }
    }

    public function logout(Request $request)
    {
        try {

            $validator = Validator::make($request->all(), [
                'email' => 'required|email|exists:users,email'
            ]);

            if ($validator->fails()) {
                return response()->json($validator->messages(), 400);
            }

            $user = User::where('email', $request->email)->first();

            $user->tokens()->delete();

            return response()->json(['success'=>'Logged Out Successfully!']);

        } catch ( \Exception $e ) {
            return response()->json(['error'=>$e->getMessage()], 500);
        }
    }
}
A final thing is left to implement. Adding the Sanctum's middleware to protect the API routes. Let's add them in api.php :
<?php

use Illuminate\Support\Facades\Route;

Route::post('/register', 'UserController@register');
Route::post('/login', 'UserController@login');
Route::post('/logout', 'UserController@logout');


Route::prefix('randomjoke')->group(function () {
    Route::get('/', 'RandomJokeController@random');
});

Route::middleware('auth:sanctum')->prefix('randomjoke')->group(function () {
    Route::post('/', 'RandomJokeController@store');
    Route::get('/{joke}', 'RandomJokeController@show');
    Route::put('/{joke}', 'RandomJokeController@update');
    Route::delete('/{joke}', 'RandomJokeController@destroy');
});
And, we are done! You can see we have added auth:sanctum string in the middleware function for all the Joke API Endpoints. Though, we have kept the root route (/) for the Joke API as open.
This is because we want to access the random jokes at the root route of our application without any restrictions. Finally, Let's test our APIs.
Test Joke APIs :
First of all, if we now try to access the POST API from Postman to post a joke without a token, our application won't allow us to do so. Let's try that in Postman :
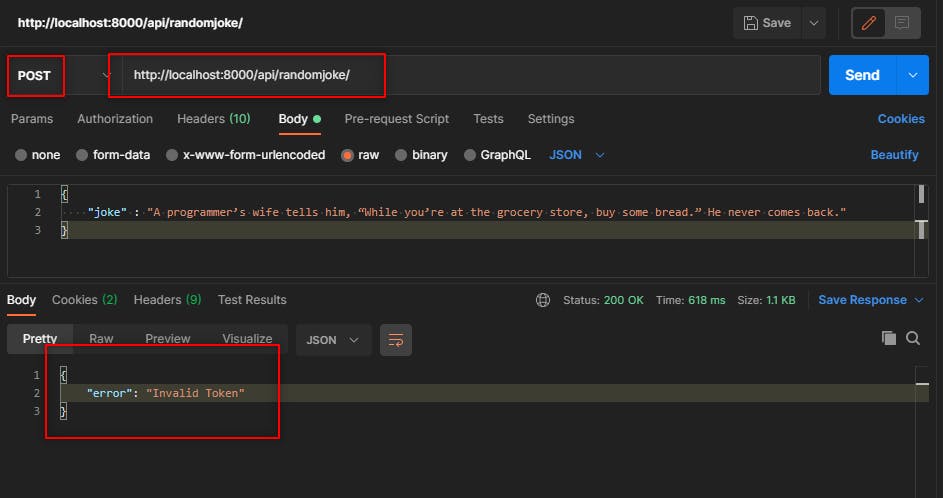
As you can see, it says invalid token.
So, we have to create a user first, then we need to log in to gain an access token for our application.
Let's hit the /register API and create a new user for us. It will look something like this :
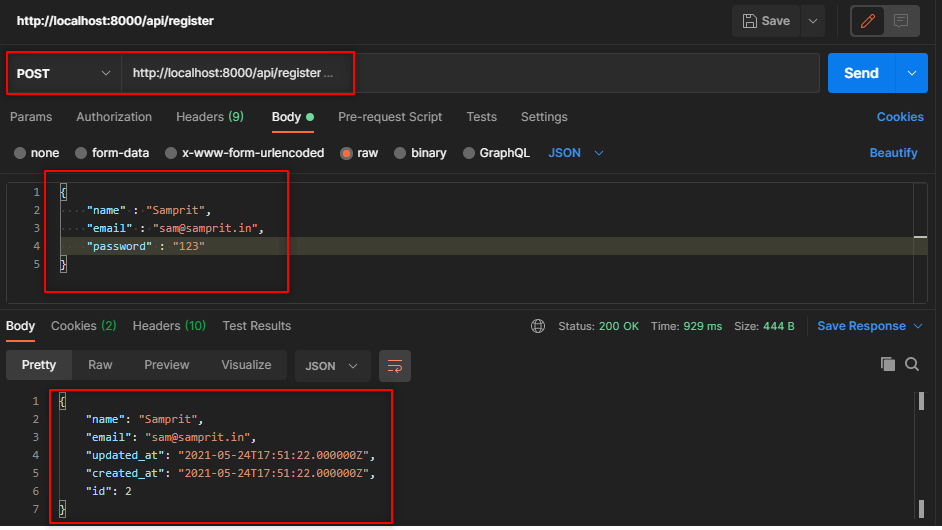
So, we have created a new user with the email : sam@samprit.in and password : 123.
Now, we need to log in to gain an access token from Sanctum with this email. Let's do it.
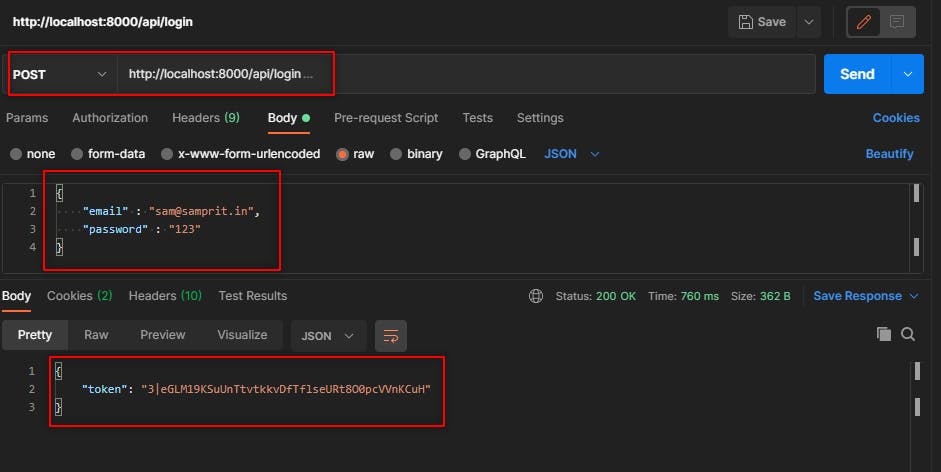
As we can see, we are getting an access token for this user. Now, this access token should be passed on to each request which is restricted by Sanctum as an Authorization header.
Let's do it for posting a new joke by hitting POST API. It will look something like this :
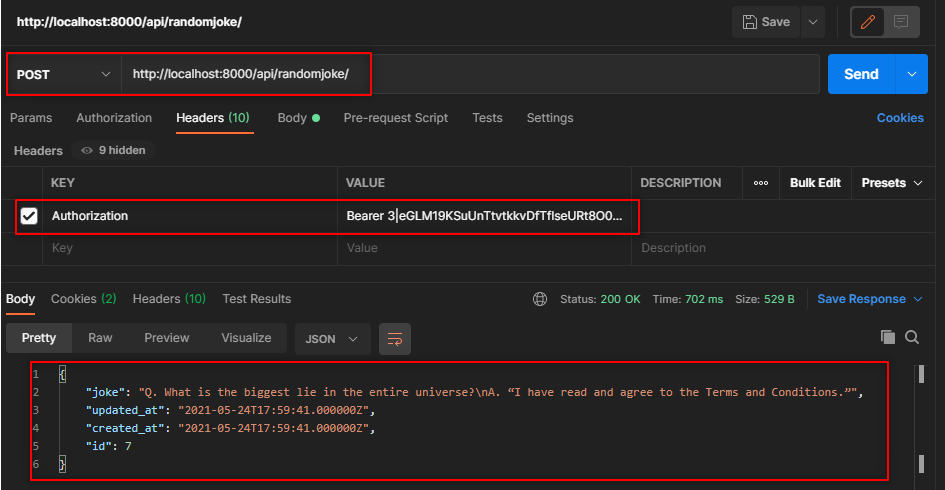
So it works!
Now let's test the /logout API as well like this :
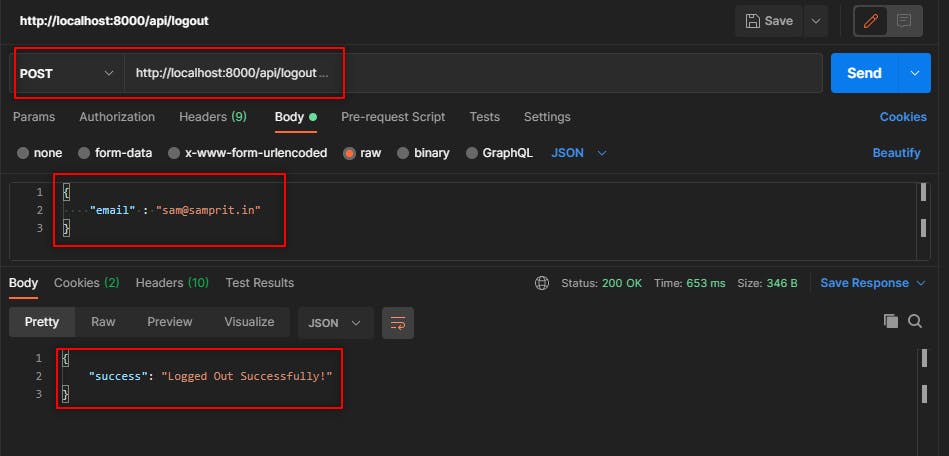
So, Sanctum-based Token Authentication for APIs works perfectly!
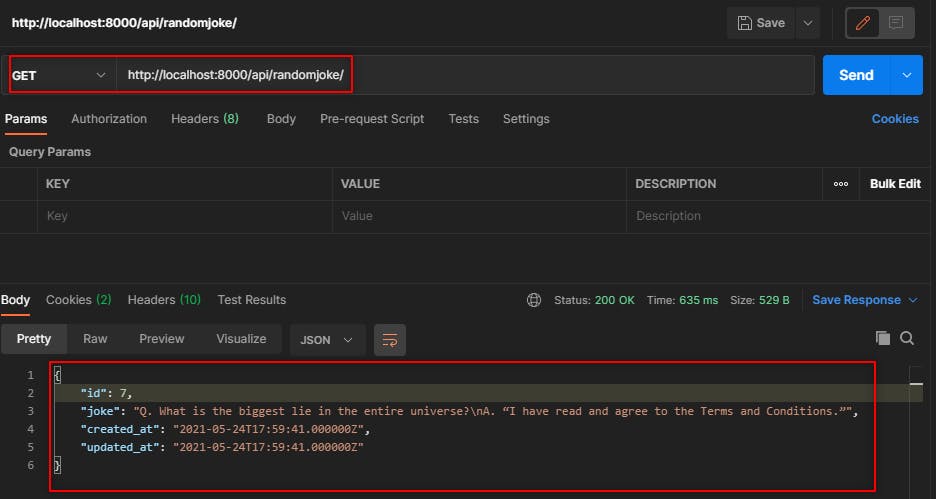
Let's test one final API, which is our /random endpoint to fetch any random joke from our application, and then it will be over. It will look something similar to this :
All the project files are hosted here in my GitHub.
Congratulations!! You made it till the last. I hope you gained something here today and reading it was worth the time. Keep working on different Auth Systems on different frameworks and explore more about them just like I do always. Good Luck.