


Alternate Icons were a premium category feature in iOS Apps in 2020. Recently Instagram rolled out this feature on its 10th Anniversary. A personalisation is a powerful tool in all steps of mobile marketing. If you are excited to learn, Join me!
What are Dynamic Icons
iOS 10.3 comes with dynamic app icon changing feature. Developers will now be able to change app icons without an app update. The functionality of the dynamic app icon is limited, i.e., you can’t either recreate the Clock app's moving hands or date changing Calendar app icon.
Getting Started
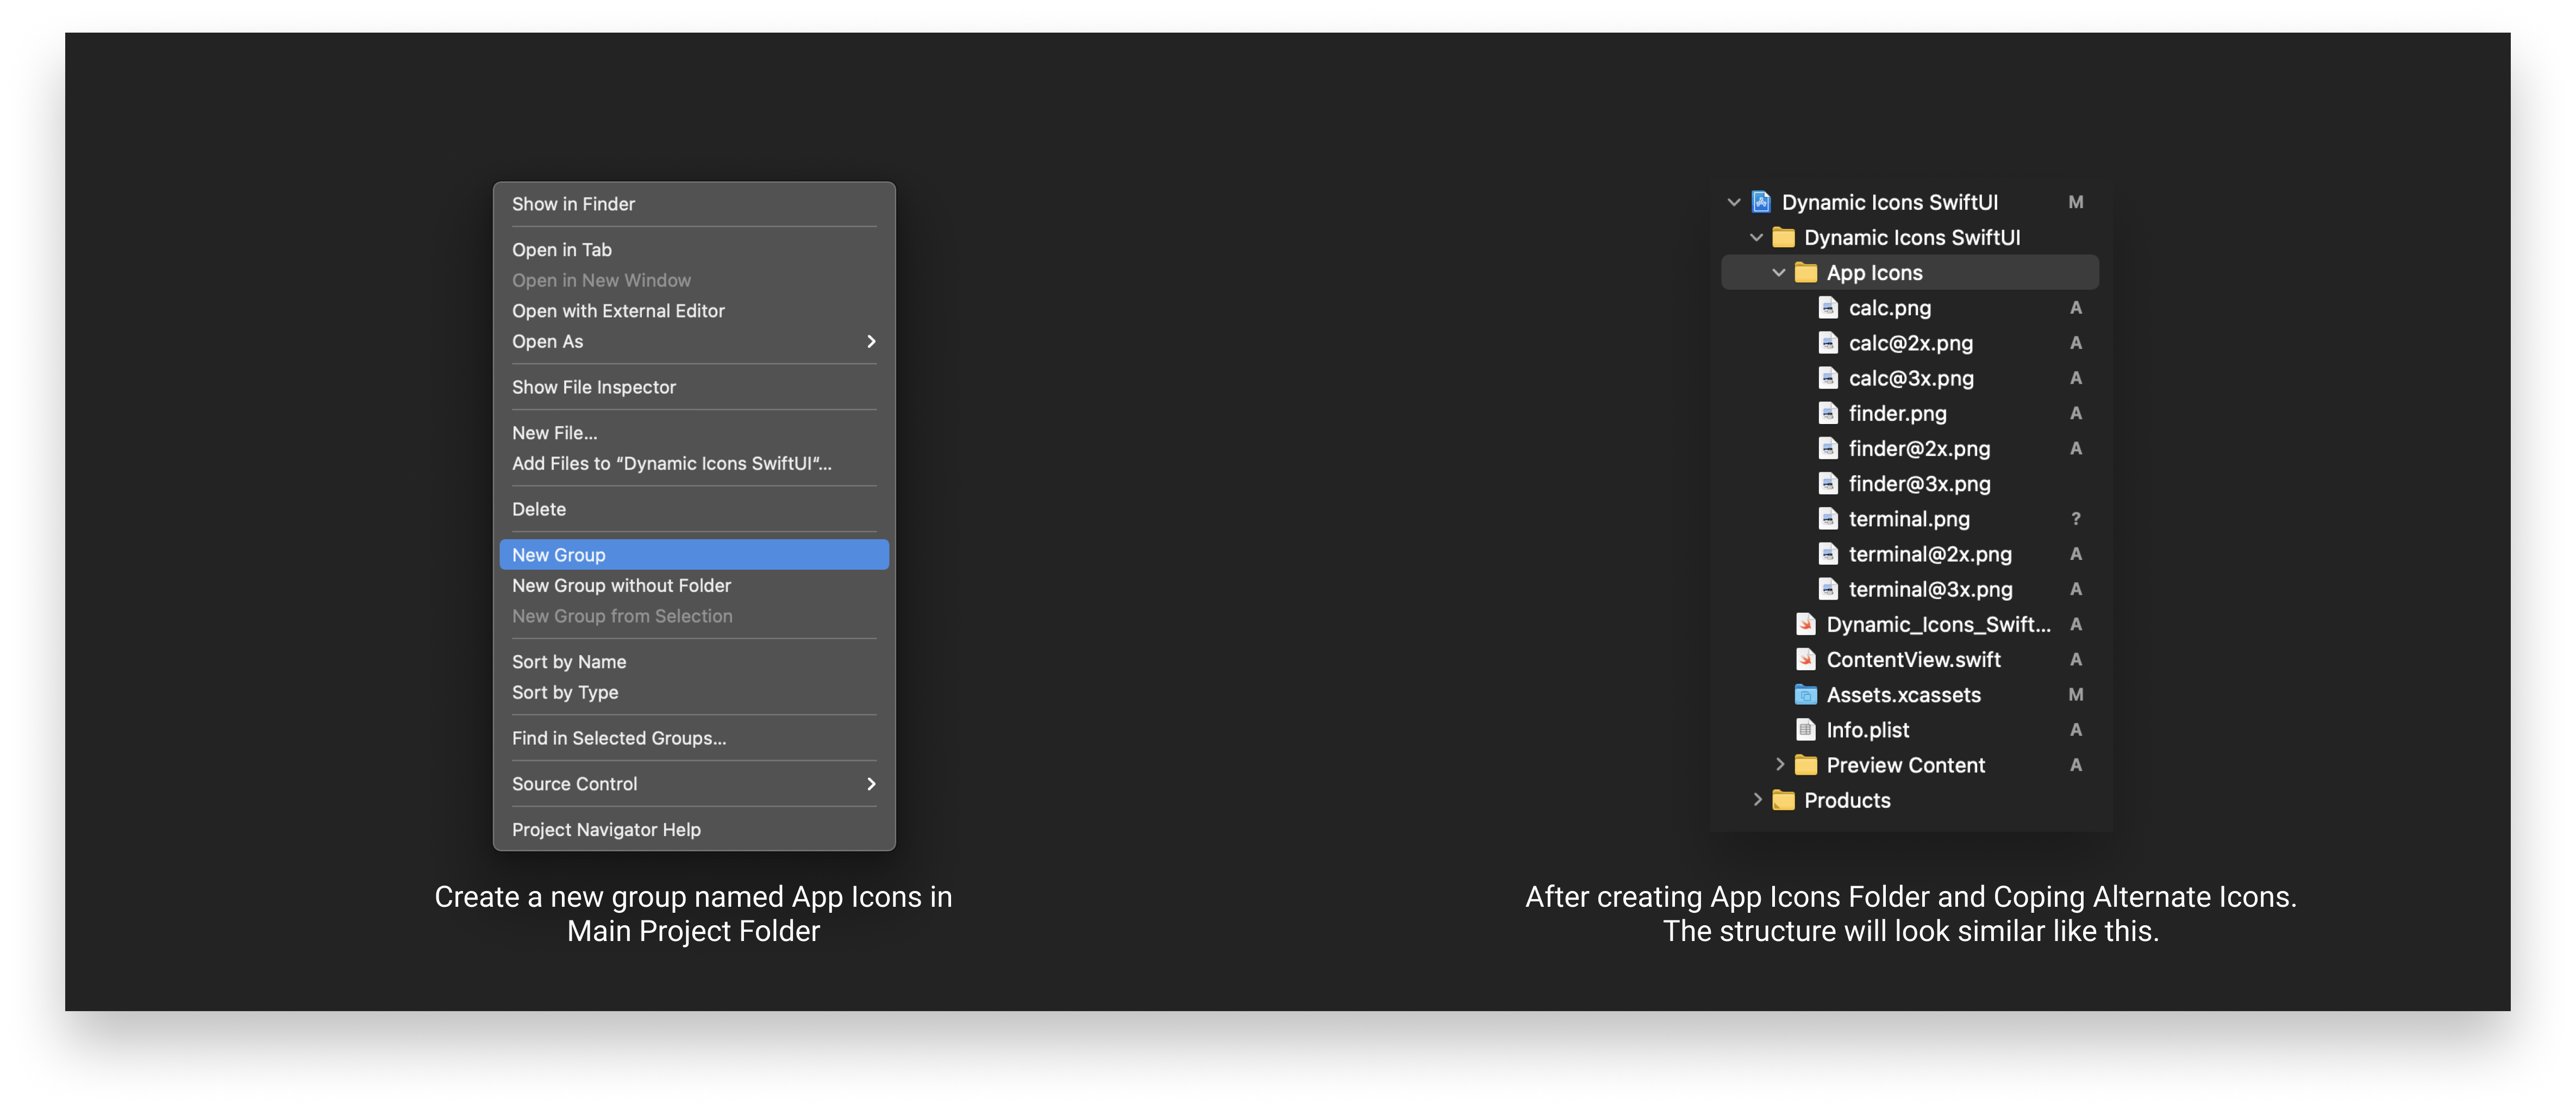
Create a brand new SwiftUI Xcode Project or existed SwiftUI Project also works fine. We need to add some icons to your project in the main folder or a group, rather than inside an asset catalogue. Remember to use the @2x and @3x naming convention to ensure iOS automatically picks the correct icon for users’ devices.
After adding icons, your project folder will look similar to this.
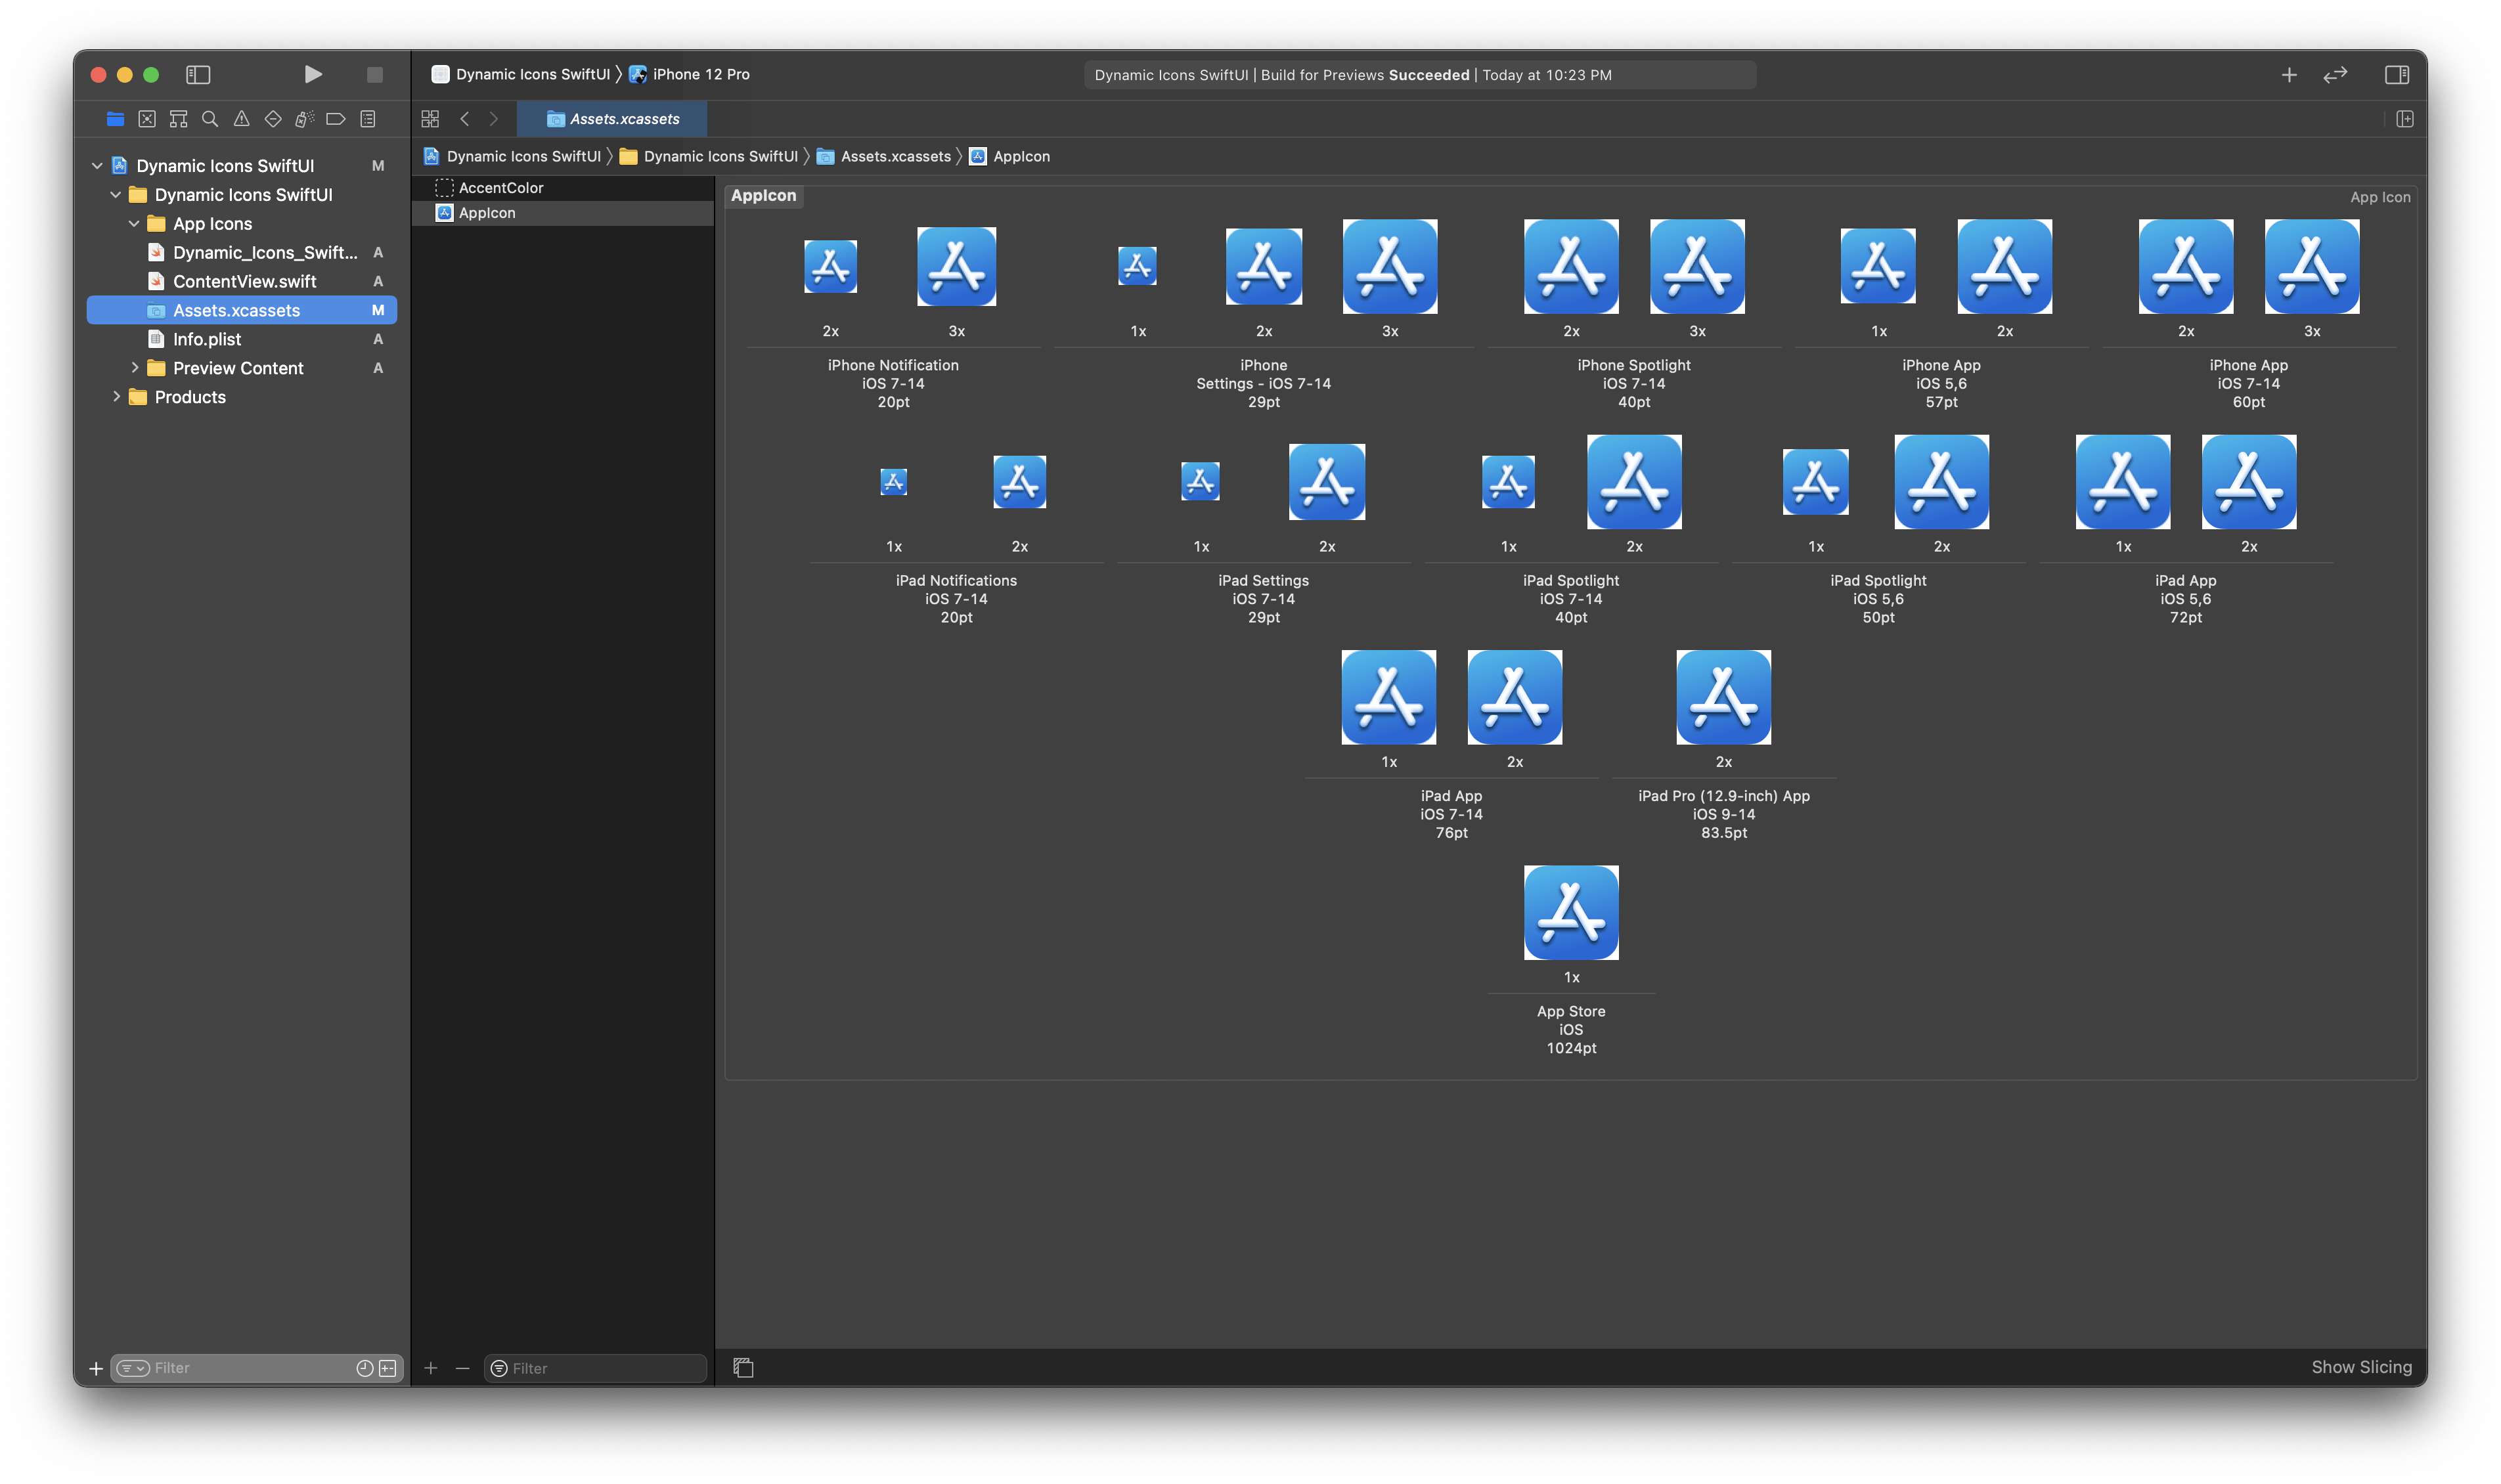
The default app icon of the App is AppStore Icon.
Define Icons in Info.plist
By Default Info.plist file will look like a key-value pair structure, but to further work on this project, you have to change the view into an XML structure. To change, go to your project navigator, right-click your Info.plist file, and choose Open As>Source Code.
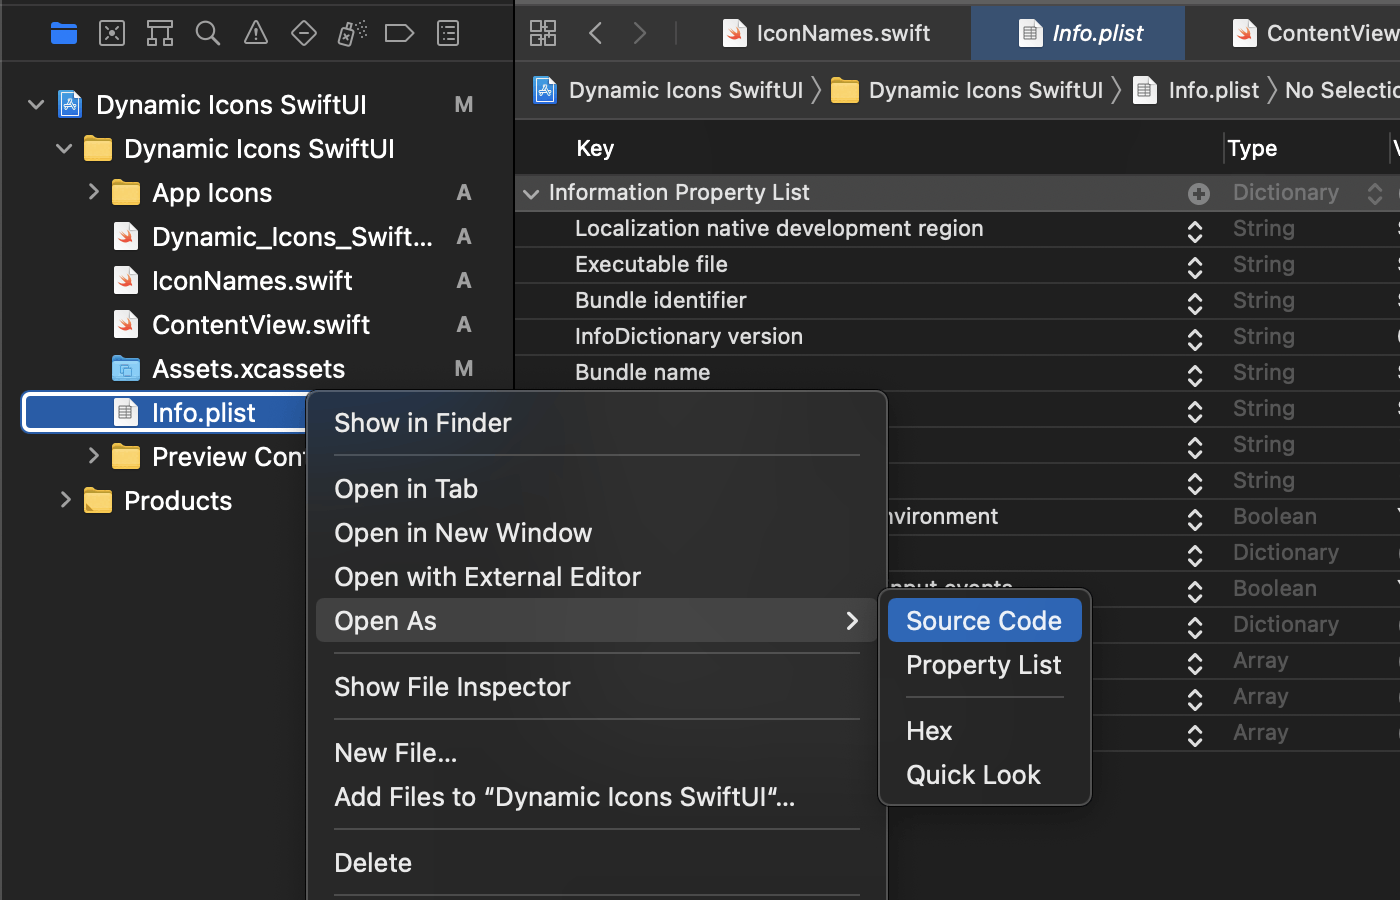
This will reveal the raw XML behind your plist – it might seem like a lot at first, but this way better than using the GUI for this particular task.
Now add this to your XML code after first <dict> in the Info.plist file.
<key>CFBundleIcons</key>
    <dict>
        <key>CFBundlePrimaryIcon</key>
        <dict>
            <key>CFBundleIconFiles</key>
            <array>
                <string>AppIcon</string>
            </array>
            <key>UIPrerenderedIcon</key>
            <false/>
        </dict>
        <key>CFBundleAlternateIcons</key>
        <dict>
            <key>finder</key>
            <dict>
                <key>CFBundleIconFiles</key>
                <array>
                    <string>finder</string>
                </array>
                <key>UIPrerenderedIcon</key>
                <false/>
            </dict>
            <key>terminal</key>
            <dict>
                <key>CFBundleIconFiles</key>
                <array>
                    <string>terminal</string>
                </array>
                <key>UIPrerenderedIcon</key>
                <false/>
            </dict>
            <key>calc</key>
            <dict>
                <key>CFBundleIconFiles</key>
                <array>
                    <string>calc</string>
                </array>
                <key>UIPrerenderedIcon</key>
                <false/>
            </dict>
        </dict>
    </dict>
Defining the icons for your project is done with a particular set of property list keys and values. Let me breakdown this code for you using a simple structure below.
CFBundleIconsis a dictionary which holds two keys ofCFBundlePrimaryIconthat defines primary icon andCFBundleAlternateIconsdefines alternate icons.CFBundlePrimaryIconkey itself is a dictionary that hasCFBundleIconFiles, which is an array containing the filenames for your primary icon andUIPrerenderedIconis a boolean value that enables gloss effect for iOS Icon.CFBundleAlternateIconskey is also a dictionary, but this time, its children's keys are the names of images you want to use. This doesn’t need to be their filename; however, you want to reference each icon in your code.Similar to
CFBundlePrimaryIcon, each icon inCFBundleAlternateIconshas two keysCFBundleIconFilesarray for icon files andUIPrerenderedIconboolean for each icon to apply gloss effect settings.
Fetching Icons
Create a new swift class with name IconNames and copy below code to the file
import SwiftUI

// 1
class IconNames: ObservableObject {

    var iconNames: [String?] = [nil]
    @Published var currentIndex = 0

    // 2
    init() {
        fetchAlternateIconNames()

        if let currentIcon = UIApplication.shared.alternateIconName {
            self.currentIndex = iconNames.firstIndex(of: currentIcon) ?? 0
        }
    }


    func fetchAlternateIconNames() {
        // 3
        if let icons = Bundle.main.object(forInfoDictionaryKey: "CFBundleIcons") as? [String: Any],
           let alternateIcons = icons["CFBundleAlternateIcons"] as? [String: Any] {
            for(_, value) in alternateIcons {


                guard let iconList = value as? Dictionary<String,Any> else {
                    return
                }

                // 4
                guard let iconFiles = iconList["CFBundleIconFiles"] as? [String] else {return}

                guard let icon = iconFiles.first else {
                    return
                }

                iconNames.append(icon)
            }
        }
    }
}
IconNamesclass conforms to theObservableObjectprotocol, which means SwiftUI’s views can watch it for changes. This class has two variables,iconNamesis an array of optional Strings and other iscurrentIndexmarked@Publishedwhen changed, all views using that object will be reloaded to reflect those changes.
This initializer takes care of fetching alternate icons list and changing the
currentIndexvalue.This will fetch the alternate icons defined in
Info.plistmain Bundle.This will fetch the icon files as a string and append it to
iconNamesarray
In this class, we have created a function to fetch icon names from Info.plist file and return an array of strings when called.
Creating View
Now, we will create a view to visualise the icons fetched before. copy below code to ContentView.swift in Project.
import SwiftUI

struct ContentView: View {

    // 1
    @EnvironmentObject var iconSettings : IconNames
    private var twoColumnGrid = [GridItem(.flexible()), GridItem(.flexible())]


    var body: some View {

        NavigationView {
            ScrollView {
                LazyVGrid(columns: twoColumnGrid,spacing: 8) {
                    // 2
                    ForEach(0..<iconSettings.iconNames.count) { index in
                        VStack {
                            Image(uiImage: UIImage(named: iconSettings.iconNames[index] ?? "AppIcon60x60") ?? UIImage())
                                .renderingMode(.original) //important
                                .resizable()
                                .frame(width: 120,height: 120)
                                .scaledToFit()

                                // 3
                                .onTapGesture {

                                    let value = index
                                    let mindex = self.iconSettings.iconNames.firstIndex(of: UIApplication.shared.alternateIconName) ?? 0

                                    // 4
                                    if mindex != value{

                                        UIApplication.shared.setAlternateIconName(self.iconSettings.iconNames[index]){ error in
                                            if let error = error {
                                                print(error.localizedDescription)
                                            } else {
                                                print("Successfully AppIcon is Changed")
                                            }
                                        }
                                    }
                                }
                            Text("\(iconSettings.iconNames[index]?.capitalized ?? "Default")")
                        }.padding()
                    }
                }.padding()
            }.navigationBarTitle("Dynamic Icons")
        }
    }
}
ContentViewas two variables,iconSettingsmarked as@EnvironmentObjectproperty wrapper allows us to create views that rely on shared data, often across an entire SwiftUI app and other is fortwoColumnGridin LazyVStack.This loops through the icons and loads them into the view that shows an icon with name in a two grid layout structure.
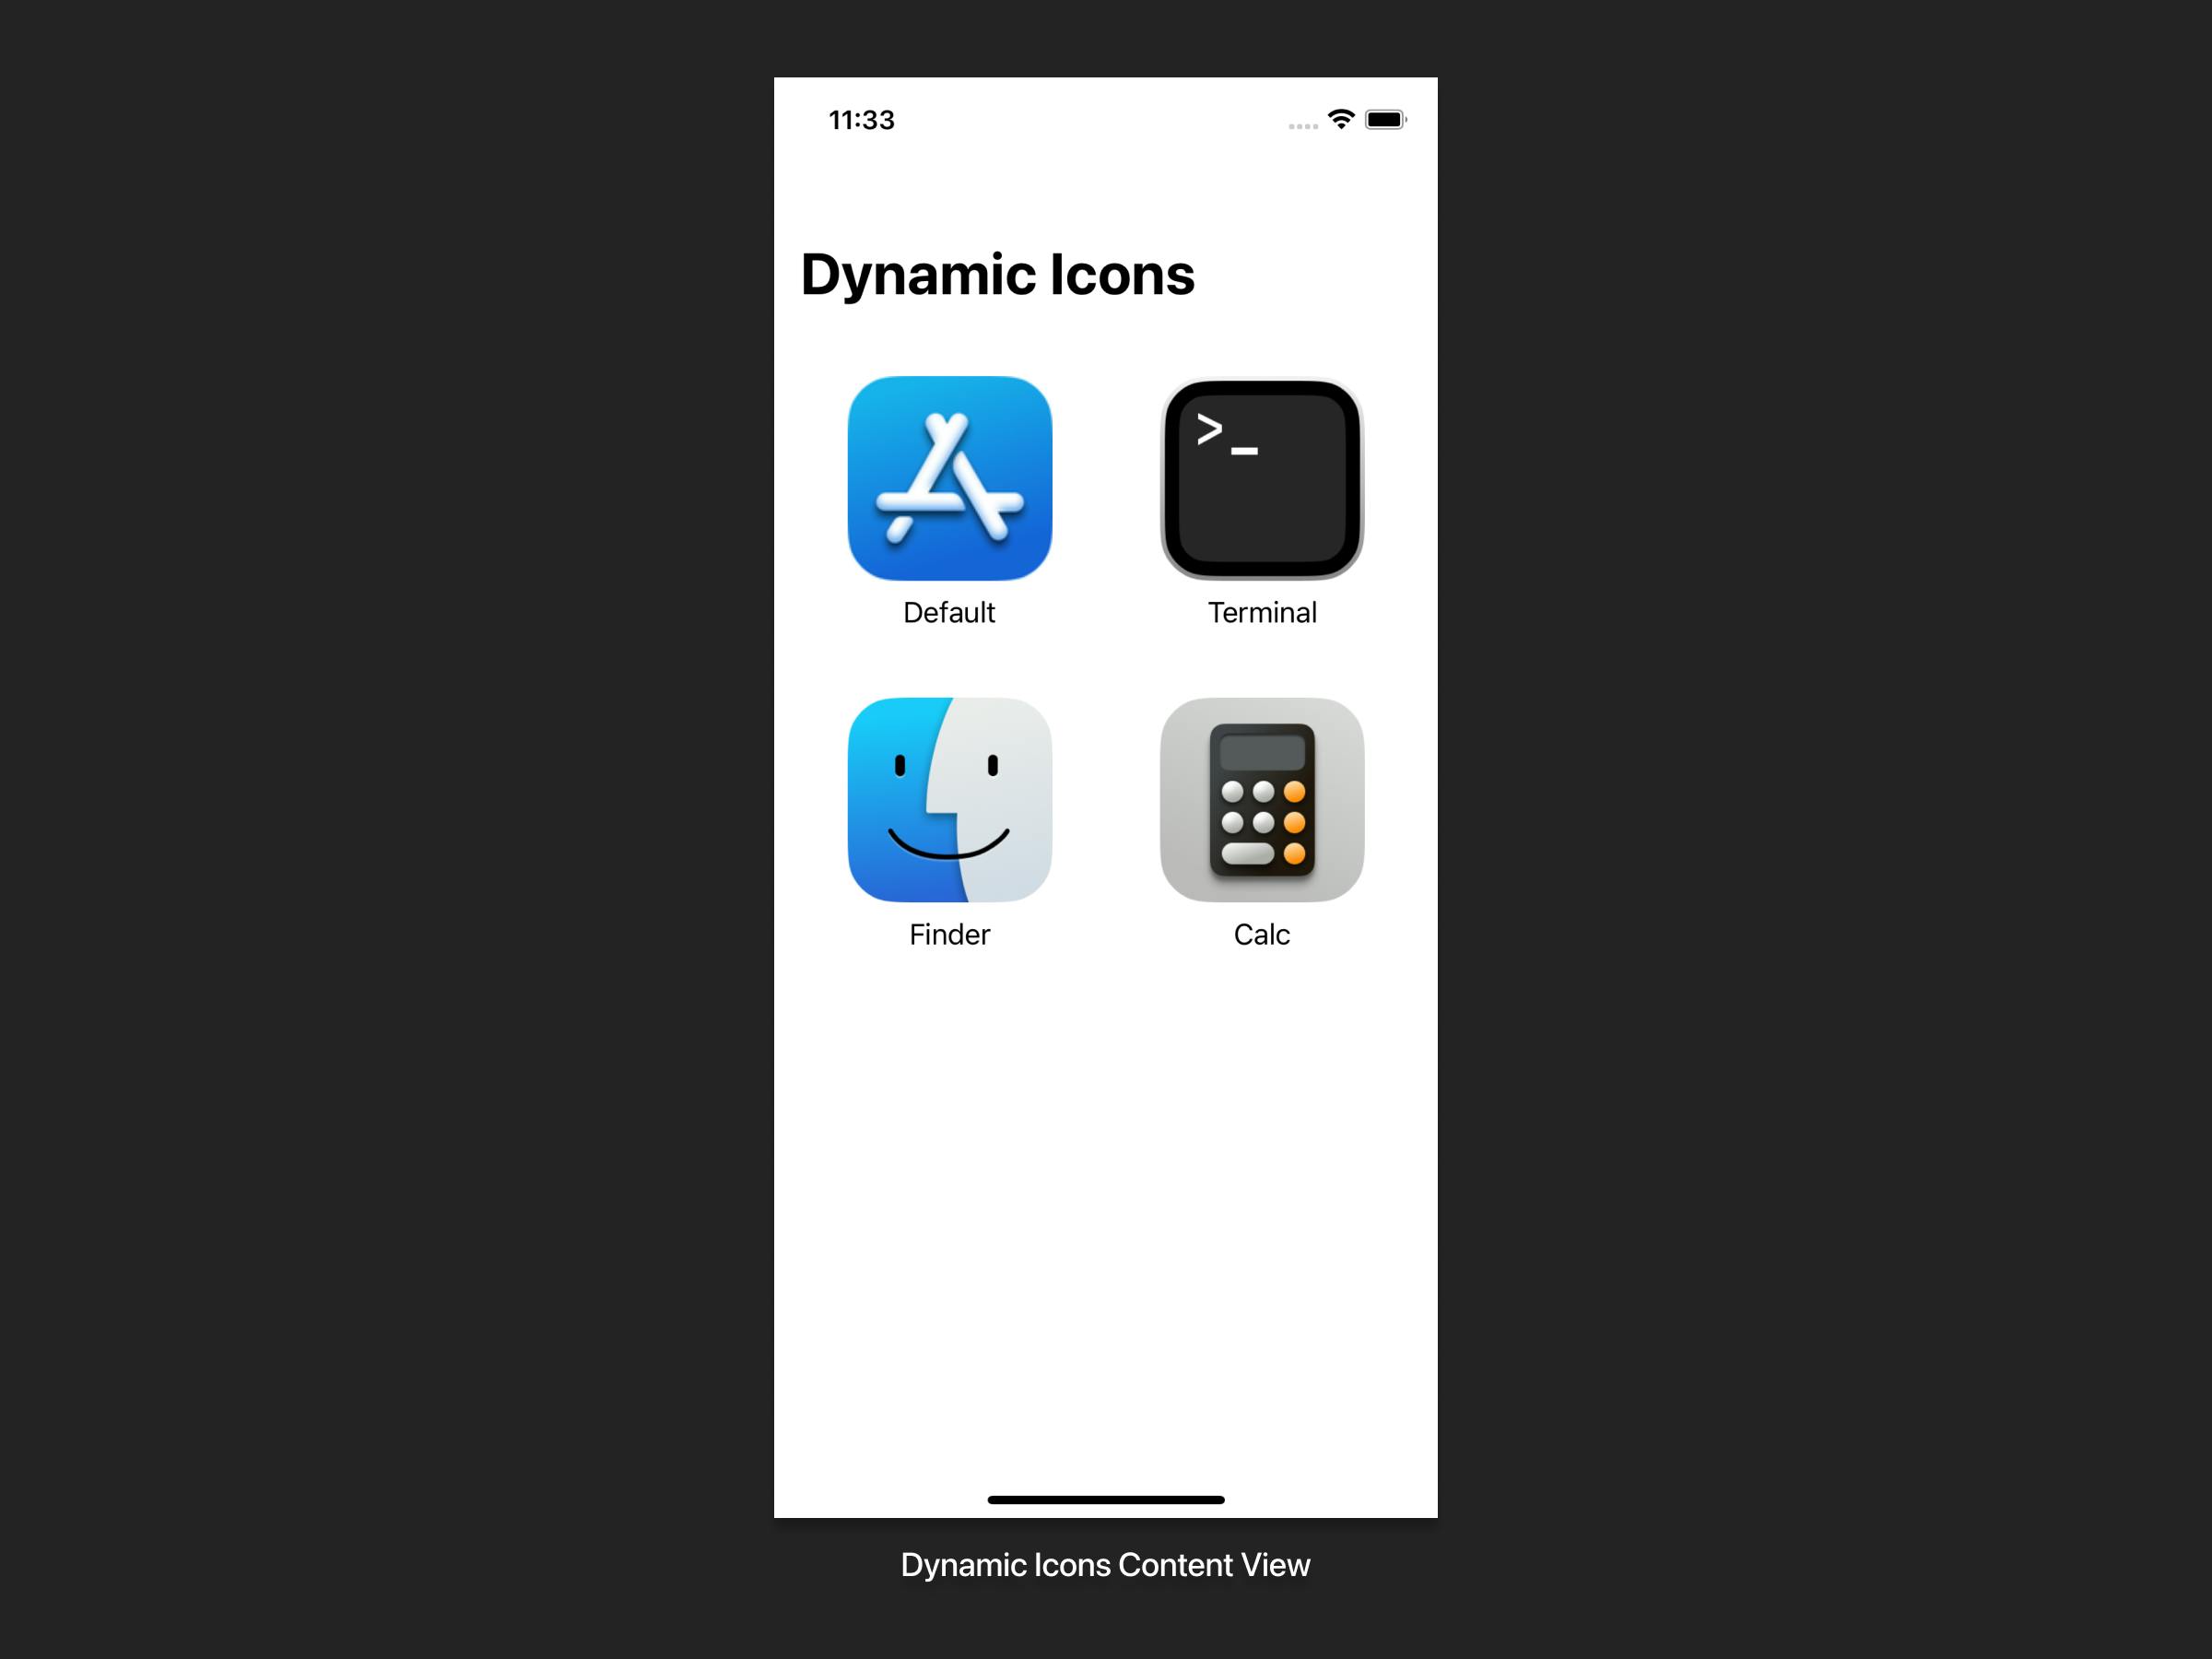
Great, you can now see the icons!
The app's default icon will return nil, replacing the icon name with
AppIcon60x60defines the current app icon in the main Bundle.
Understanding App Icon Manager
We mainly need to understand two things here
- var supportsAlternateIcons: returns a Boolean value that indicates whether the app is allowed to change its icon.
- func setAlternateIconName(_:completionHandler:): the function will change the app's icon.
Let's get back to our view,
3. On Tapping each icon, we want to change the current app icon, so when icon tapped index is assigned to value and mindex has the current app icon index.
4. In this example, we are not using supportsAlternateIcons because we are loading icons from the main Bundle to support every icon. Here, we compare mindex and value if the values aren't equal, then app icon gets updated.
One Last Step
When launching our app, the first and most high view in the app hierarchy must immediately be provided with an IconNames instance as an EnvironmentObject. Therefore, we need to pass the @StateObject we initialised in our Dynamic_Icons_SwiftUIApp struct to the ContentView as an injected EnvironmentObject like this.
import SwiftUI

@main
struct Dynamic_Icons_SwiftUIApp: App {
    @StateObject var iconNames = IconNames()

      var body: some Scene {
          WindowGroup {
              ContentView()
                  .environmentObject(iconNames)
          }
      }
}
Great! SwiftUI now creates an IconNames instance and injects it to the whole view hierarchy as an EnvironmentObject when the app launches. Now, all views of our app can bound to this EnvironmentObject.
Here you go,
The alert you see was internally managed by app
Wrap Up
- Add Icons in a group and define icons in
Info.plistfile - Load Icons into the View
- Change app icon using
setAlternateIconNamefunction.
I hope this article will help you to change iOS app icon dynamically. If in case you missed anything, check my Github.
If you like to improve your App Development Skills, even more, check out blog.learncodeonline.in Feel free to connect me on Instagram or Twitter if you have any additional tips or feedback.
Hope you’ve enjoyed this and Thanks for reading!