


Version Dart: 2.12, Flutter: 2.0, VSCode: 1.55
Authenticating the app is one common task when you have to serve each user uniquely based on their personalized interests and securely save their data to provide the same personalized experience across all of the user's devices.
Authentication can be done in two ways one, self-managed by you, and the other is using some of the most popular services like Firebase, Parse. In this article, we are only going to see the authentication services with the Firebase.
Firebase is a Backend-as-a-Service (BaaS) app development platform that is maintained and operated by Google. It provides hosted backend services such as a real-time database, cloud storage, authentication, crash reporting, machine learning, remote configuration, and hosting for your static files.
📹 Here is a quick video. If you want to understand, what is a firebase?
Firebase works pretty well with Flutter apps. We are using Firebase authentication in our app. Firebase authentication has many ways to authenticate the user using email, mobile number, and social logins. This article covers only using email and passwords to authenticate users.
Along the way, you’ll learn how to:
- Authentication Flow
- Firebase Setup for Android and iOS
- Authentication services(sign in, sign up, sign out)
- Persisting the auth state
- Getting the current user details
- Handling Exceptions
Note: This article assumes that you know the Flutter framework basics, including common widgets and their properties. This also assumes that you are comfortable with the Dart programming language and conventions.
Getting Started
Download the starter project here. Once you have downloaded the project, open it in our IDE. This tutorial uses Visual Studio Code, but Android Studio or IntelliJ IDEA will work fine as well.
After opening the starter project, run flutter pub get to get rid of the errors. At this point, if you build and run, you should see the following.
The app has a set of screens for Firebase authentication. As of now, you can freely navigate back and forth between the screens without entering any data. Before doing any coding, though, it’s essential to understand how authentication works.
Authentication Flow
Authentication flow can easily understand by this set of pages — represented as screens — is in the image below:
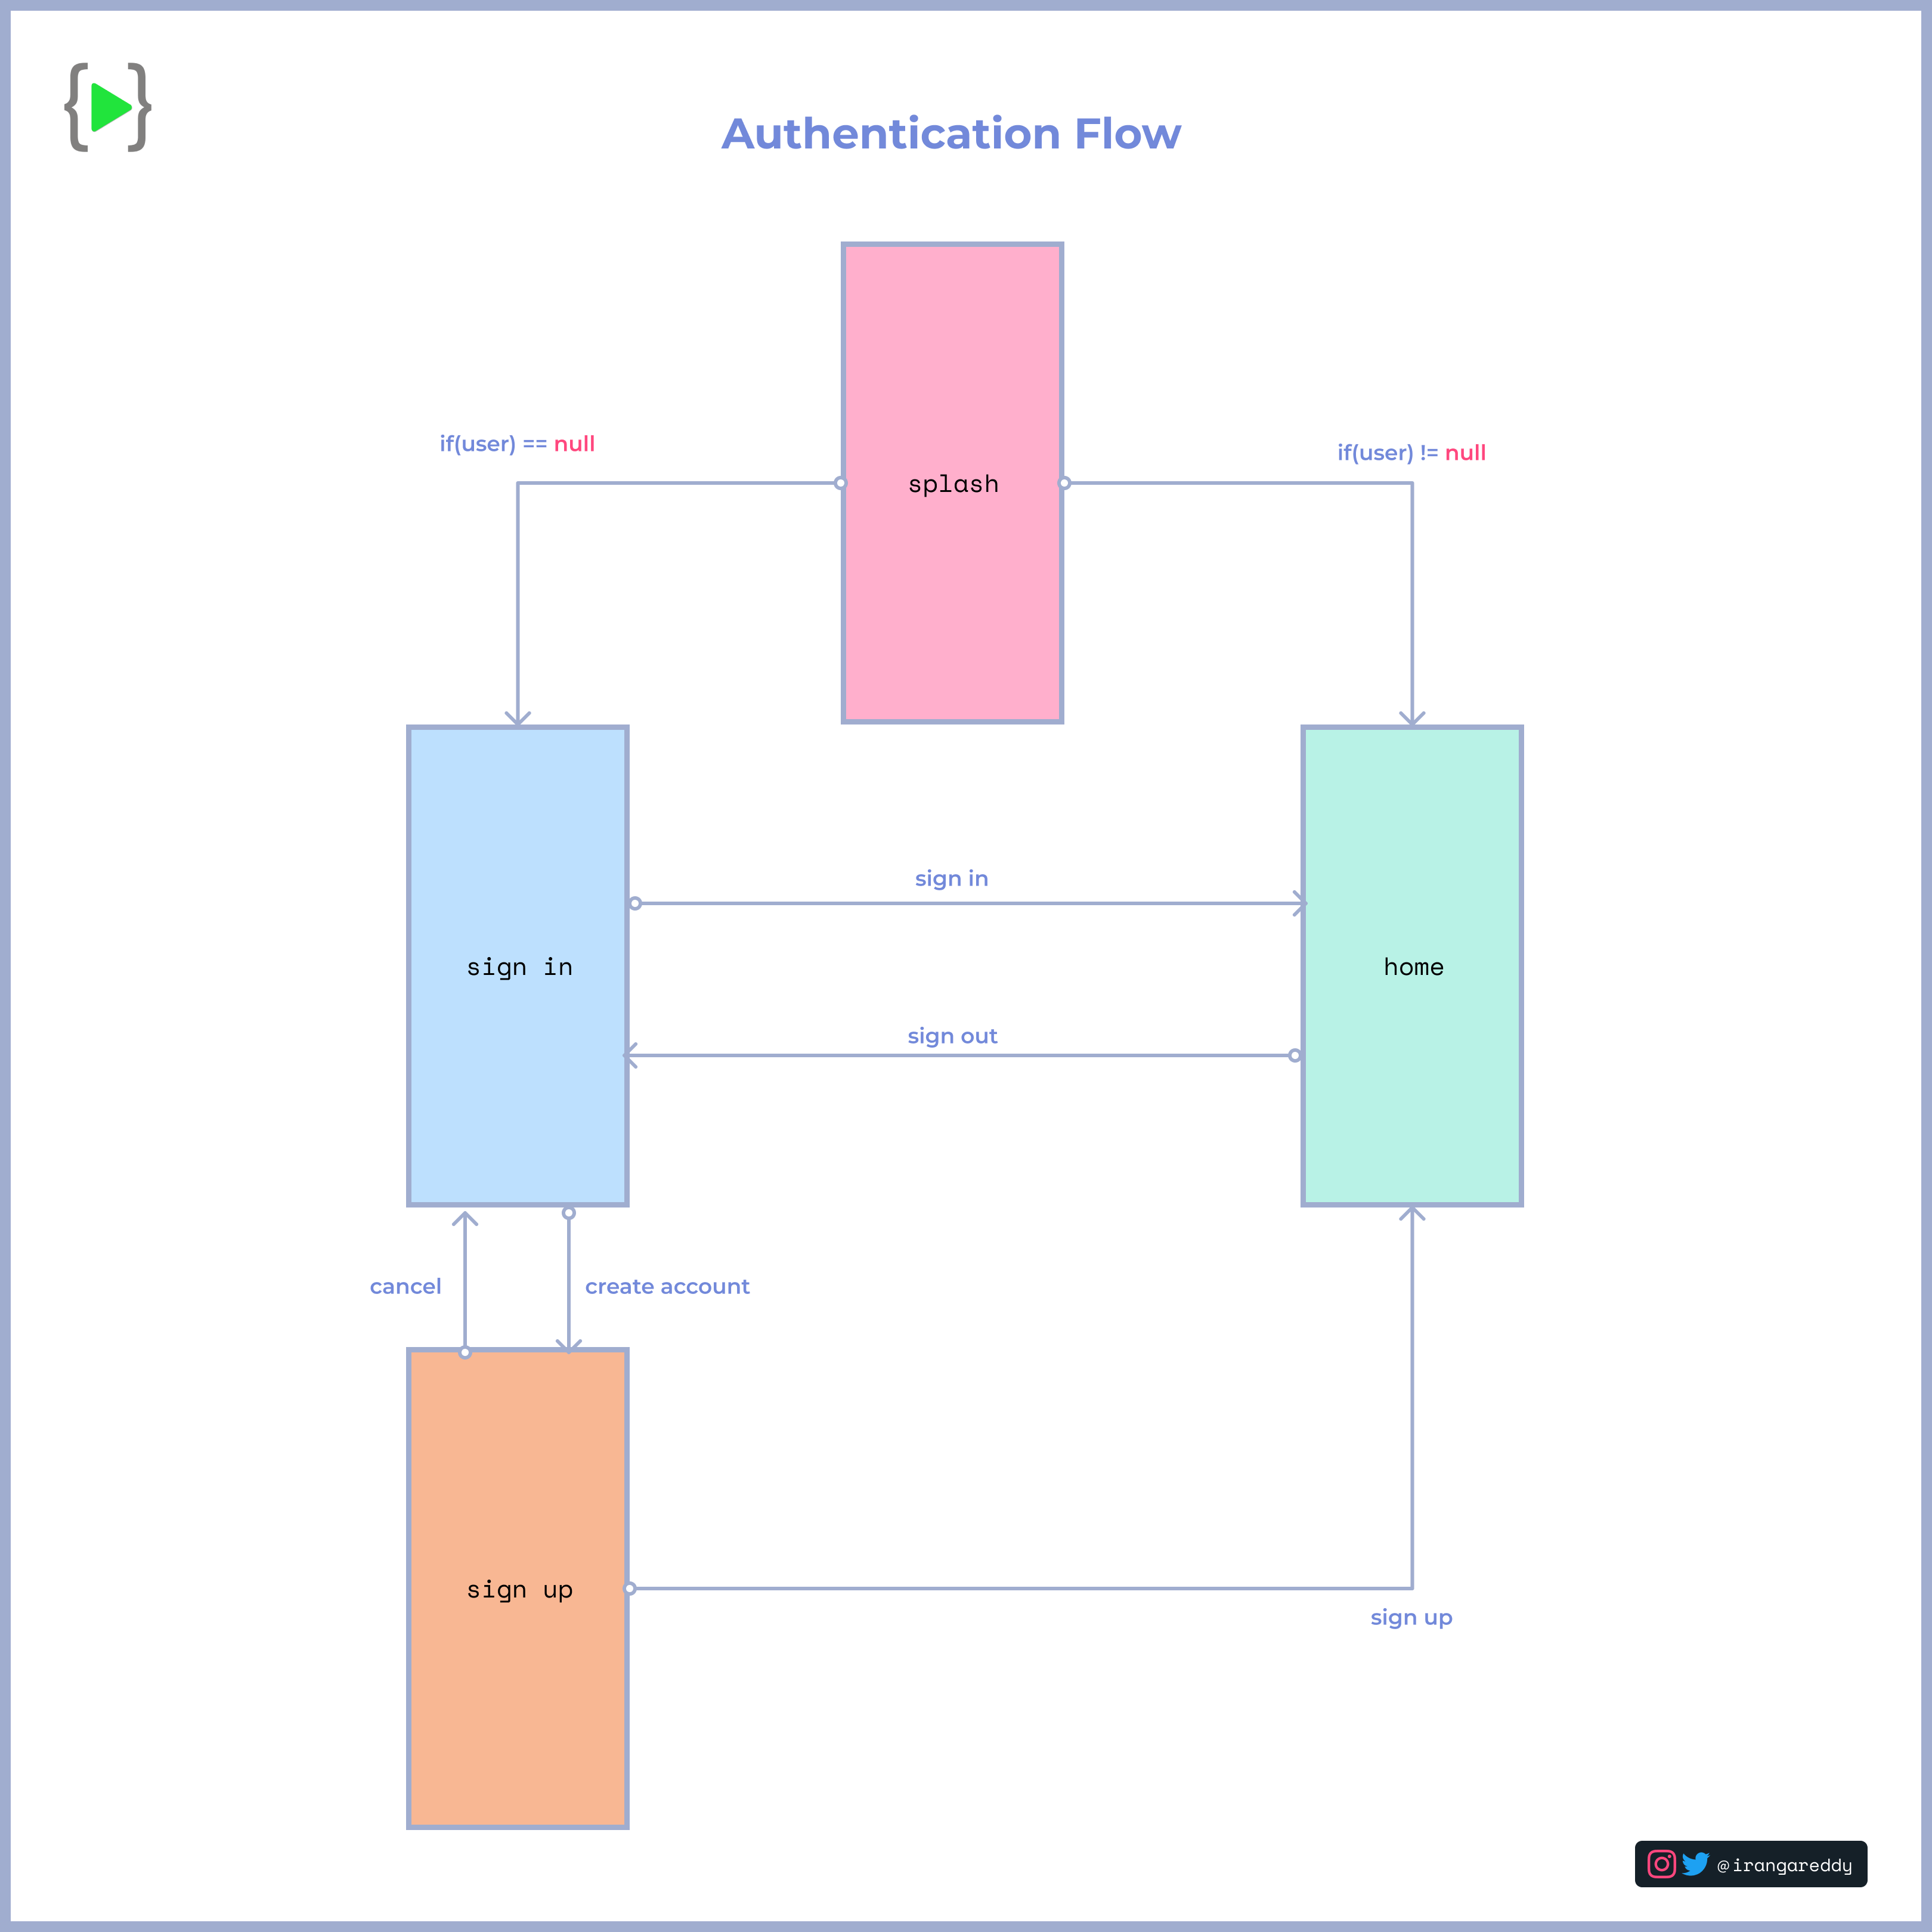
Logic
The app starts with a splash screen if the user != null should navigate to the home screen. if not, it will be navigated to sign-in screen. From there, you can navigate back and forth between sign-up screen and sign-in screen to create an account or log in, respectively. once you have logged in from any of the screens, you will navigate to the home screen, and lastly, you can sign out from the home screen.
The most exciting part of the app is, the user
auth statusdoesn't save locally.
One last step before we get into code .i.e., we need to set up the Firebase project for Android and iOS.
Firebase Setup
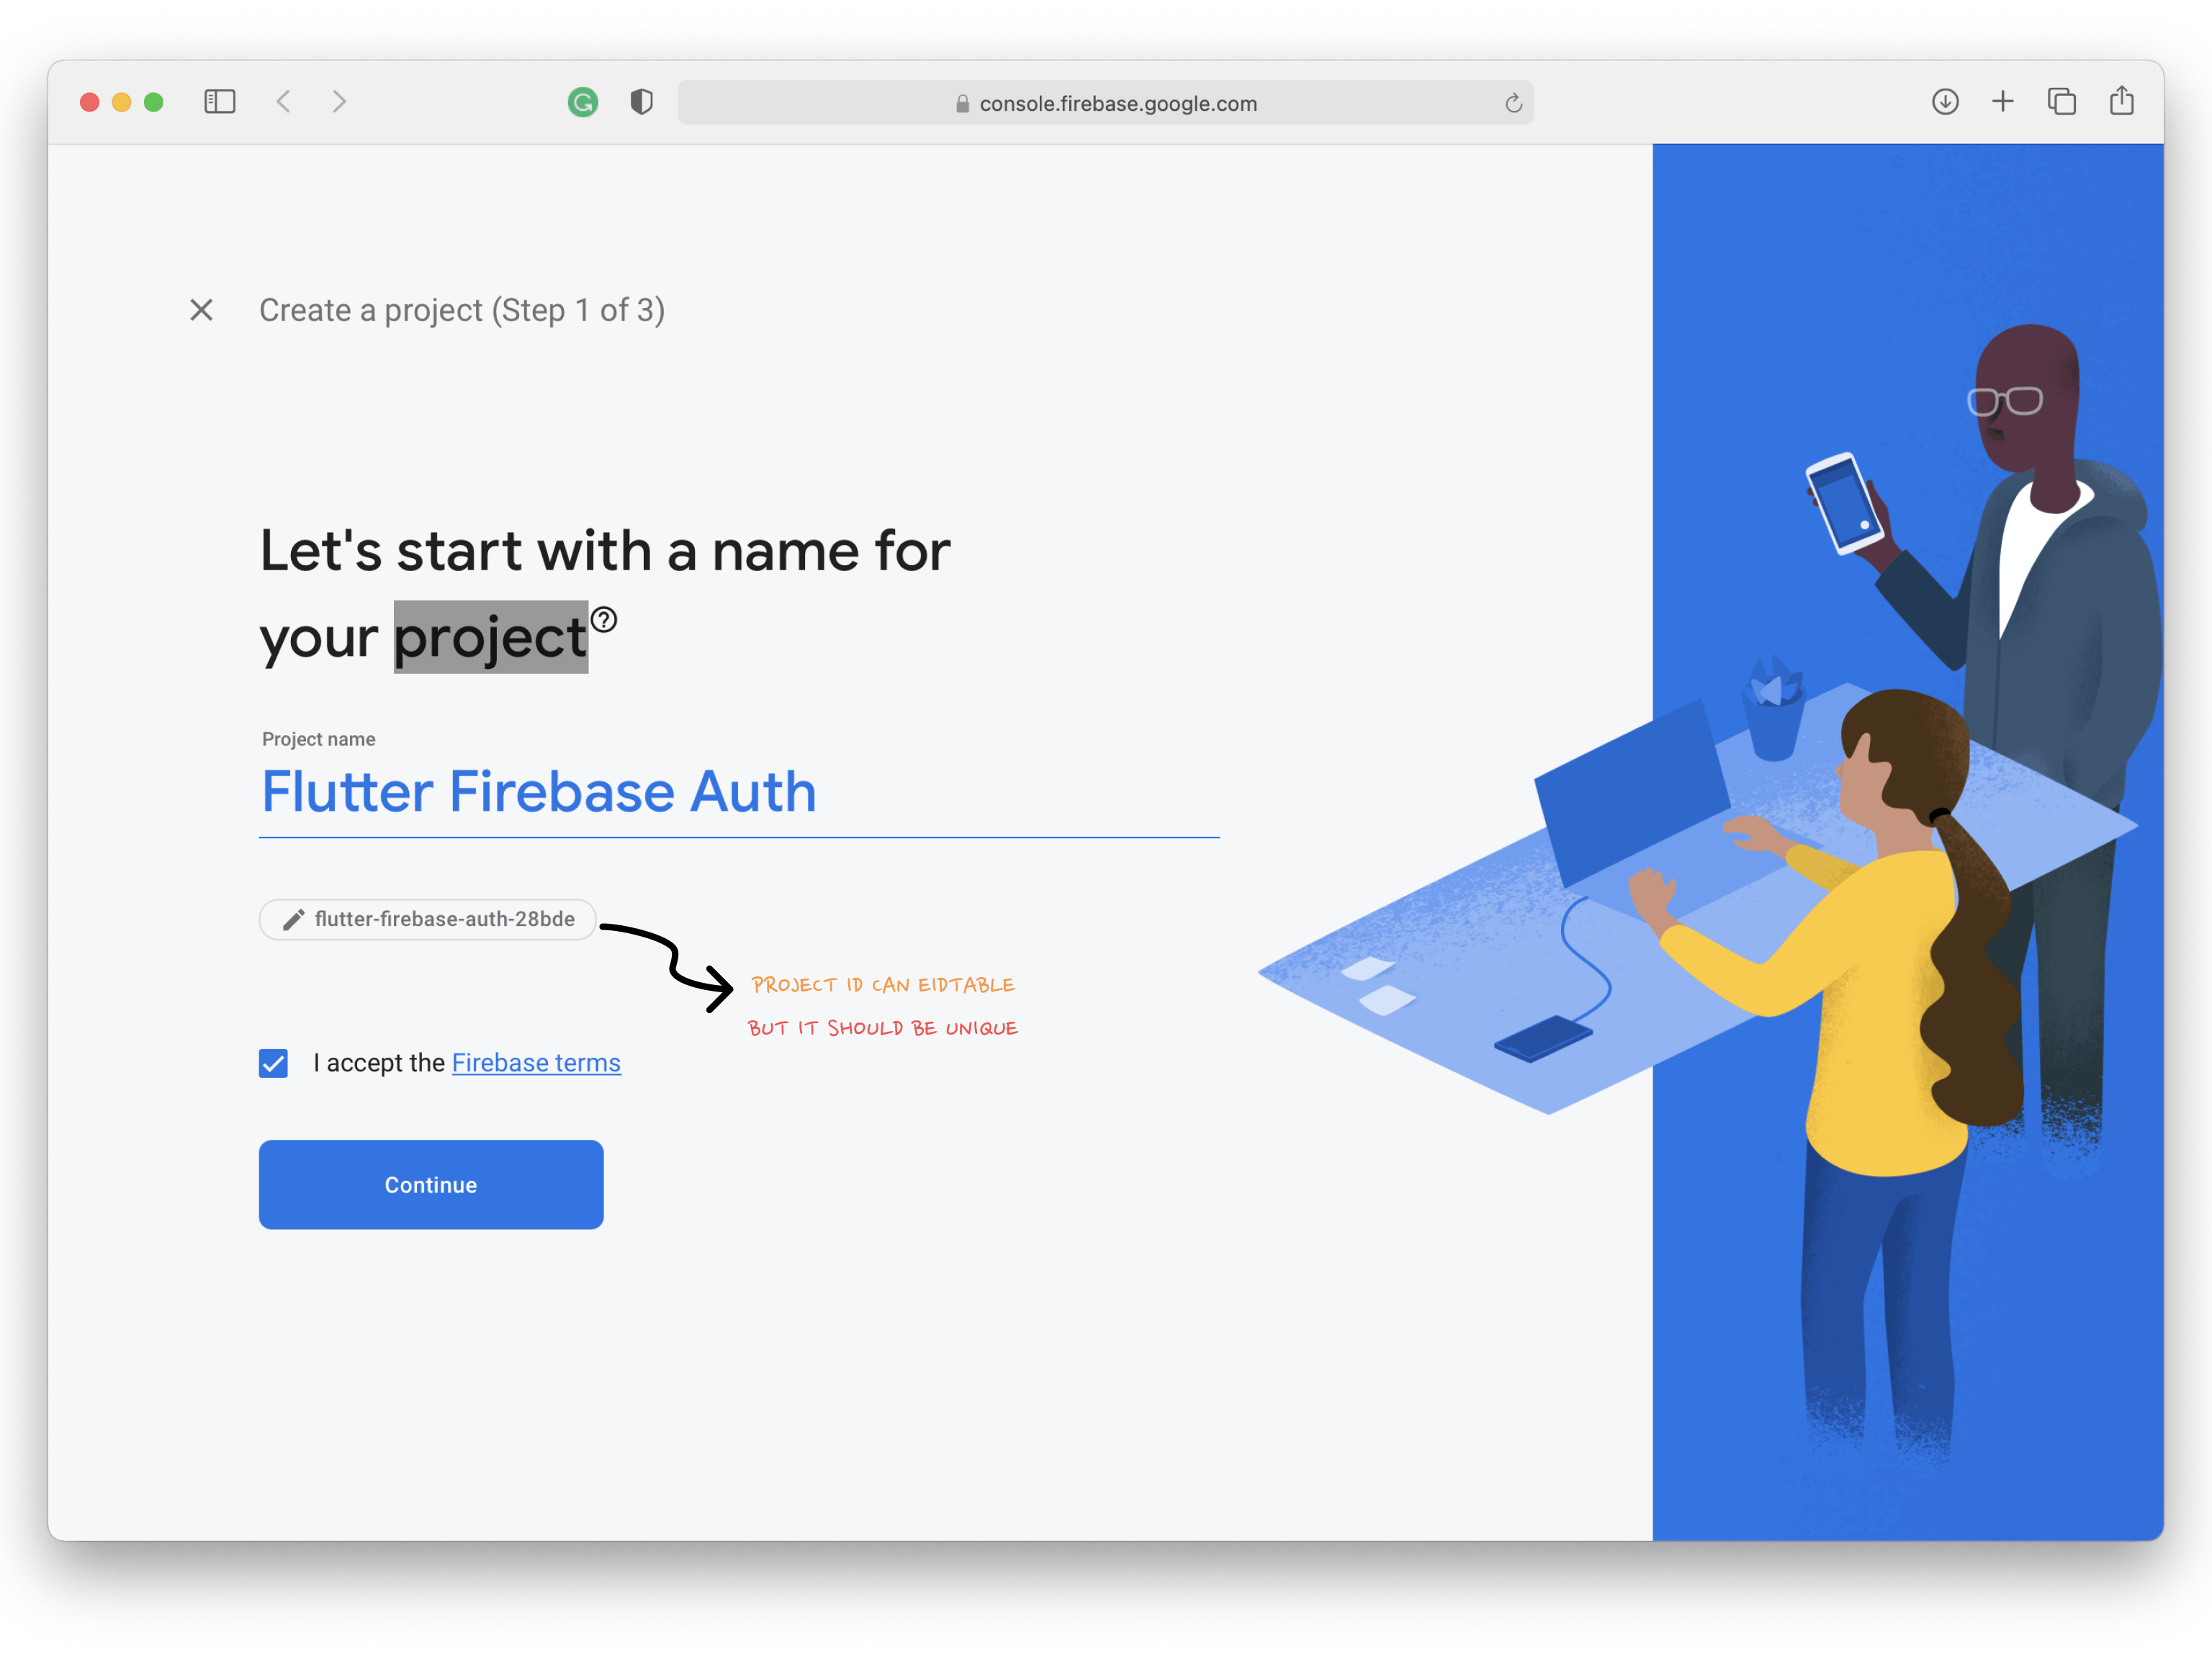
To create a new Firebase project, go to the Firebase console, which will look similar to the following.
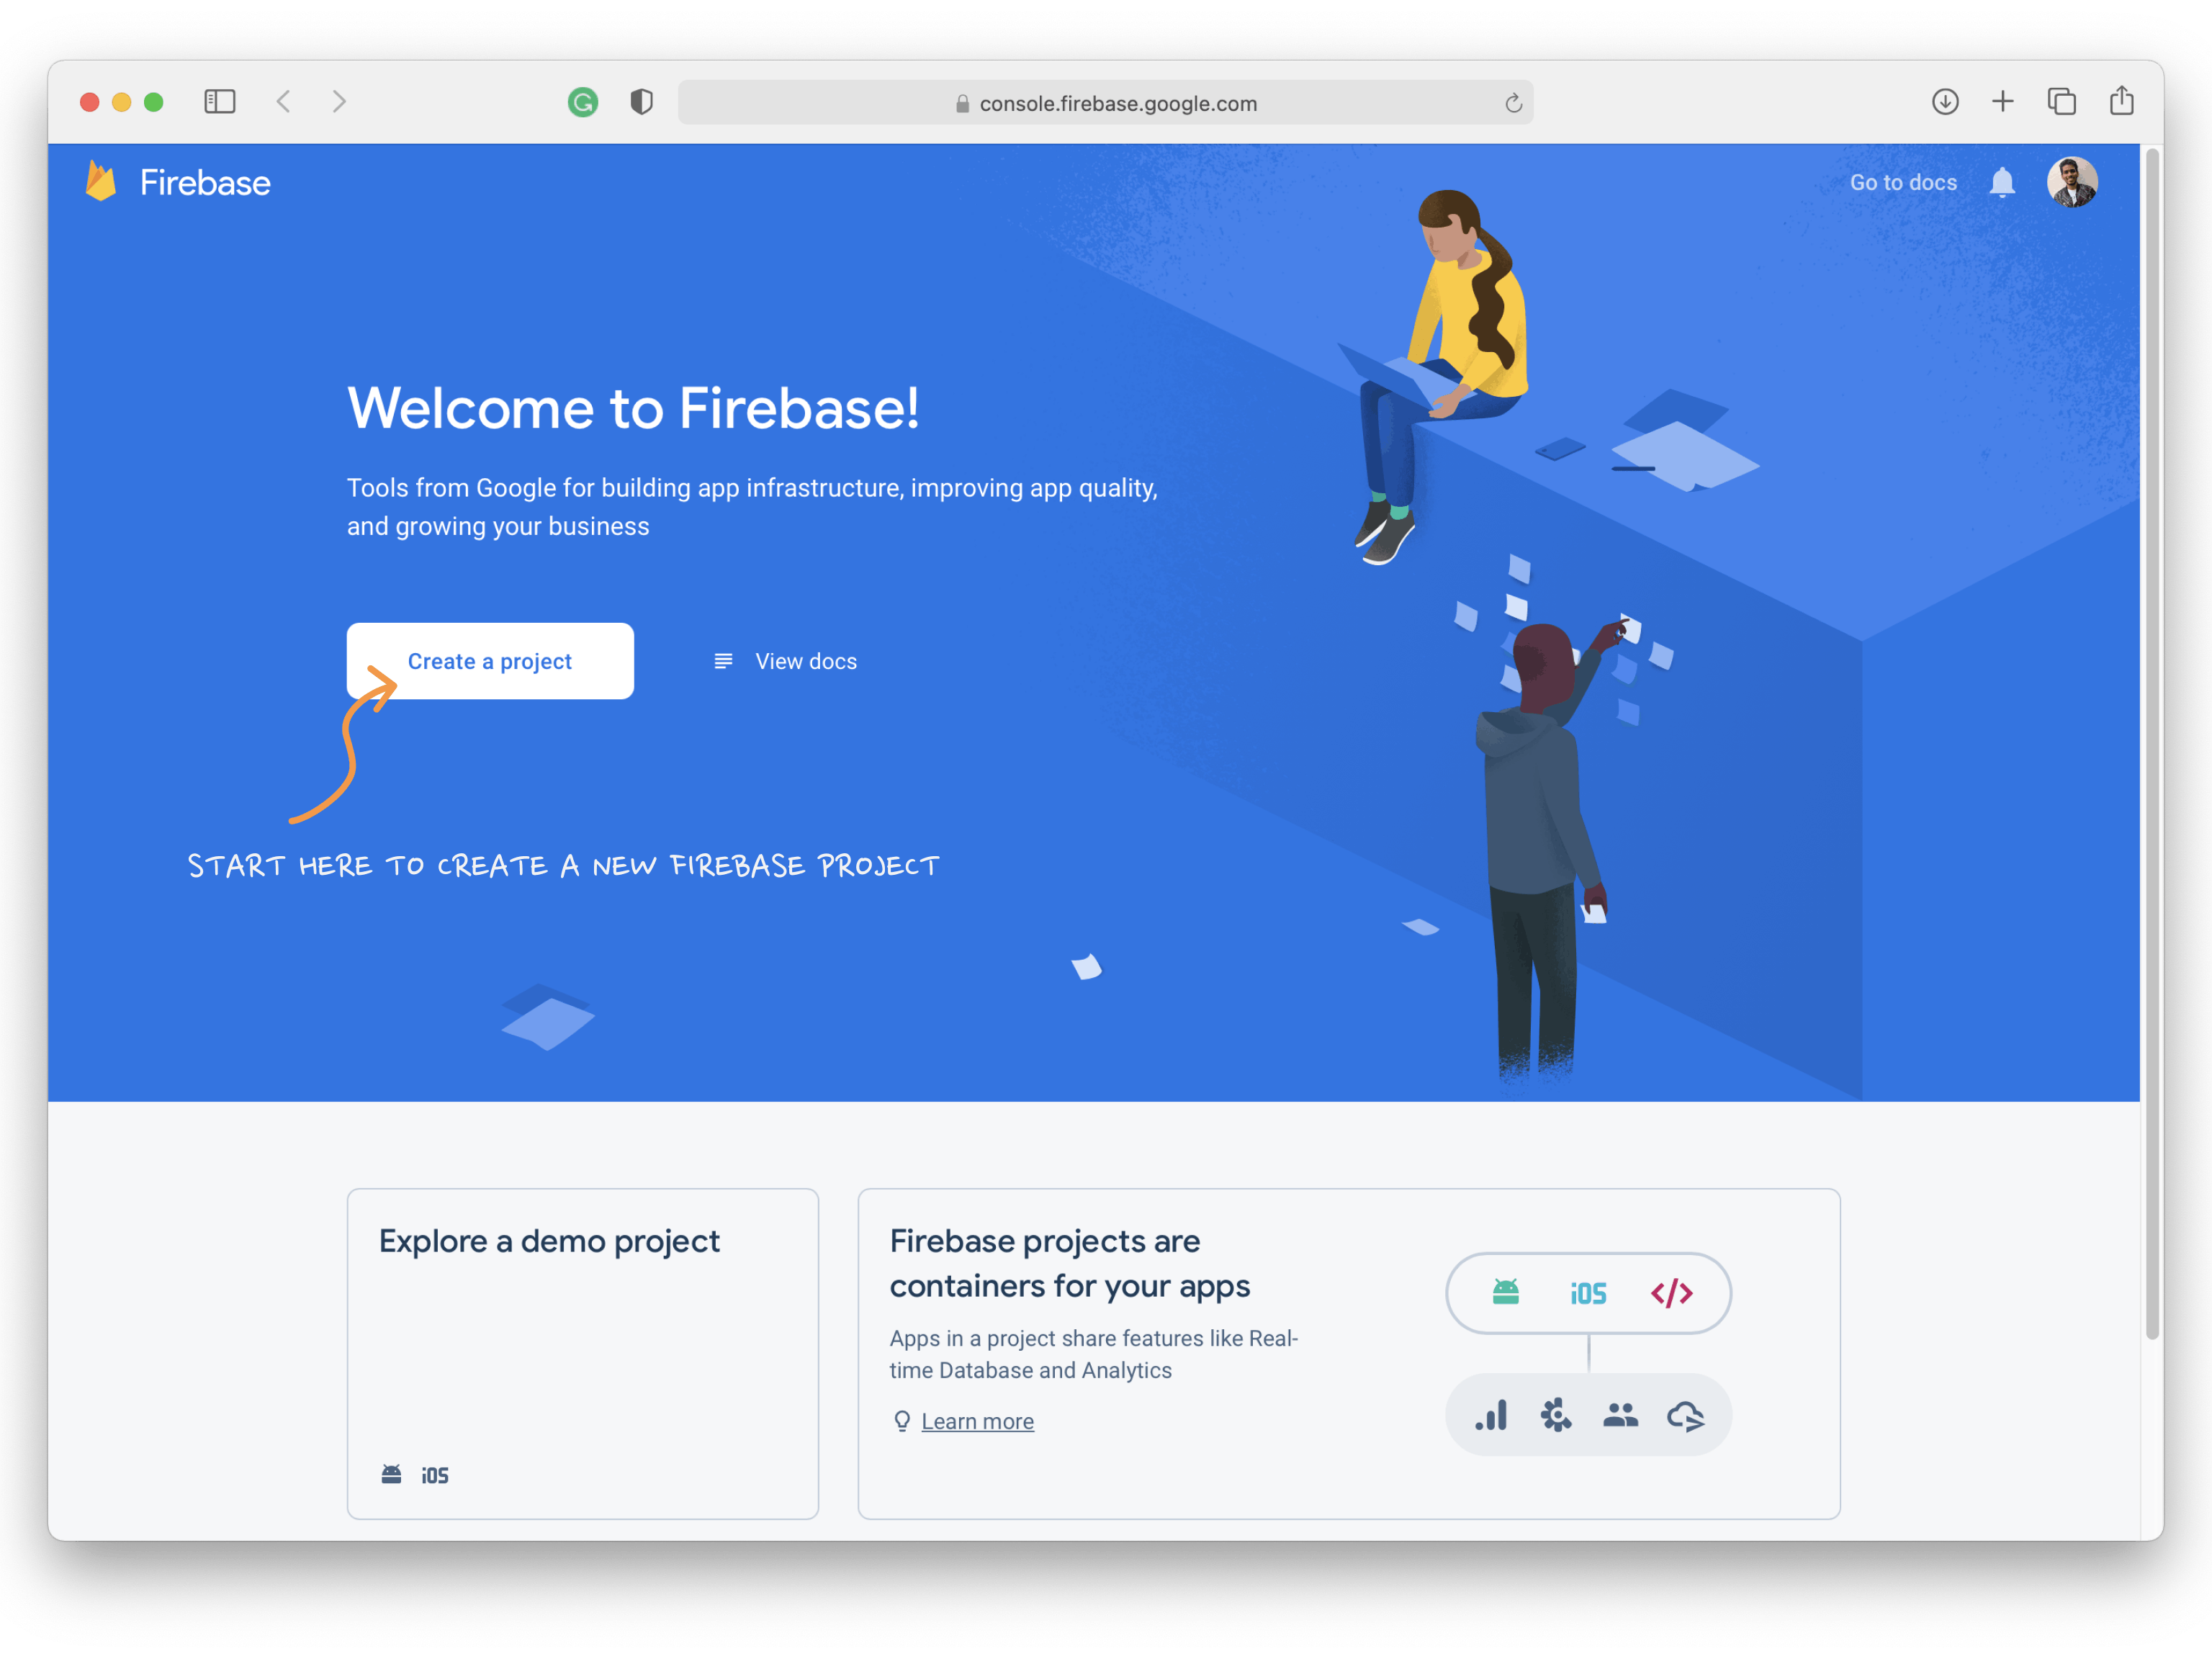
Create a new project by a name, which will look similar to the following. The project id below is auto-generated by firebase.
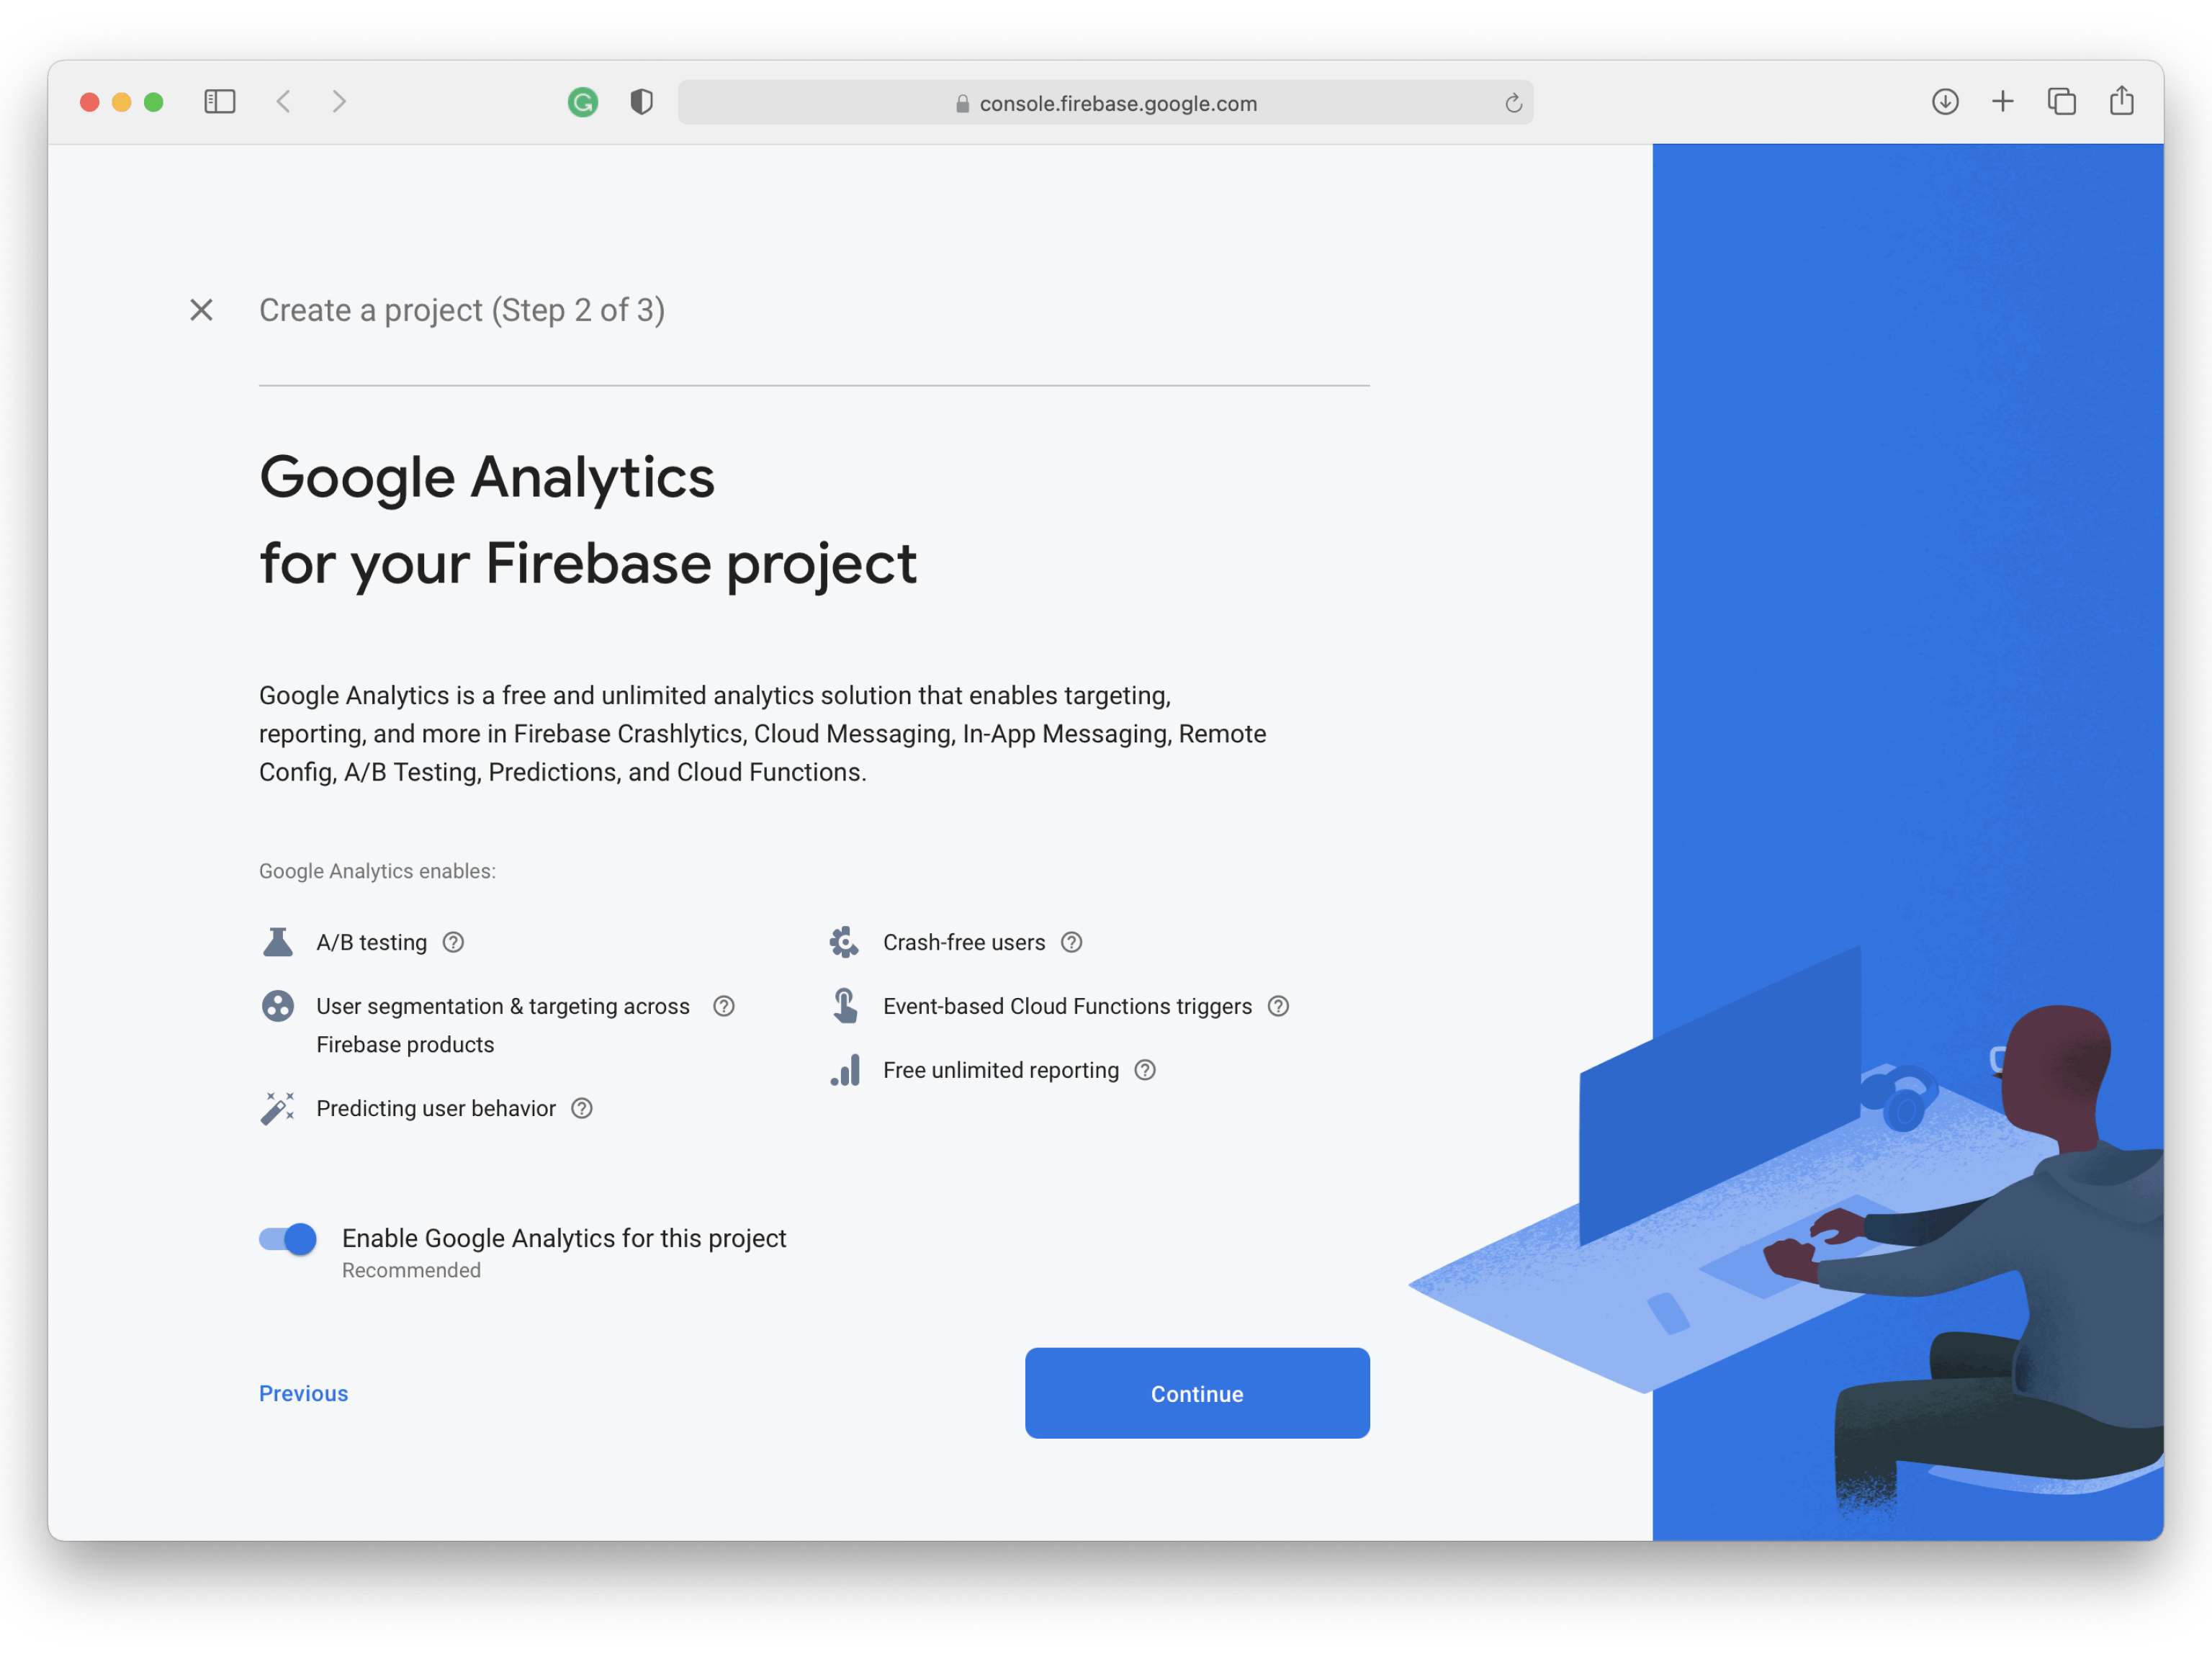
Enabling Google Analytics is left to you. If you want Crash Analytics, A/B Testing reports, you can allow it.
Once you have finally done the setup and click ready to get the Project home screen, you can configure different services.
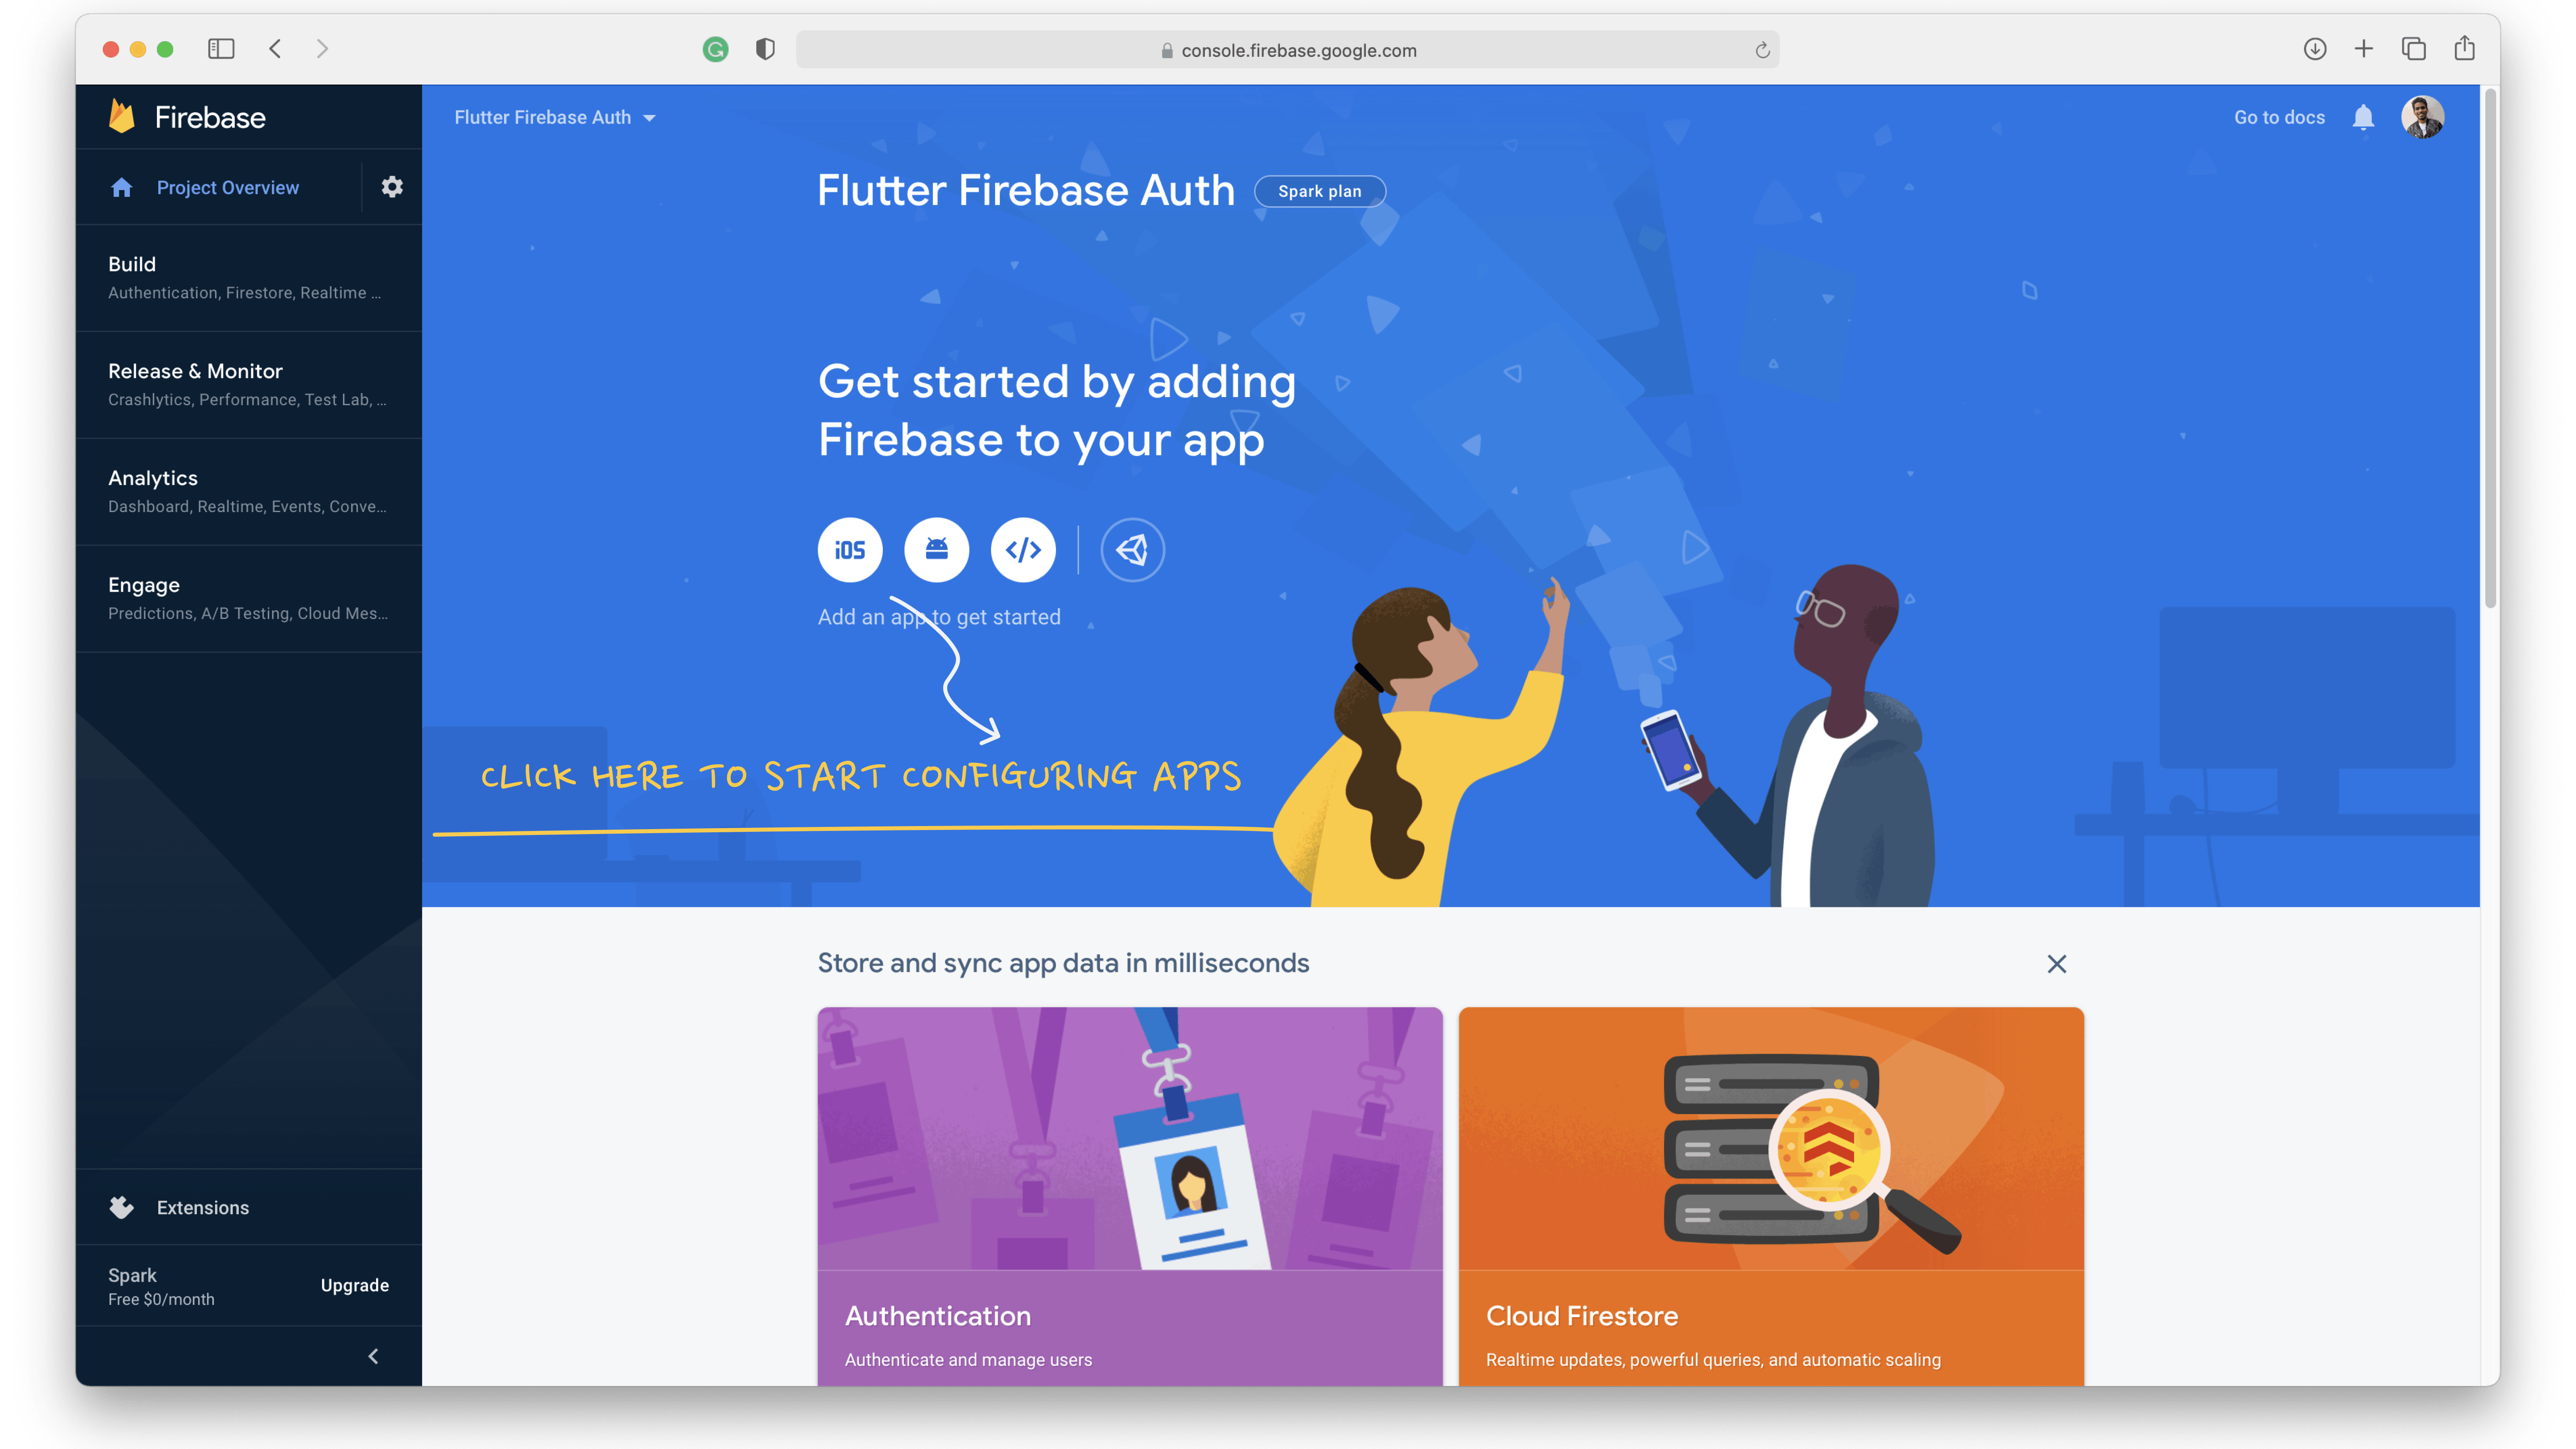
Let's start configuring apps.
Config iOS
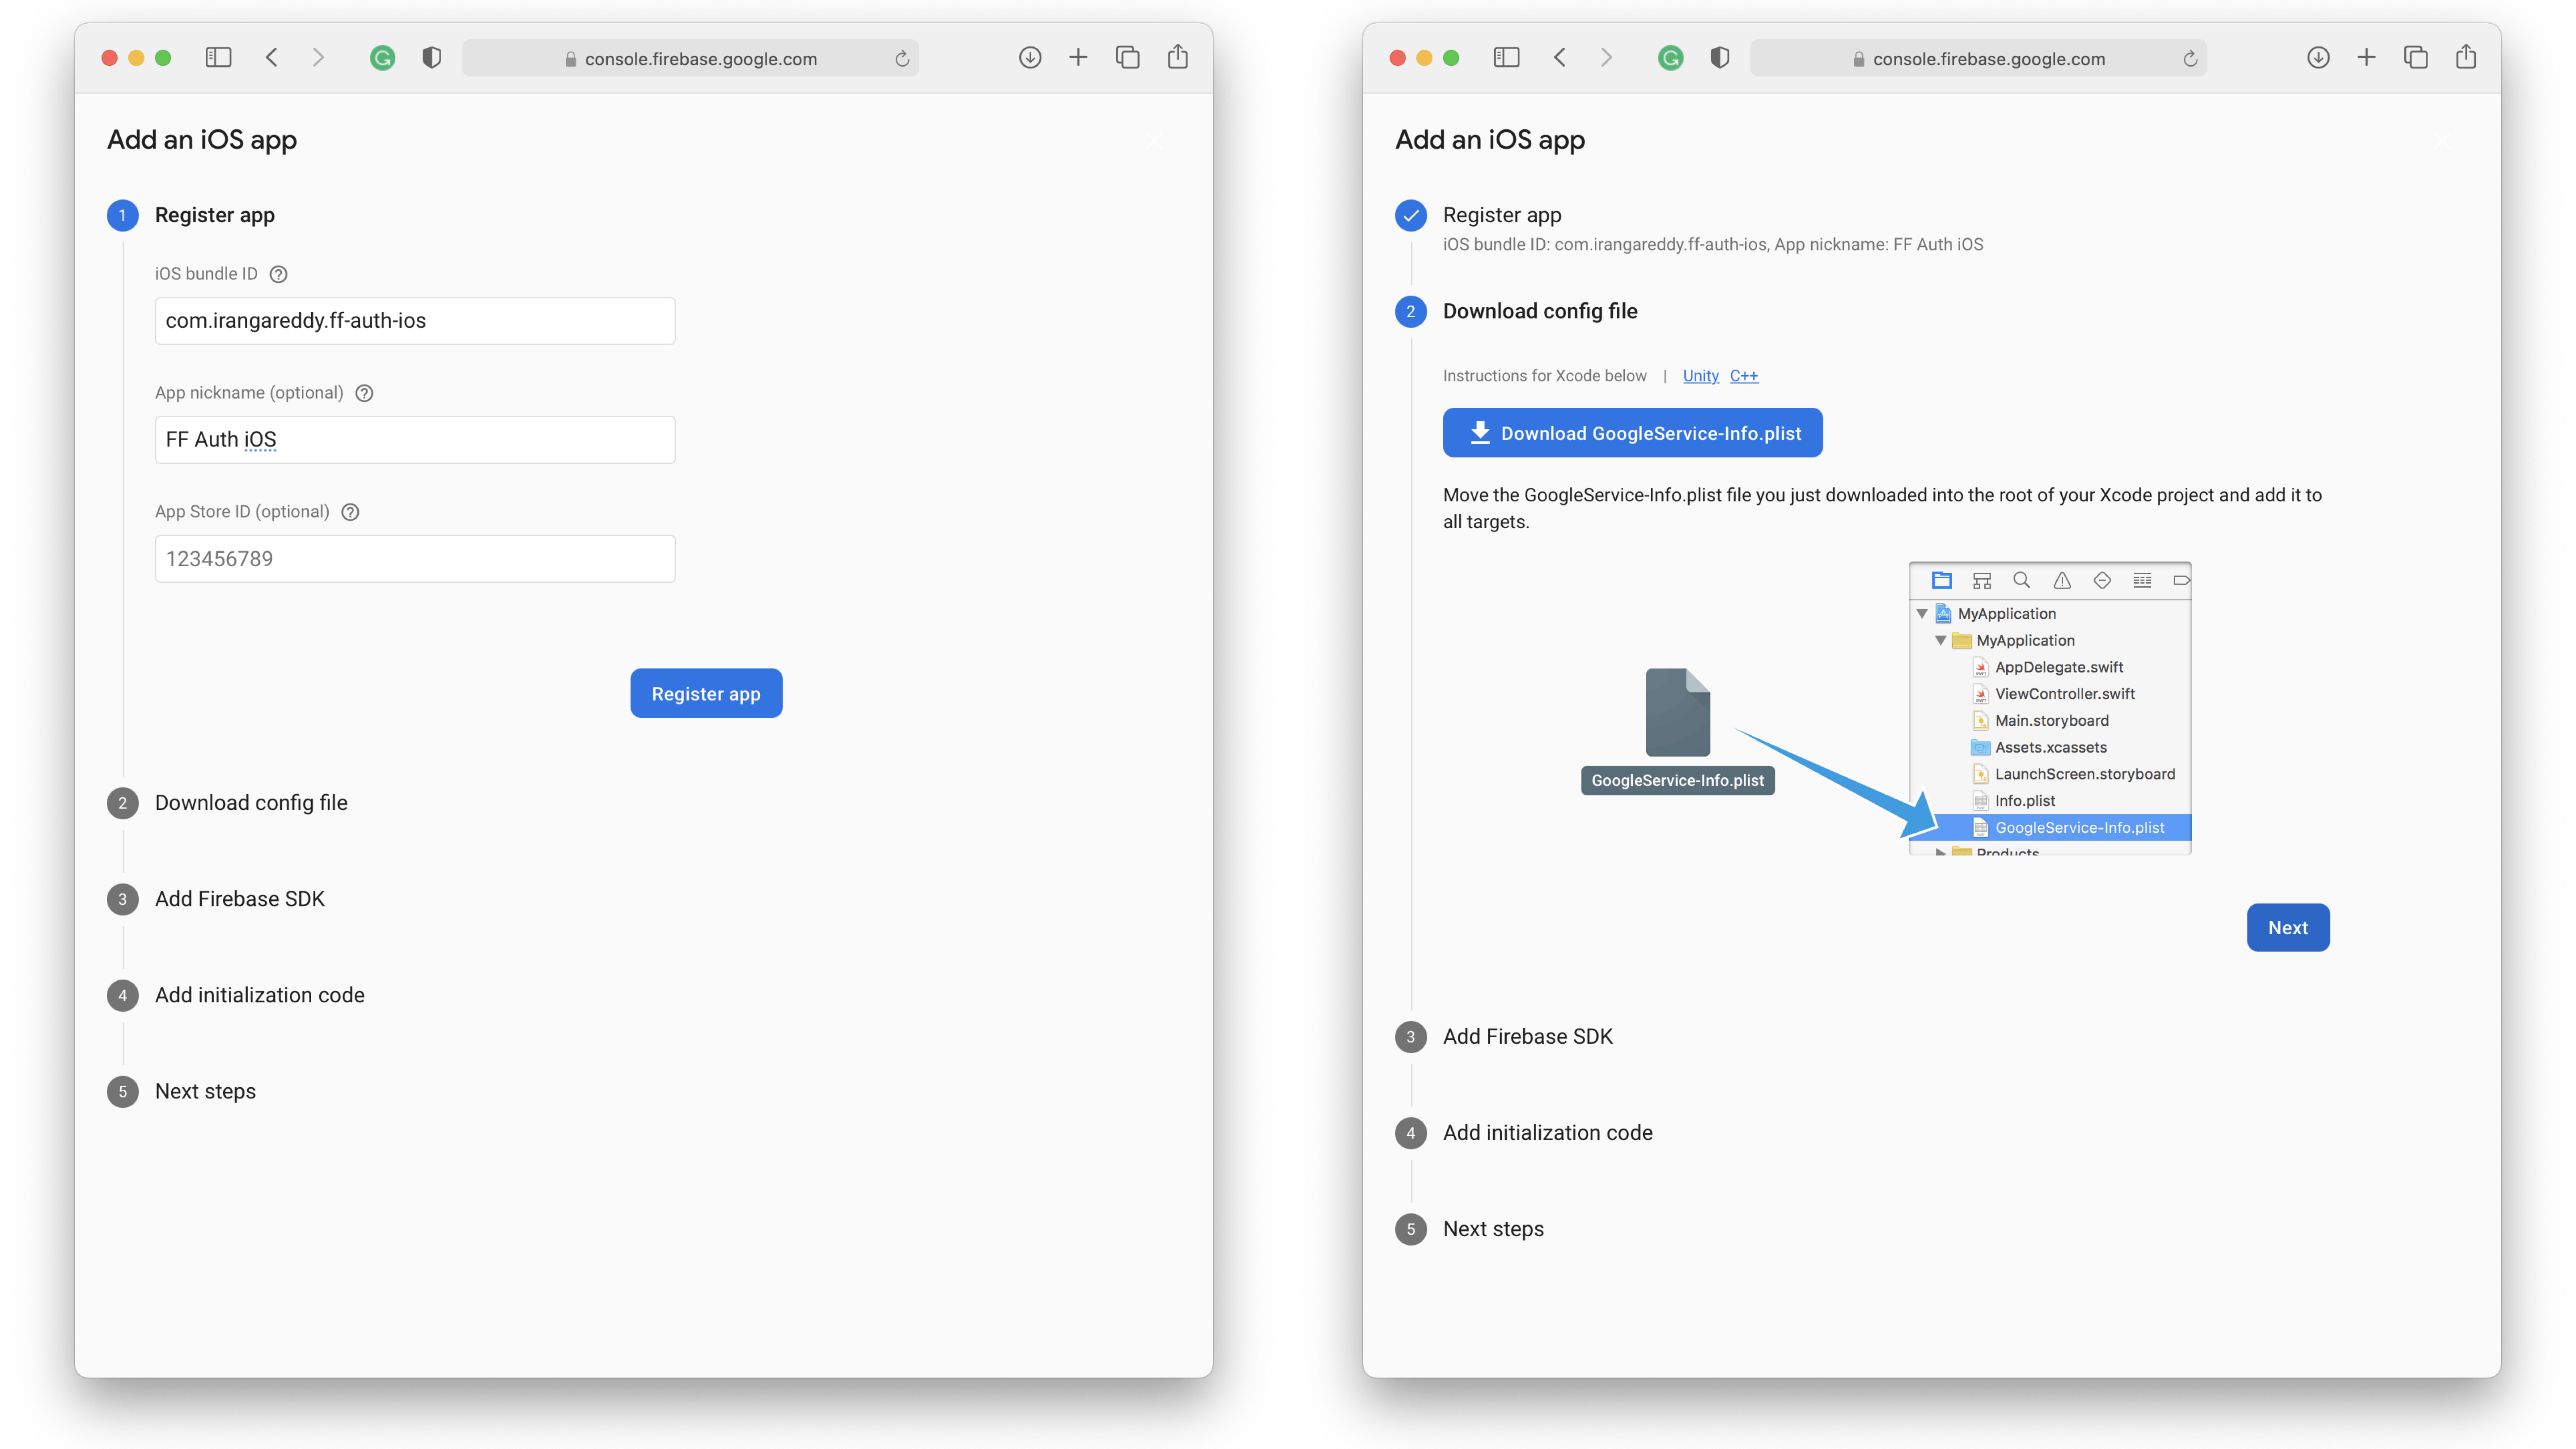
Register iOS app
To configure an iOS app, you need to provide a unique bundle id that is your iOS app bundle identifier; you can find it in the general settings of Xcode Project. By default, you see com.example.app-name. and that you can change to something like this com.your-name.app-name.
And the app nickname is optional.
Download iOS config file
Download the config file and place it in the specified position. To make things easy, I have put a dummy file name ios-config.html. Replace the config file with the HTML file and make sure the file name is the same as GoogleService-Info.plist.
And click next to all of the following steps. That's it you have successfully configured Firebase for iOS Project.
Config Android
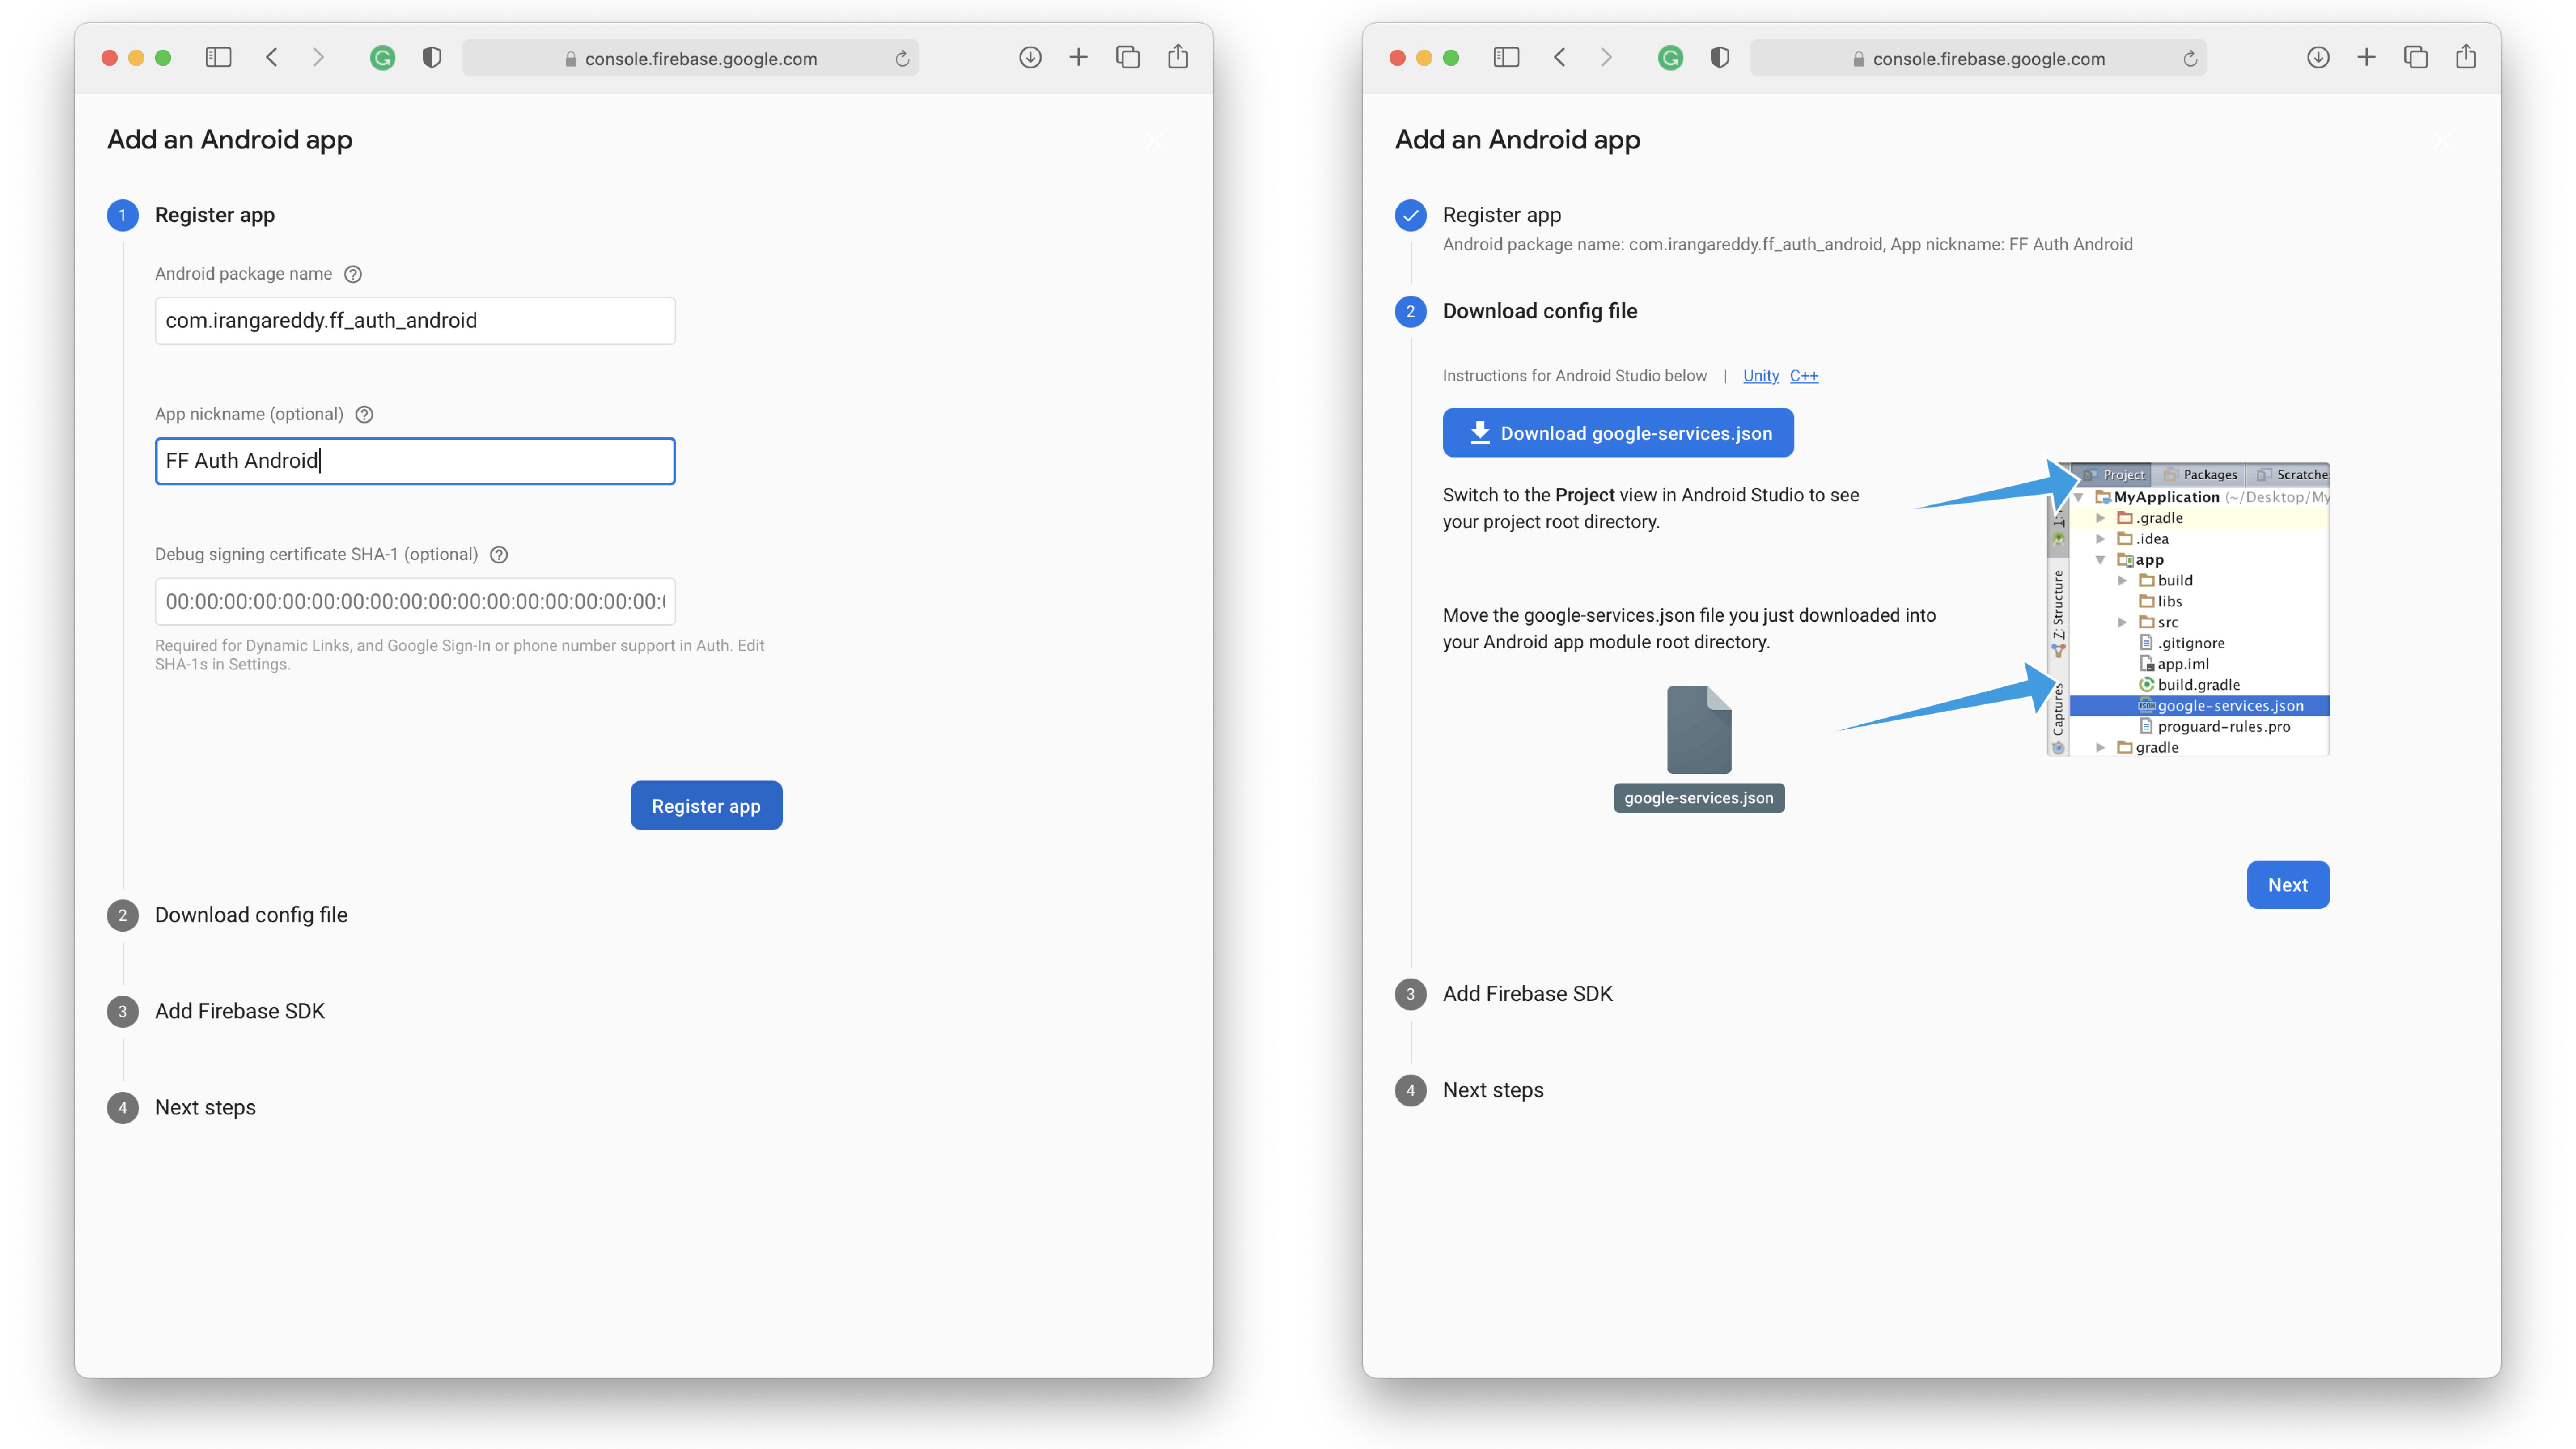
Register Android app
To configure an Android app, you need to provide a unique package name. You can find the android app package name at android>app>build.gradle. by default, it will be com.example.app_name. You can change the package name to something like this com.your_name.app_name.
And the app nickname is optional.
Download Android config file
Download the config file and place it in the specified position. To make things easy, I have put a dummy file name android-config.html. Replace the config file with the HTML file and make sure the file name is the same as google-services.json.
Add the google-services plugin to the android app.
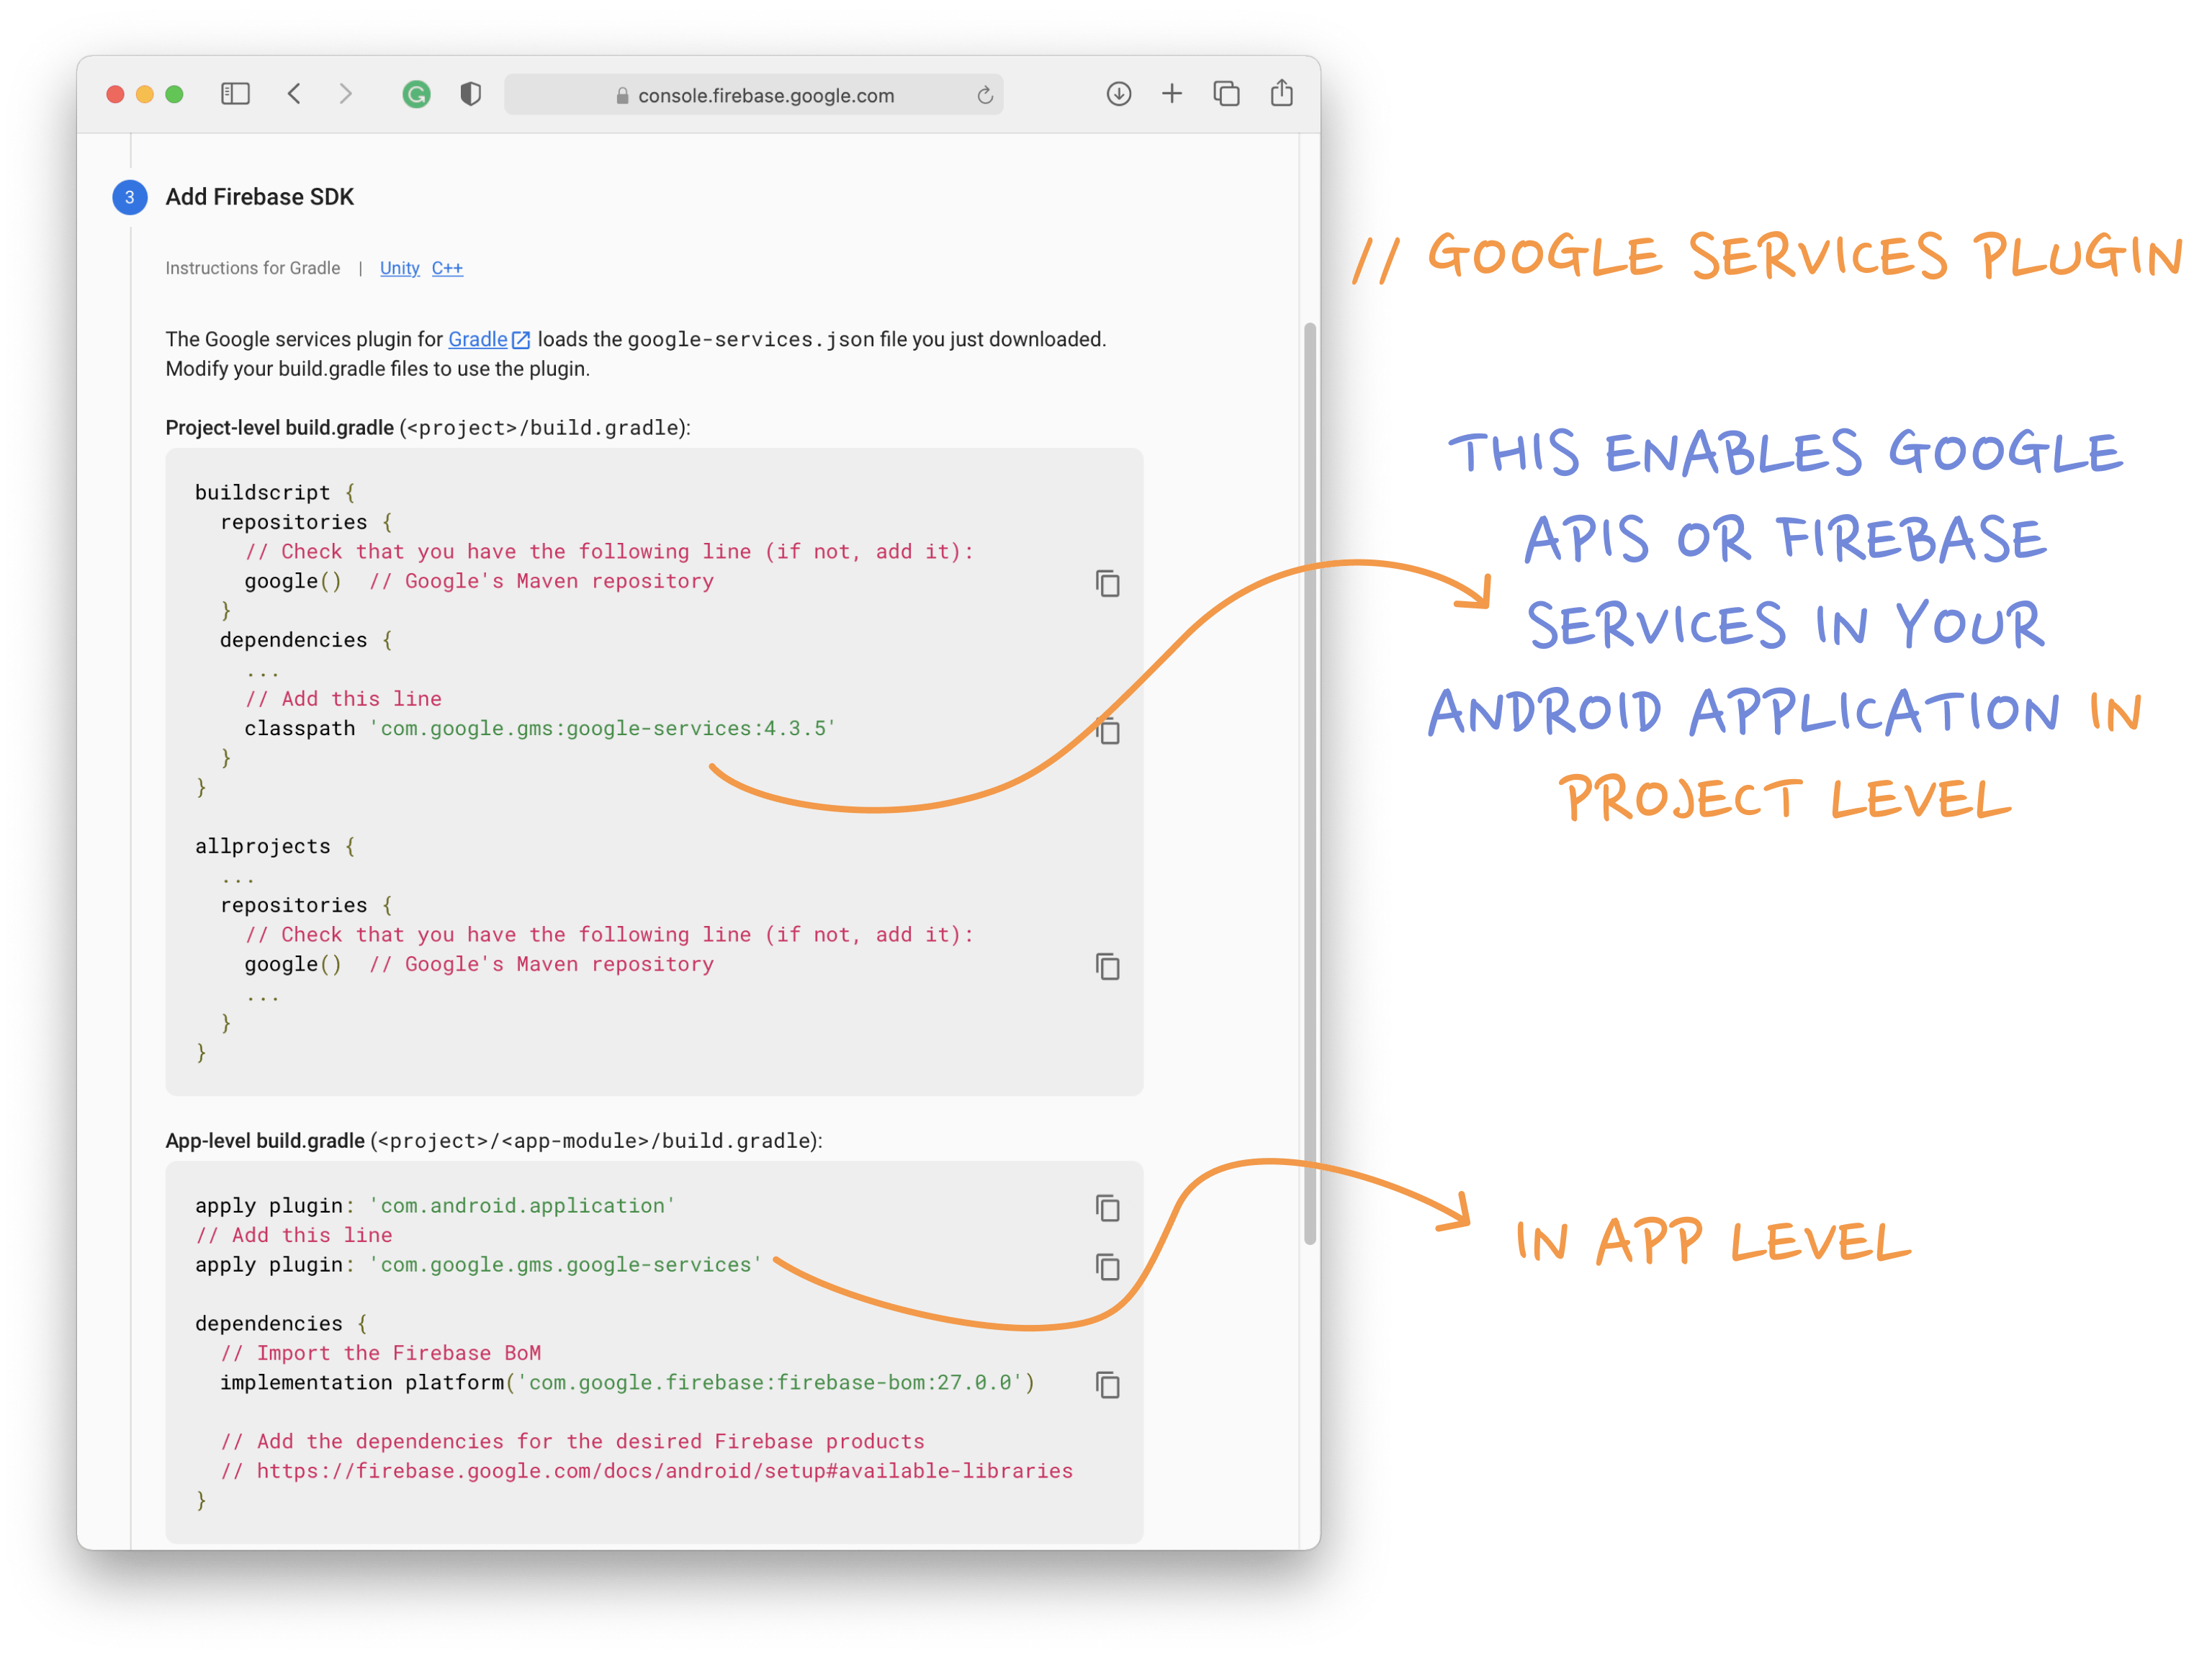
// TODO #2: Google Services Plugin - Project Level
// TODO #3: Google Services Plugin - App Level
Open Todo's pane in the IDE and replace the todo's with the google-services plugin code, respectively.
And click next to all of the following steps. That's it you have successfully configured Firebase for Android Project.
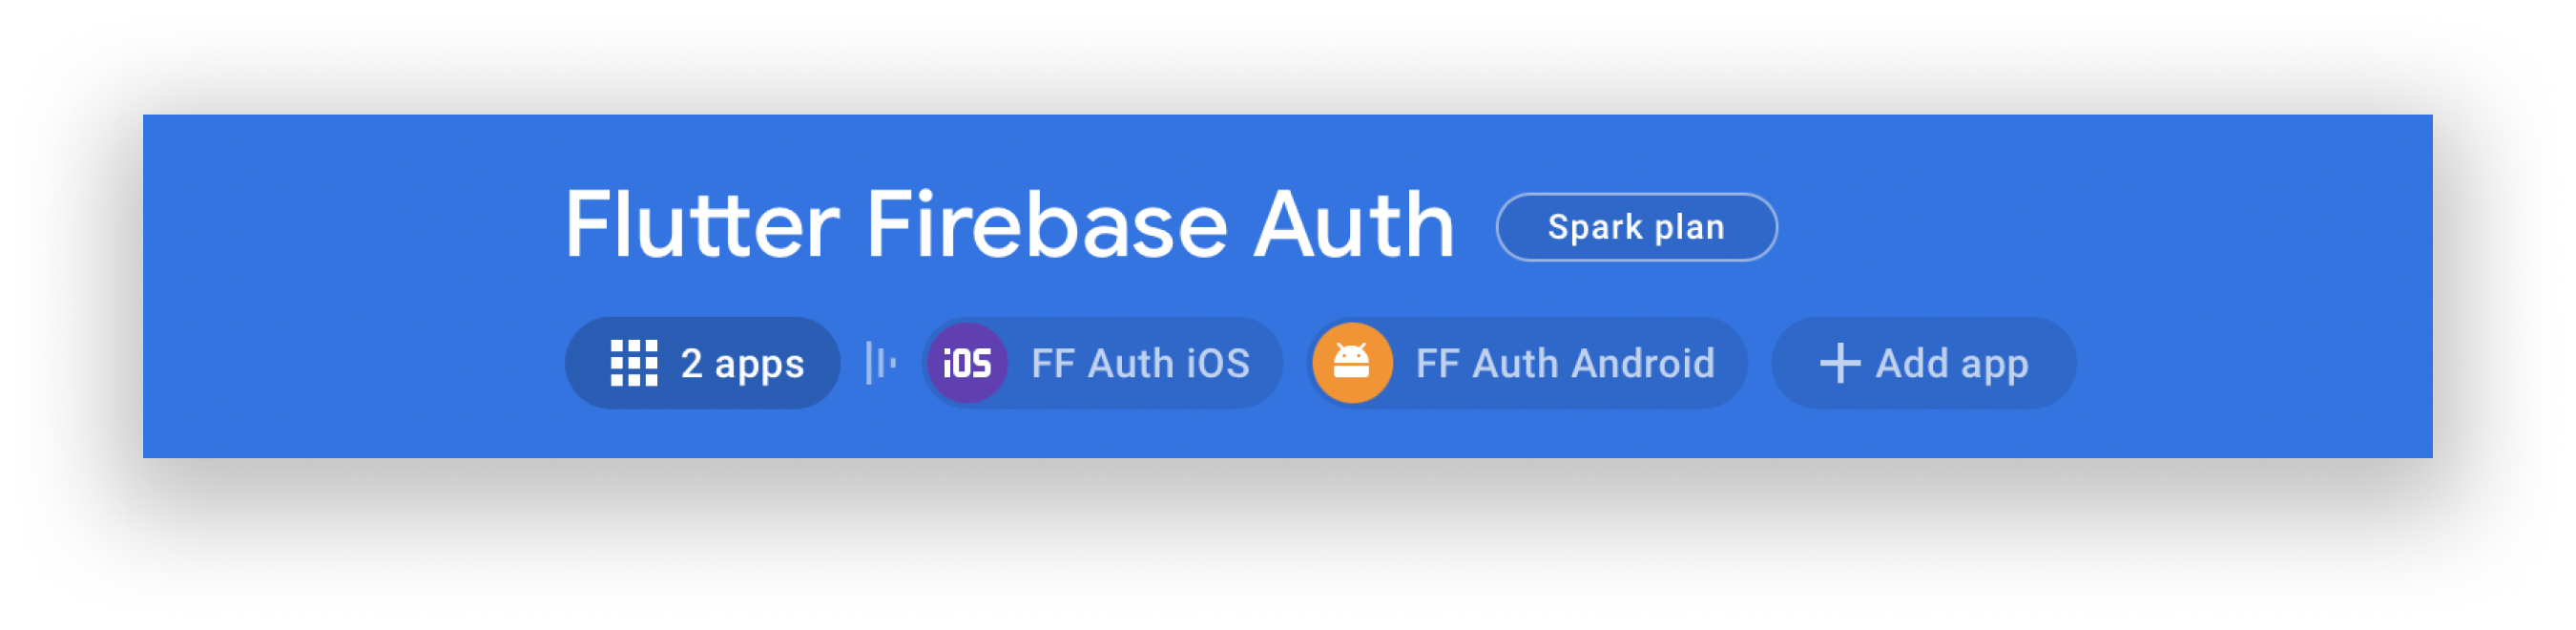
Once you have finished setup for android and if you navigate back to project home. You will see that both apps are added to the project.
Project setup is completed. But our app needs to authenticate the user using firebase.
Enable Email & Password
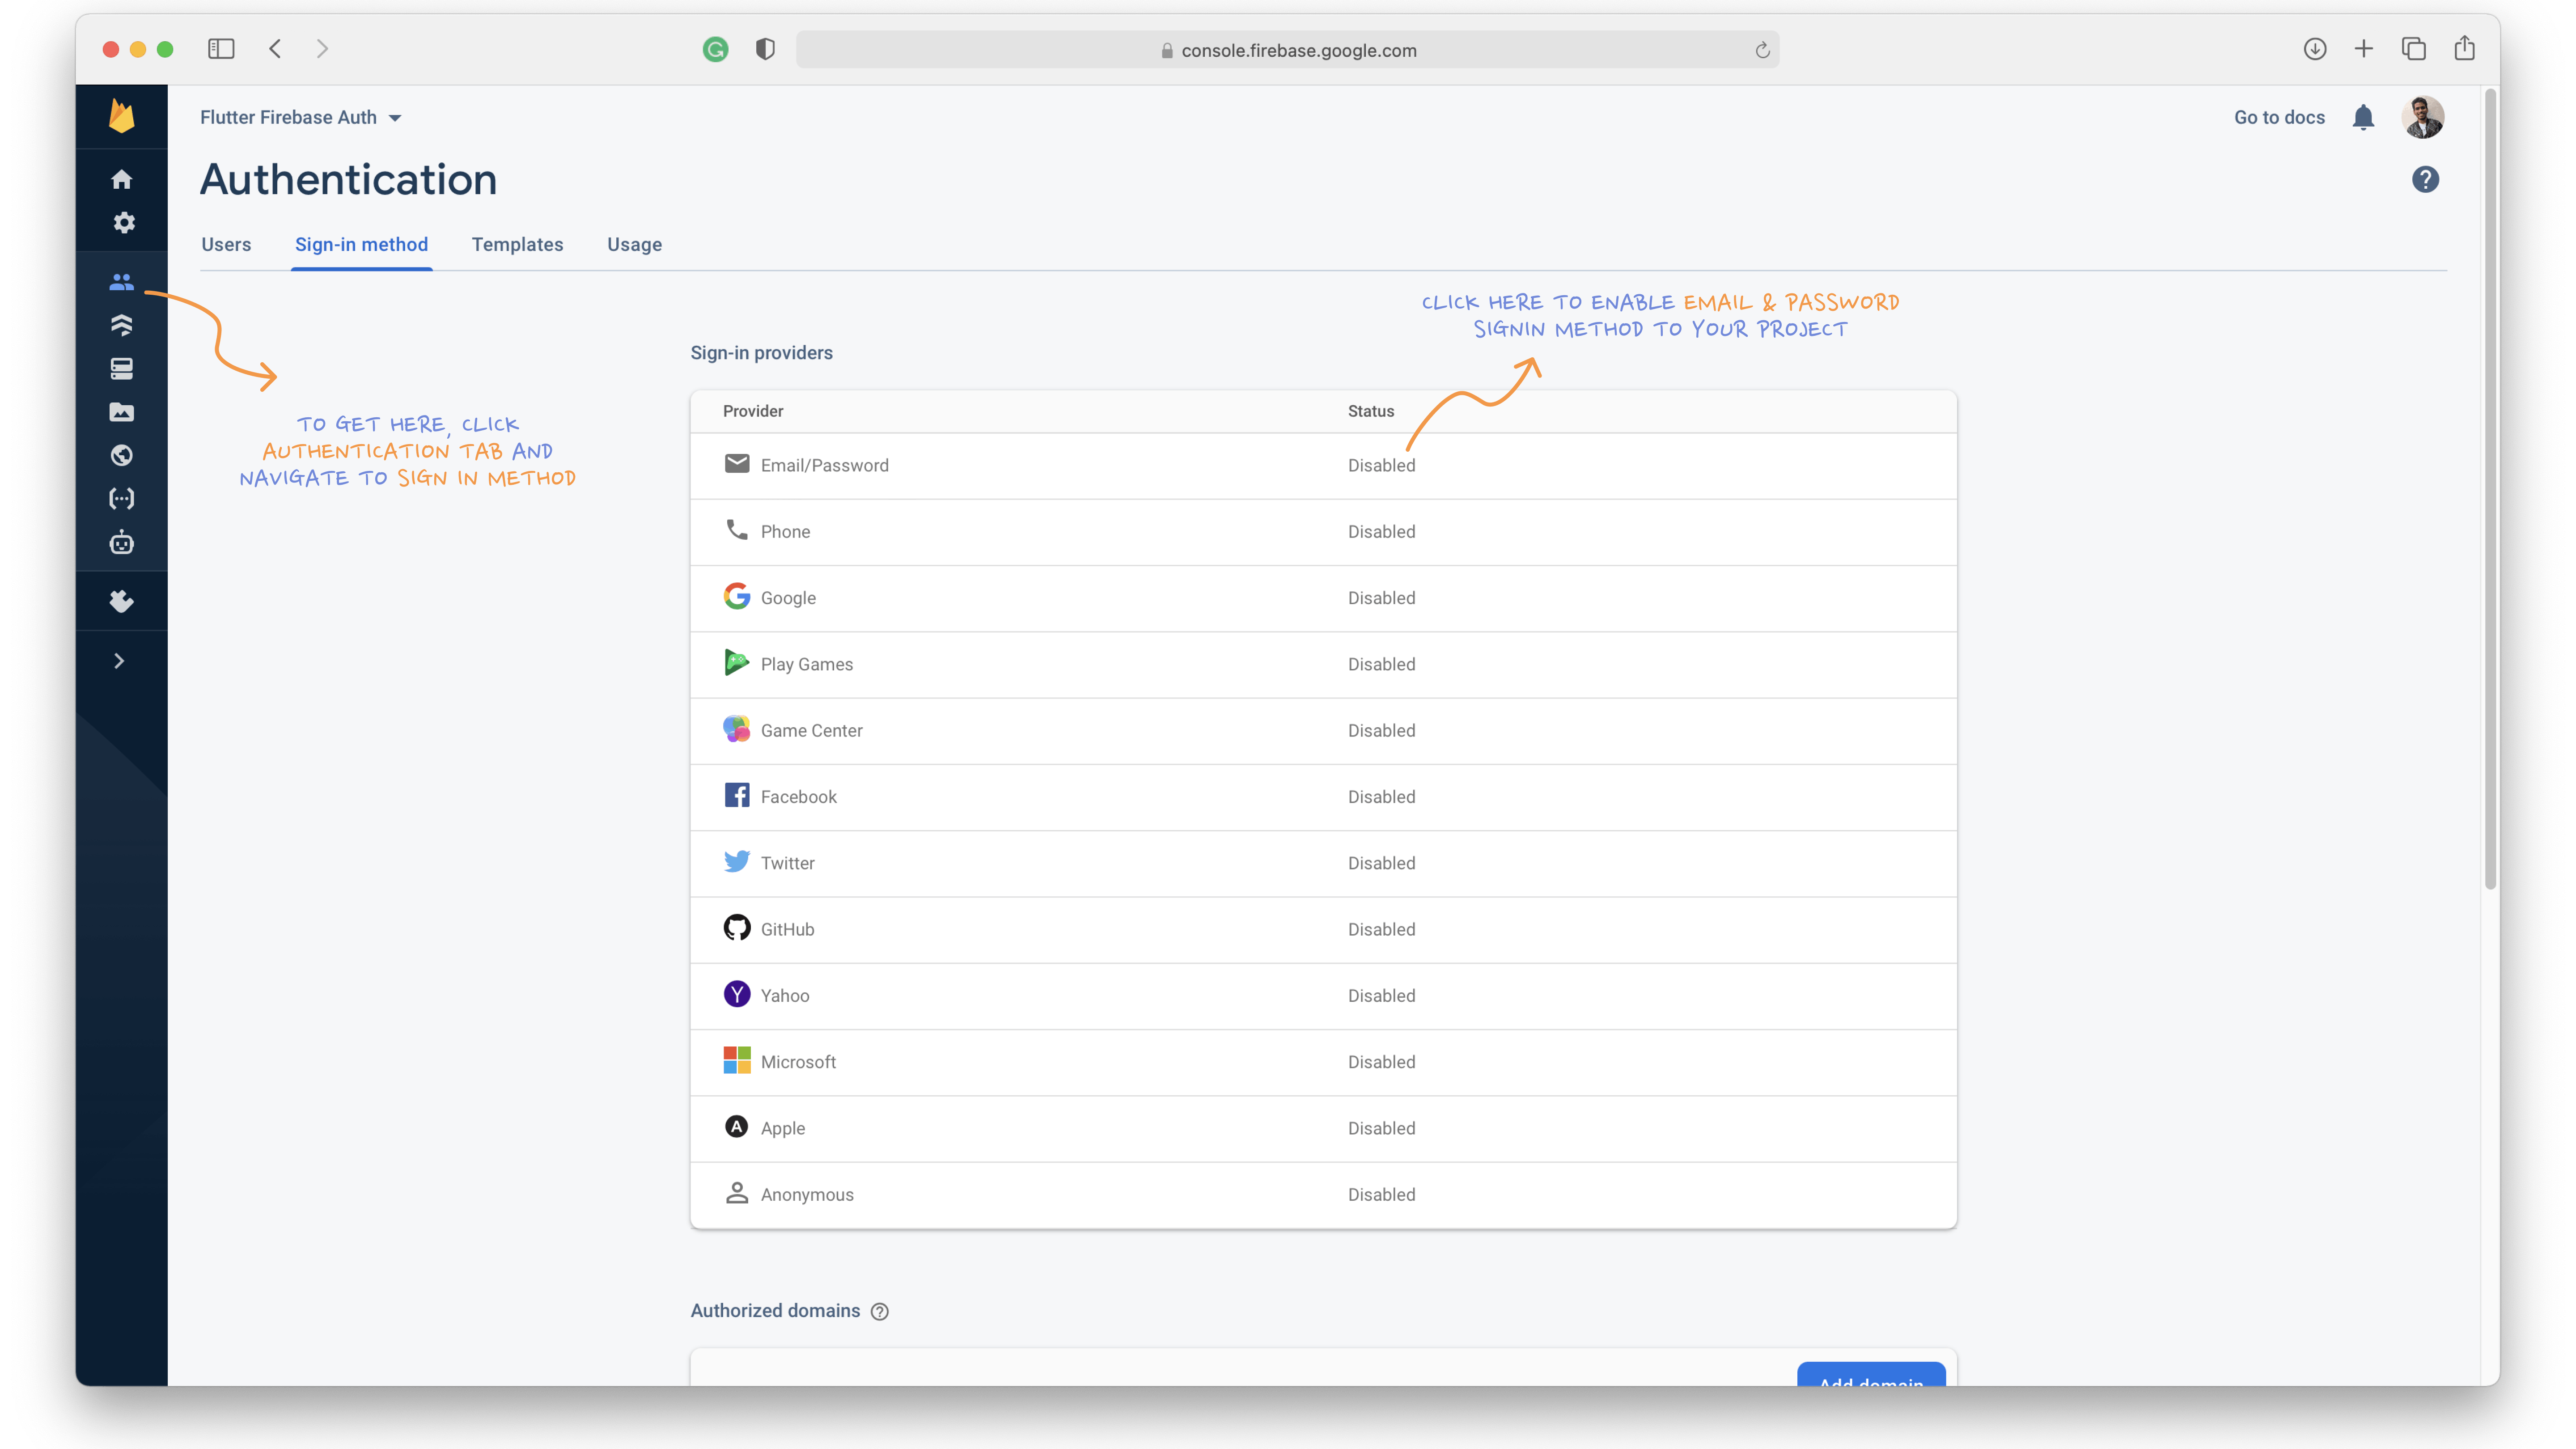
Open the Authentication tab from project home and navigate to the sign-in method. You can find many sign-in options, but we are only using email and password in our app.
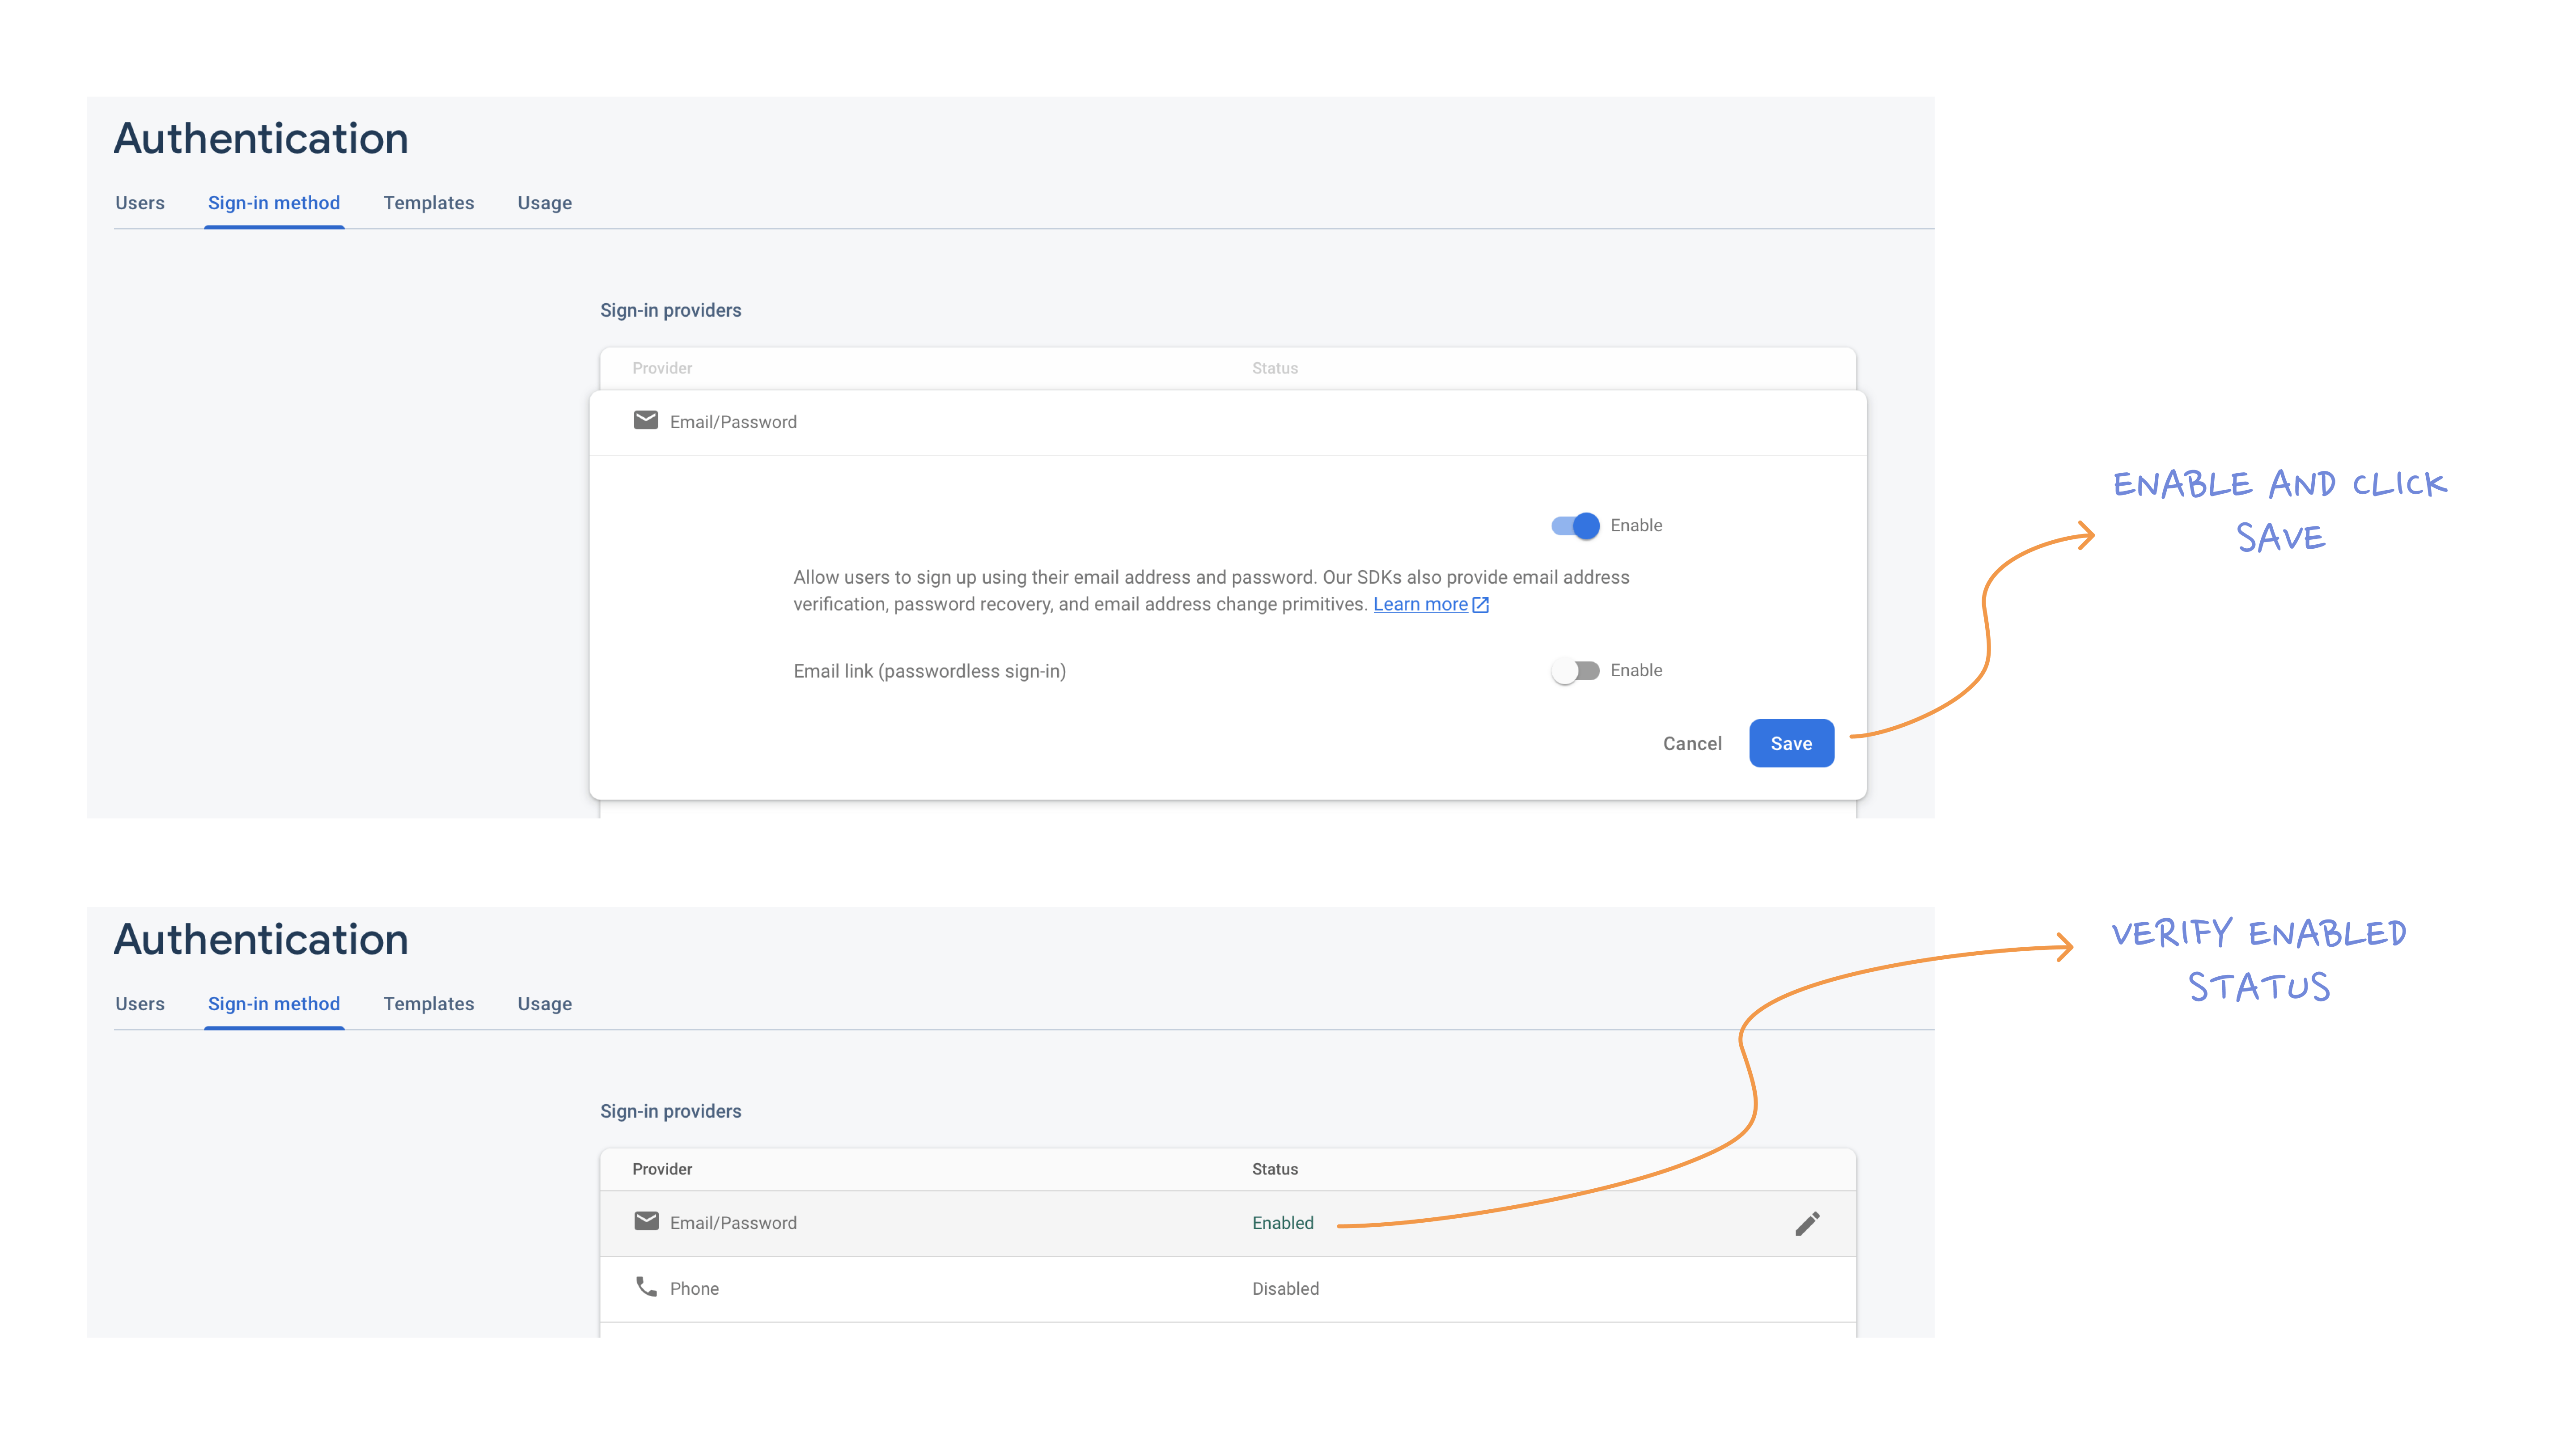
By enabling it, only we can sign in and sign-up from the app.
Let's code now!
Plugins
Open pubspec.yaml and add firebase and state management plugins and run flutter pub get
  # Firebase
  firebase_core: ^1.0.3
  firebase_auth: ^1.0.3

  # State Management
  provider: ^5.0.0
Authentication Service
Create an authentication_service.dart file in lib folder and copy the following code.
import 'package:firebase_auth/firebase_auth.dart';


class AuthenticationService {

  // 1
  final FirebaseAuth _firebaseAuth;

  AuthenticationService(this._firebaseAuth);

  // 2
  Stream<User> get authStateChanges => _firebaseAuth.authStateChanges();


  // 3
  Future<String> signIn({String email, String password}) async {
    try {
      await _firebaseAuth.signInWithEmailAndPassword(email: email, password: password);
      return "Signed in";
    } on FirebaseAuthException catch(e) {
      return e.message;
    }
  }

  // 4
  Future<String> signUp({String email, String password}) async {
    try {
      await _firebaseAuth.createUserWithEmailAndPassword(email: email, password: password);
      return "Signed up";
    } on FirebaseAuthException catch(e) {
      return e.message;
    }
  }

  // 5
  Future<String> signOut() async {
    try {
      await _firebaseAuth.signOut();
      return "Signed out";
    } on FirebaseAuthException catch(e) {
      return e.message;
    }
  }

// 6
 User getUser() {
    try {
      return _firebaseAuth.currentUser;
    } on FirebaseAuthException {
      return null;
    }
  }

}
Authentication Service is a class that has different methods that handle Firebase Authentication.
_firebaseAuthis a variable of type FirebaseAuth; this will get initialized from the constructor.- The stream returns a User class if the user is signed in or null if they are not.
signIn()accepts email and password for firebase sign and returns a Future StringsignUp()accepts email and password for firebase signup and returns a Future StringsignOut()is a simple method. On calling, it signout's the user and returns a Future String.getUser()returns the current logged-in user details.
In all the methods, if an exception occurs is handled under FirebaseAuthException.
Open lib/main.dart and replace the following code.
import 'package:flutter/material.dart';
import 'authentication_service.dart';
// screens
import 'ui/home.dart';
import 'ui/sign_in.dart';
import 'ui/sign_up.dart';
import 'ui/splash.dart';
// Import the provider plugin
import 'package:provider/provider.dart';
// Import the firebase plugins
import 'package:firebase_core/firebase_core.dart';
import 'package:firebase_auth/firebase_auth.dart';


// 1
Future<void> main() async {
  WidgetsFlutterBinding.ensureInitialized();
  await Firebase.initializeApp();
  runApp(MyApp());
}


class MyApp extends StatelessWidget {
  @override
  Widget build(BuildContext context) {
    return MultiProvider(
      providers: [
        // 2
        Provider<AuthenticationService>(
          create: (_) => AuthenticationService(FirebaseAuth.instance),
        ),
        // 3
        StreamProvider(
          create: (context) => context.read<AuthenticationService>().authStateChanges,
          initialData: null,
        )
      ],
      child: MaterialApp(
        title: 'Flutter Firebase Auth',
        debugShowCheckedModeBanner: false,
        theme: ThemeData(
          visualDensity: VisualDensity.adaptivePlatformDensity,
          primaryColor: Colors.indigoAccent
        ),
        initialRoute: '/',
        routes: {
          '/': (context) => Splash(),
          '/auth': (context) => AuthenticationWrapper(),
          '/signin': (context) => SignIn(),
          '/signup': (context) => SignUp(),
          '/home': (context) => Home(),
        },
      ),
    );
  }
}

class AuthenticationWrapper extends StatelessWidget {
  @override
  Widget build(BuildContext context) {
    final firebaseuser = context.watch<User>();
    if (firebaseuser != null) {
        return Home();
      }
      return SignIn();
  }
}
Initializing the Firebase app is asynchronous, meaning you'll need to prevent any Firebase-related usage until the initialization is complete before that, you need to initialize Flutter WidgetBinding
Provider for
AuthenticationService,on creating we pass Firebase instance to it.- Stream Provider for
Userauth status which read fromAuthenticationService>().authStateChanges AuthenticationWrapperis a StatelessWidget that watches the User, if the user is signed in, then returnshome screenif not returns thesign-in screen.
Successfully we have implemented the core logic of authentication. Now, we are only a few steps away from completing the app. i.e., we have to implement authentication service methods in the rest of the screens.
Handling Flow
Splash Screen
Open the lib/ui/splash.dart and replace the following function.
@override
  void didChangeDependencies() {
    super.didChangeDependencies();
      Timer(const Duration(milliseconds: 2000), () {
        //TODO: Change to Auth
        Navigator.pushNamed(
              context,
              '/auth',
            );
      });
  }
After displaying the splash screen, the app navigates to the AuthenticationWrapper.
Signin screen
Open the lib/ui/signin.dart and copy the following code into onpressed function.
onPressed: () {
   context.read<AuthenticationService>()
            .signIn(
                email: emailTextController.text.trim(),
                password: passwordTextController.text.trim(),
                ).then(
          (String result) => showSnackbar(context, result));
     },
Here we call AuthenticationService.signIn() using the provider package by providing email and password from the text controller.
Signup screen
Open the lib/ui/signup.dart and copy the following code into onpressed function.
 onPressed: () async {
        final result = await context
          .read<AuthenticationService>()
                .signUp(
                    email: emailTextController.text.trim(),
                    password: passwordTextController.text.trim(),
                    );

showSnackbar(context, result);

if (result == "Signed up") {
     Navigator.popUntil(
         context, ModalRoute.withName('/auth'));
        }},
Here we call AuthenticationService.signUp() using the provider package by providing email and password from the text controller. After creating an account successfully, navigating the route back to auth.
Thus, the authentication flow is only managed through AuthenticationWrapper.
🚨 Import these lines in sign-in and sign-up screens if you face an Error
import 'package:flutterfire_auth/authentication_service.dart';
import 'package:provider/provider.dart';
import 'package:flutterfire_auth/helper.dart';
Home Screen
Open the lib/ui/home.dart and replace the following code.
import 'package:flutter/material.dart';
import 'package:flutterfire_auth/authentication_service.dart';
import 'package:provider/provider.dart';
import 'package:firebase_auth/firebase_auth.dart';

class Home extends StatefulWidget {
  const Home({Key key}) : super(key: key);

  @override
  _HomeState createState() => _HomeState();
}

class _HomeState extends State<Home> {

// 1
  User user;

  @override
  void initState() {
    setState(() {
      // 2
      user = context.read<AuthenticationService>().getUser();
    });
    super.initState();
  }

  @override
  Widget build(BuildContext context) {
    return Scaffold(
      appBar: AppBar(
        automaticallyImplyLeading: false,
        elevation: 0,
        backgroundColor: Colors.indigoAccent,
        title: const Text(
          'Flutter Firebase Auth',
          style: TextStyle(
              fontSize: 20,
              fontWeight: FontWeight.w500,
              color: Colors.white
              ),
        ),
        actions: [
          IconButton(
              icon: Icon(Icons.logout),
              onPressed: () {
                // 3
                context.read<AuthenticationService>().signOut();
              })
        ],
      ),
      body: Column(
        mainAxisAlignment: MainAxisAlignment.spaceEvenly,
        children: [
          Text("Hurrah!",
              style: TextStyle(
                fontSize: 30,
                fontWeight: FontWeight.w700,
                color: Colors.black,
              )),
          Center(
            child: user != null ?
            Image.asset('assets/Saly.png') : Container(),
          ),
          Column(
            children: [
              Text(
                "You logged in as",
                style: TextStyle(
                fontSize: 15,
                fontWeight: FontWeight.w500
                ),
              ),
              Padding(
                padding: const EdgeInsets.all(8.0),
                child: Container(
                  decoration: BoxDecoration(
                    color: Colors.blueGrey.shade50,
                    borderRadius: BorderRadius.all(
                      Radius.circular(25.0),
                    ),
                  ),
                  child: Padding(
                    padding: const EdgeInsets.all(16.0),
                    child: Text(
                  // 4
                  user != null ? user.email : "No User Found",
                      style: TextStyle(
                        fontSize: 20,
                        fontWeight: FontWeight.w600,
                      ),
                    ),
                  ),
                ),
              ),
            ],
          ),
        ],
      ),
    );
  }
}
- Create a
uservariable of typeUserto store the current user. - Get user details on initializing and set it
uservariable. - Here, we call
AuthenticationService.signOut()using the provider package to log out the user. uservalue can benullable.So, getting email only when the user is not null.
Handling Exceptions
If you have observed, we call the showSnackbar() after calling sign in and sign up methods. This function show messages that are returned by the AuthenticationService methods.
Finally, build and run to see what you coded so far!

Verify
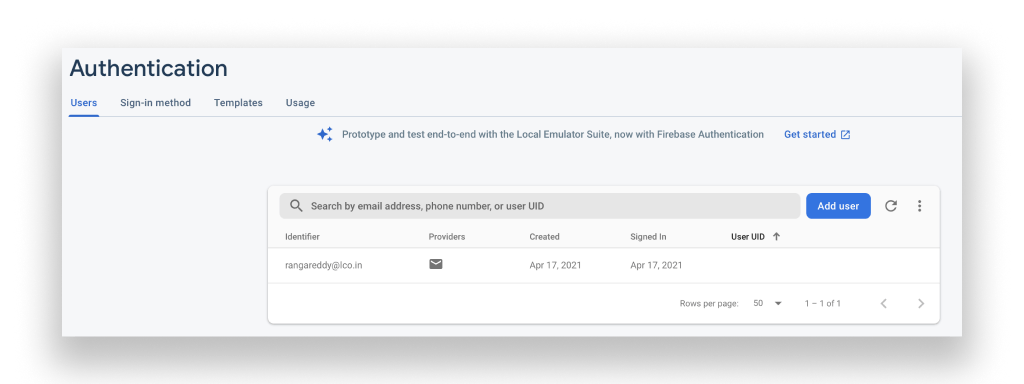
If everything is done perfectly, you can users in Firebase Project.
Here is the final code if in case you need it.
Hurrah 🎉!, Know you have completed building a Firebase app that uses Email and Password Authentication for login.
Wrap up
Authenticating an app is made easy using Firebase Authentication Service. Let us recall what we have done so far to build this app.
- Developed core logic Authentication.
- Created and Configured Firebase Project for iOS and Android
- Created an Authentication Service class that has firebase auth methods.
- Created MultiProvider for initializing the Firebase Auth and to stream user status.
- Applied methods in the UI and passed the requirements.
- Finally Handled Exceptions.
I hope you’ve enjoyed this. If you found this article helpful, kindly share this with your fellow developers and in the community.
If you have any questions or comments, please join the discussion below!
If you like to improve your App Development Skills even more, check out blog.learncodeonline.in. Feel free to connect me on Instagram or Twitter if you have any additional tips or feedback.
Thanks for reading!