


When it comes to security Linux servers are considered to be the most secured by default. I agree to this at some extent as Linux comes up with some best in class security tools in-built. All you need to do is tune them up and customize as per your requirements which will help it to become even more secure system.
In this article we will learn about how one can make a Linux server more secure by following some security hardening practices.
User Management
Disable the very powerful root user
The root user which has power to do almost everything on Linux server gets created by default as the first user on every Linux system. Disable it. And provide sudo access instead to all the users who requires to run administrative commands.
Disable root user on Ubuntu ->
Lock the root account by disabling its password.
root@lco-linux-master:~# passwd -l root
passwd: password expiry information changed.

root@lco-linux-master:~# passwd --status root
root L 12/21/2020 0 99999 7 -1
To unlock it back run the following command:
root@lco-linux-master:~# passwd -u root
passwd: password expiry information changed.

root@lco-linux-master:~# passwd --status root
root P 12/21/2020 0 99999 7 -1
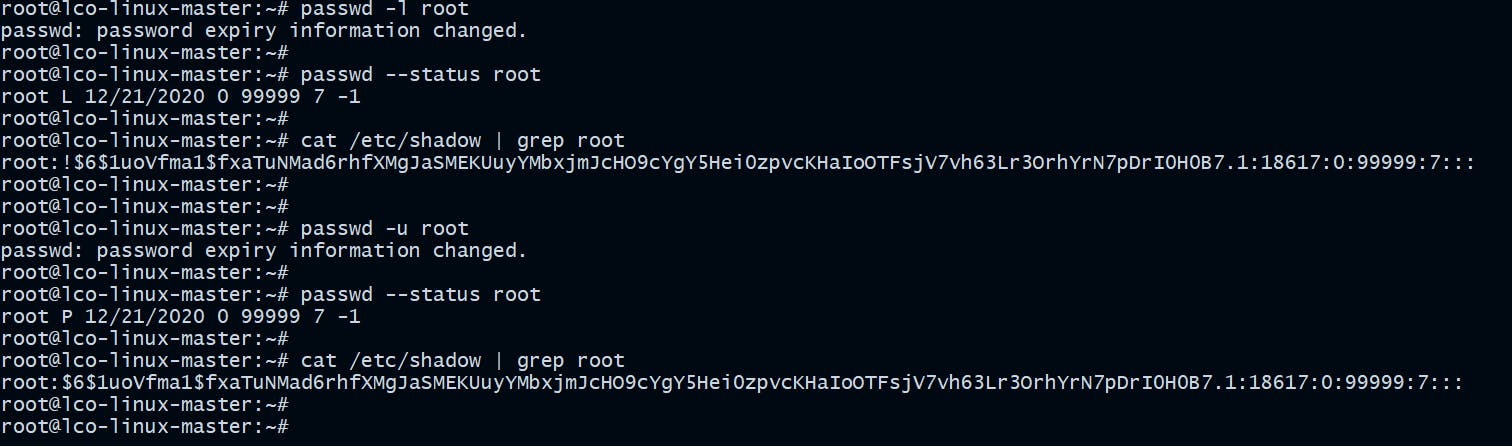
When you lock a user's account it becomes shadowed in shadow file which contains the password information for the system users.
!being present in the password field (2nd field) mean the account is locked.
Implement Password Complexity
Ensure you put strict and unique password complexity rules.
For example:
- Set a minimum length of at least 10 characters
- Ensure passwords uses special characters, upper and lowercase letters
- Ensure same password is never reused
- Ensure configuring password expiration, as no password can provide adequate security indefinitely.
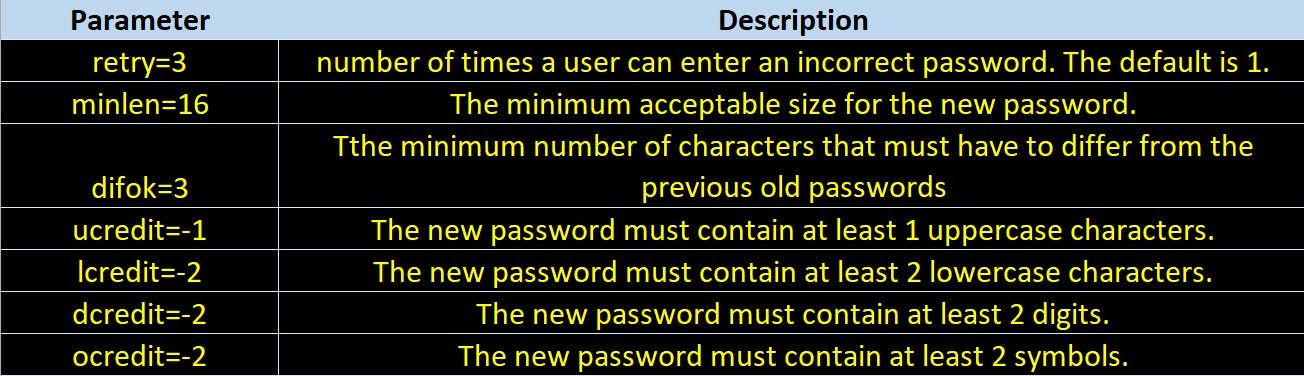
On Ubuntu or Debian based systems update /etc/pam.d/common-password file with following parameters.
password requisite pam_cracklib.so retry=3 minlen=12 difok=1 remember=3 lcredit=1 ucredit=1 ocredit=1 dcredit=-1
On Red Hat or CentOS the file name will be /etc/pam.d/system-auth and entries will remain same.
Below table describes the various parameters we used above.
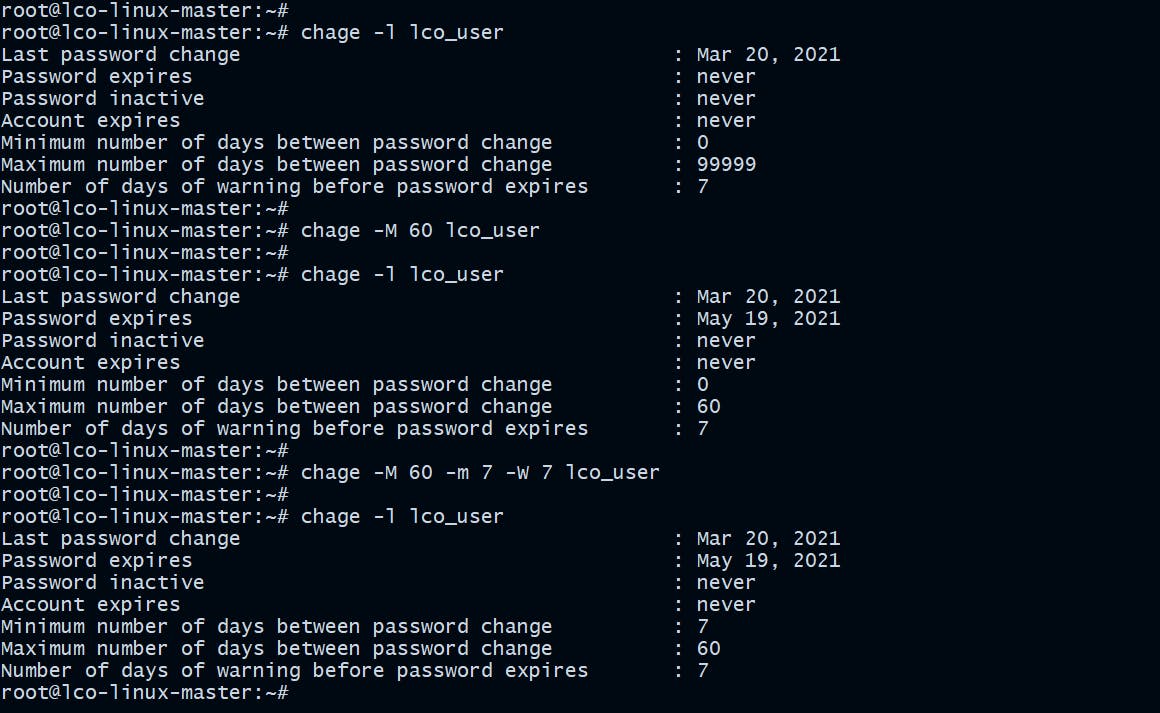
Configure Password Expiration
There must be a password expiration policy existing which have a minimum and maximum password age forcing users to change their passwords when they expire.
root@lco-linux-master:~# chage -M 60 lco_user

root@lco-linux-master:~# chage -M 60 -m 7 -W 7 lco_user
Parameters ->
-M Set maximum number of days
-m Set minimum number of days
-W Set the number of days of warning
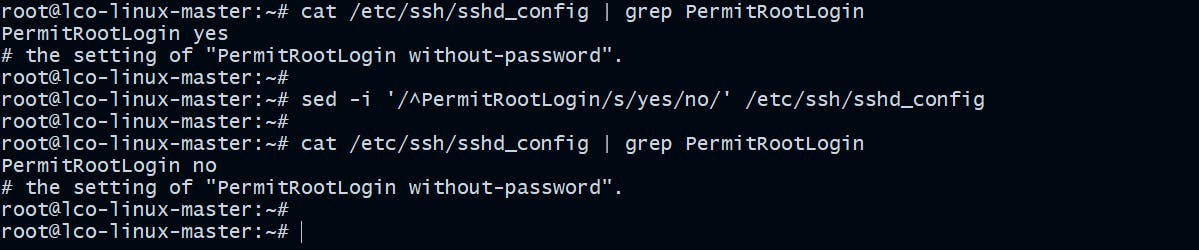
Disable Root Logins over ssh
Update the ssh configuration file on your system and disable the root logins.
root@lco-linux-master:~# sed -i '/^PermitRootLogin/s/yes/no/' /etc/ssh/sshd_config
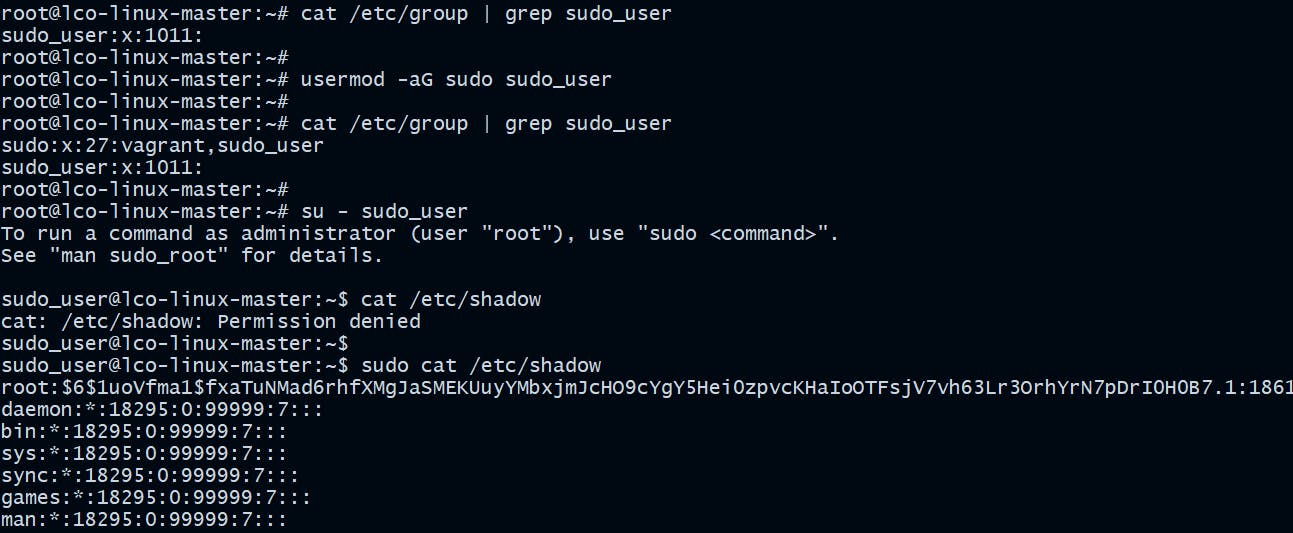
Setup sudo users
Run following commands to setup a sudo user.
On Ubuntu:
root@lco-linux-master:~# usermod -aG sudo sudo_user
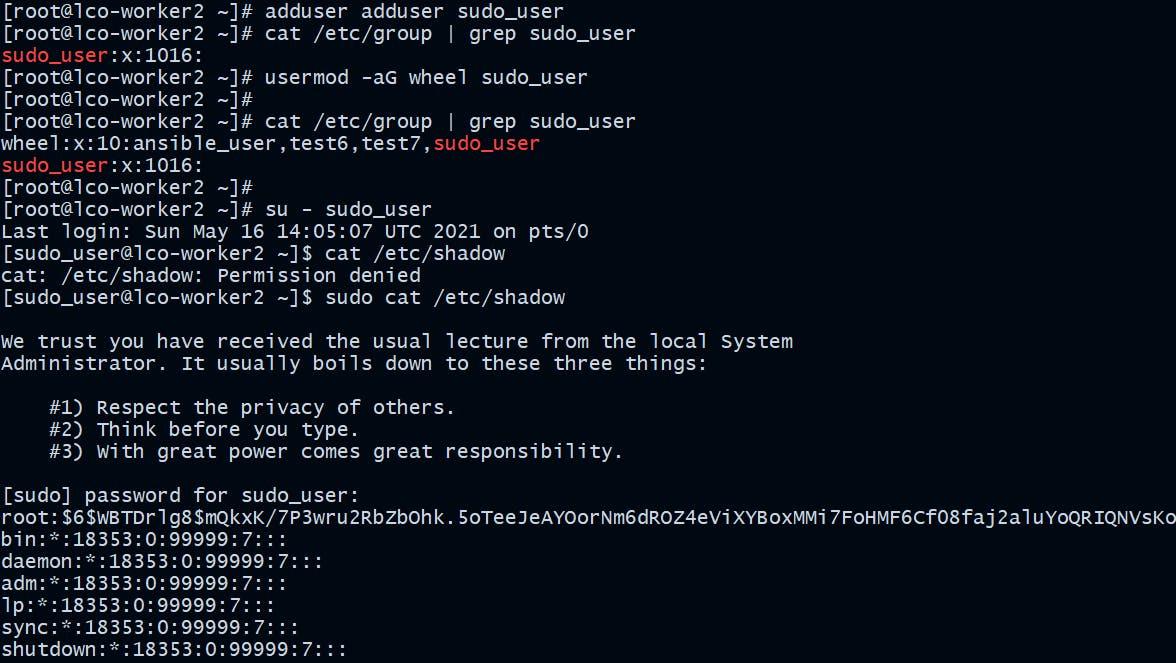
On CentOS:
[root@lco-worker2 ~]# usermod -aG wheel sudo_user
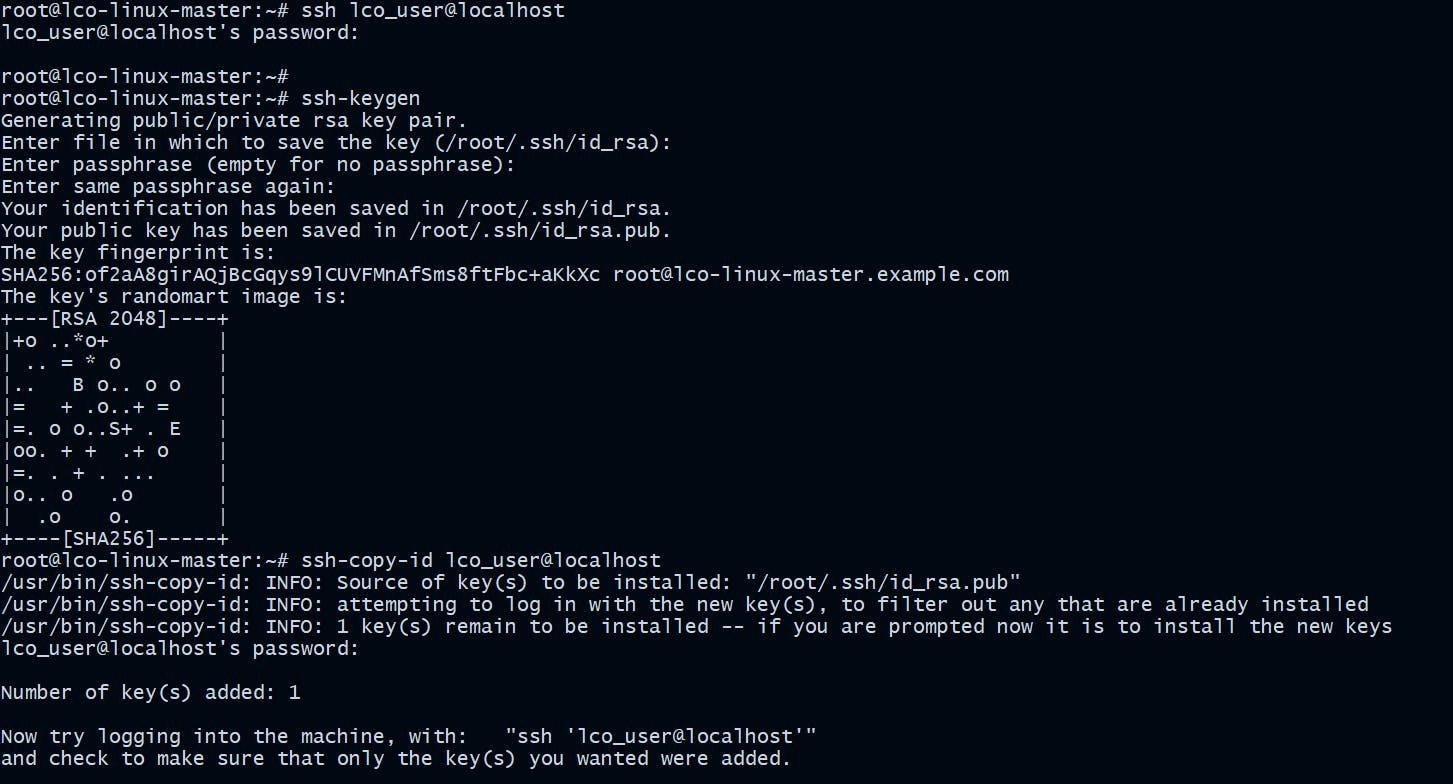
Enable Password less authentication using SSH key pairs
You can use a more secure method for user login than using passwords. Create an SSH key pair to use with the user for logins.
Follow the steps below to do that.
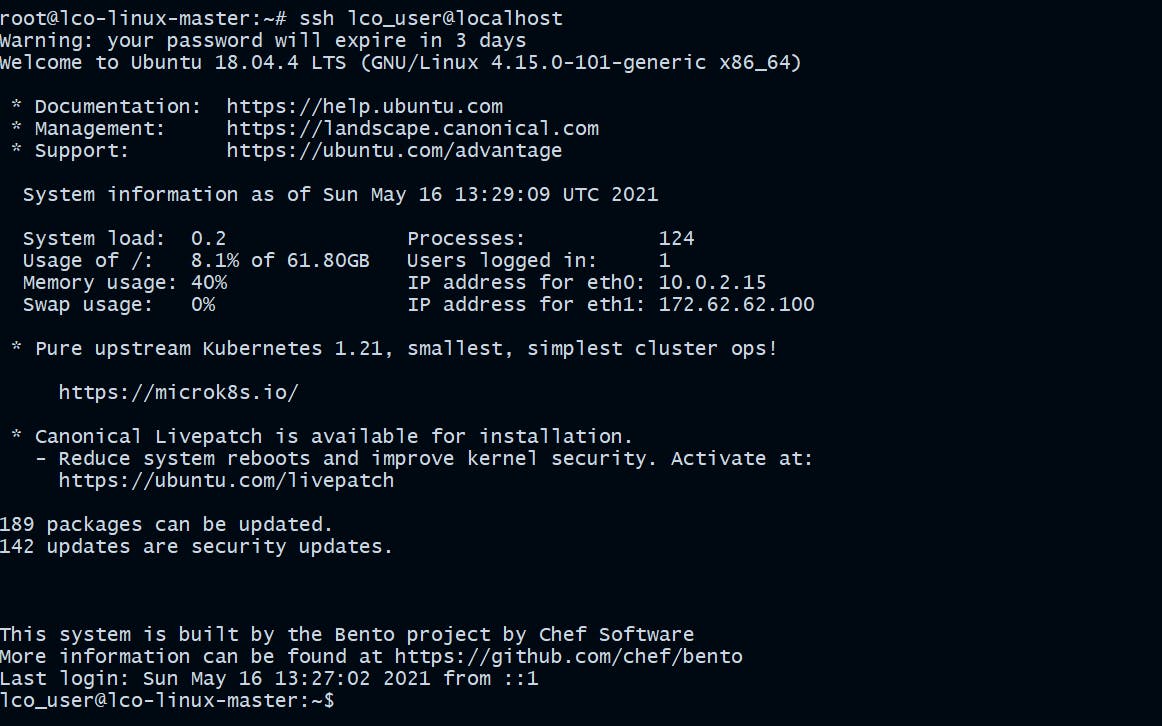
root@lco-linux-master:~# ssh-keygen

root@lco-linux-master:~# ssh-copy-id lco_user@localhost
ssh-keygencommand used to generate a public/private authentication key pair.ssh-copy-idcommand installs an SSH key on a remote server's authorized keys file which enables password less authentication.
Now it will be a passwordless login for the user.
Verify No Accounts Have Empty Passwords
Verify there exist no users with empty passwords, if they do exist, lock them.
[root@lco-worker2 ~]# awk -F: '($2 == "") {print}' /etc/shadow

[root@lco-worker2 ~]# passwd -l empty_pass_user

Configure the Firewall
Make sure the software level firewalls are configured.
On Ubuntu:
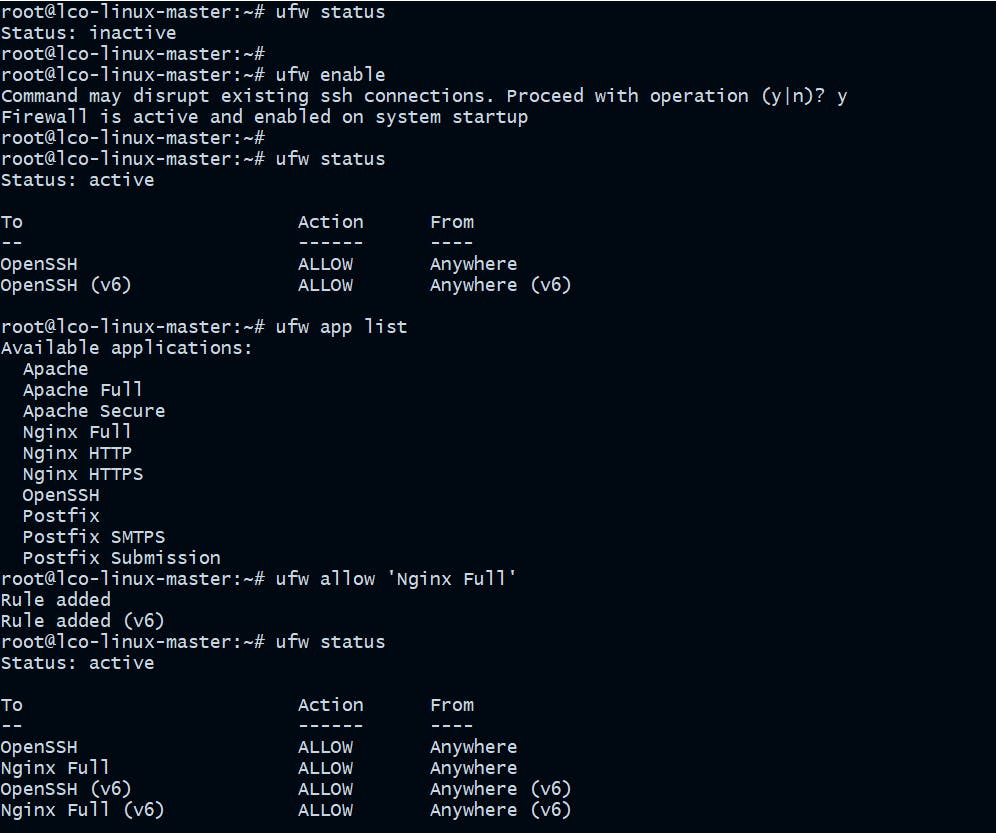
root@lco-linux-master:~# ufw enable
root@lco-linux-master:~# ufw status
root@lco-linux-master:~# ufw app list
root@lco-linux-master:~# ufw allow 'Nginx Full'
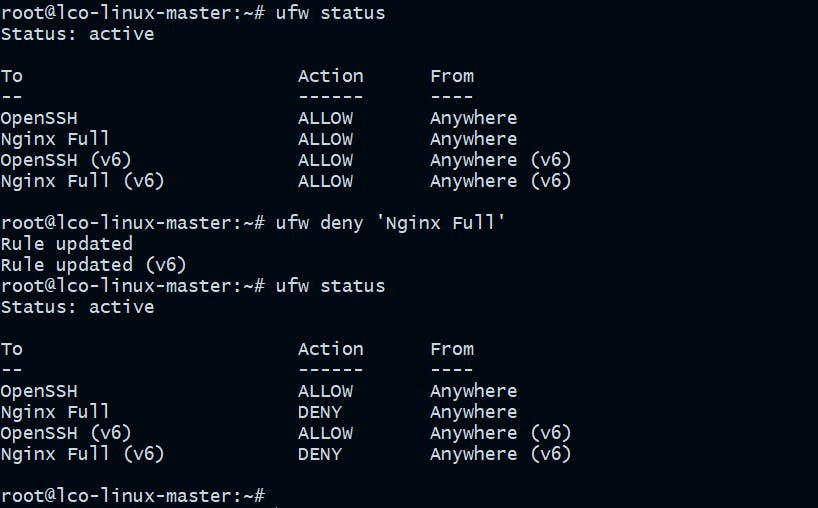
root@lco-linux-master:~# ufw deny 'Nginx Full'
On CentOS:
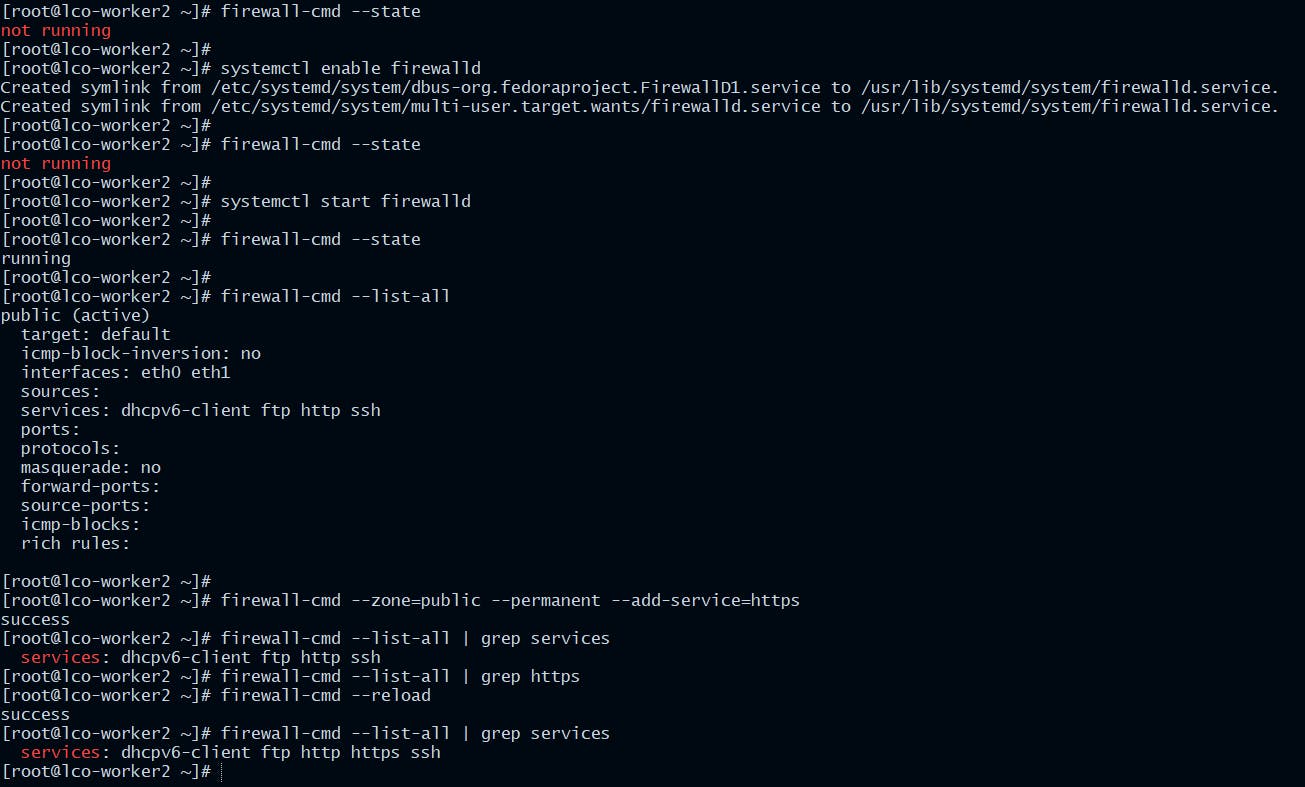
[root@lco-worker2 ~]# firewall-cmd --state
[root@lco-worker2 ~]# systemctl enable firewalld
[root@lco-worker2 ~]# systemctl start firewalld
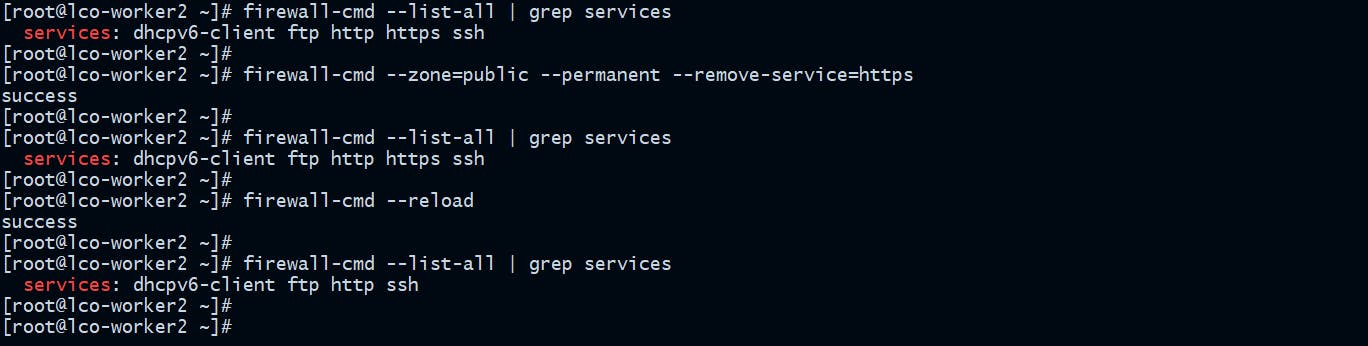
[root@lco-worker2 ~]# firewall-cmd --list-all
[root@lco-worker2 ~]# firewall-cmd --zone=public --permanent --add-service=https
[root@lco-worker2 ~]# firewall-cmd --zone=public --permanent --remove-service=https
Be up-to-date with software and distribution versions
On Ubuntu:
root@lco-linux-master:~# apt-get update && apt-get upgrade

On CentOS:
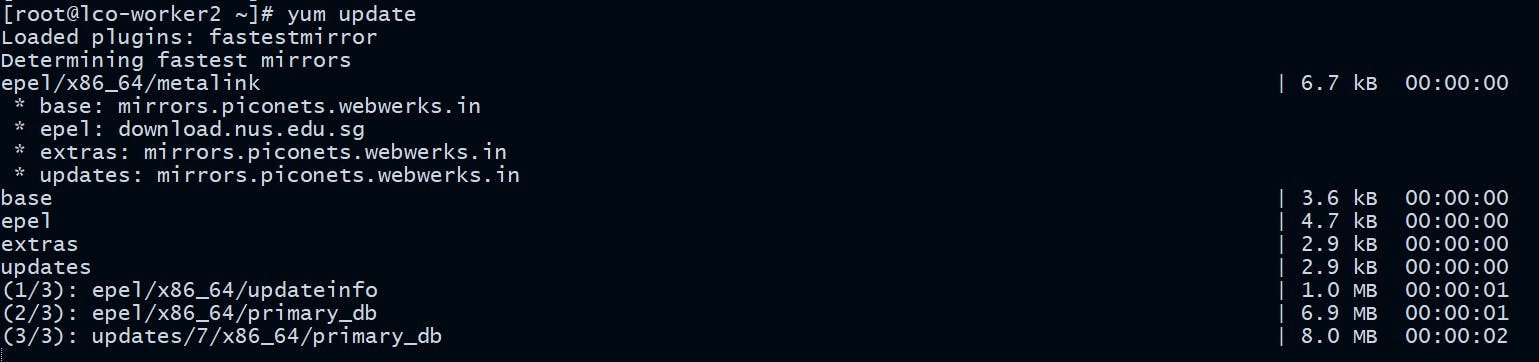
[root@lco-worker2 ~]# yum check-update

[root@lco-worker2 ~]# yum update
Always monitor Listening Network Ports
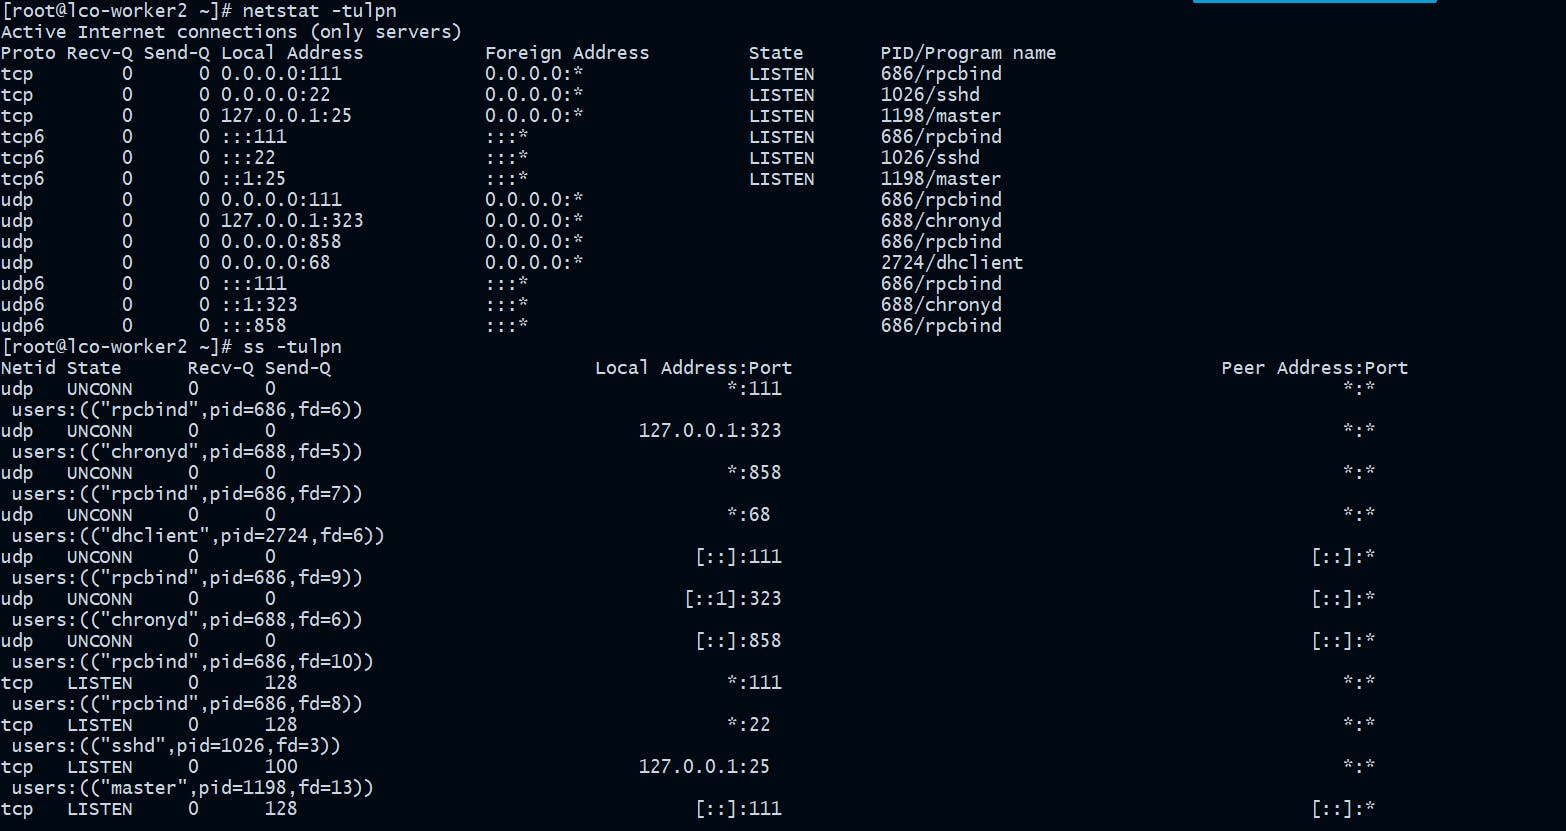
Use any of the following commands to list all open ports and the programs associated.
[root@lco-worker2 ~]# netstat -tulpn

[root@lco-worker2 ~]# ss -tulpn
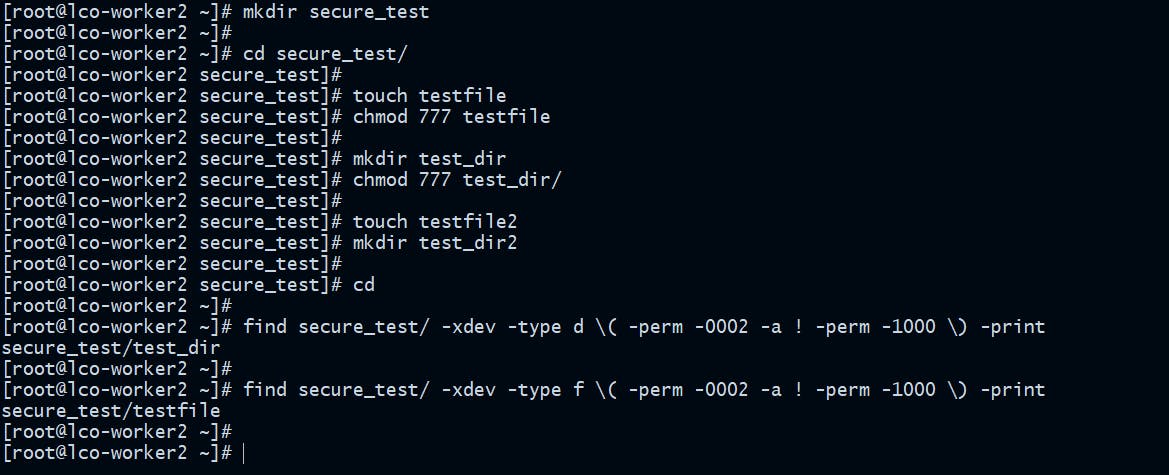
Find and take necessary actions on world-writable files
[root@lco-worker2 ~]# find secure_test/ -xdev -type d \( -perm -0002 -a ! -perm -1000 \) -print

[root@lco-worker2 ~]# find secure_test/ -xdev -type f \( -perm -0002 -a ! -perm -1000 \) -print
Find and Disable Unwanted SUID and SGID executables
Find all SUID files:
[root@lco-worker2 ~]# find / -perm /4000 2>/dev/null
Find all SGID files:
[root@lco-worker2 ~]# find / -perm /2000 2>/dev/null
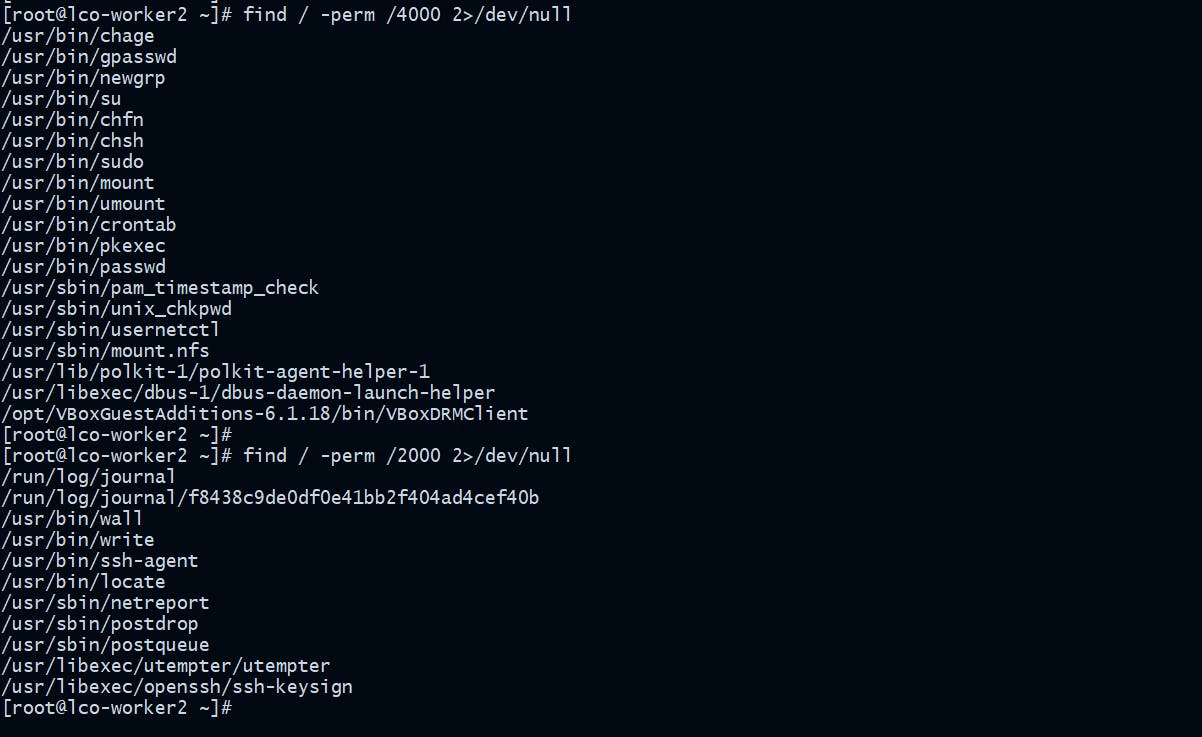
After finding them you can investigate and take necessary action.
Find the files with no ownership
Run the following command to find the files with no ownership and take necessary action after that.
[root@lco-worker2 ~]# find / -xdev \( -nouser -o -nogroup \) -print 2>/dev/null
Log review is critical
One should regularly review the system, authentication and application related logs. We should have a centralized dedicated log server.
Below table mentions common Linux default log files name and their usage.

Always use Encrypt communications
We should always avoid using all unencrypted transfer protocols for our access and file transfer needs such as Telnet and FTP, or anything that would send passwords or other sensitive information as plain text. They uses a really weak plain-text authentication methods.
For example I have setup a vsftpd server on my CentOS host and trying to connect from the Ubuntu host via ftp.

Now look at the packets captured during that time.
[root@lco-worker2 ~]# tcpdump -i eth1 -nn -v port ftp or ftp-data
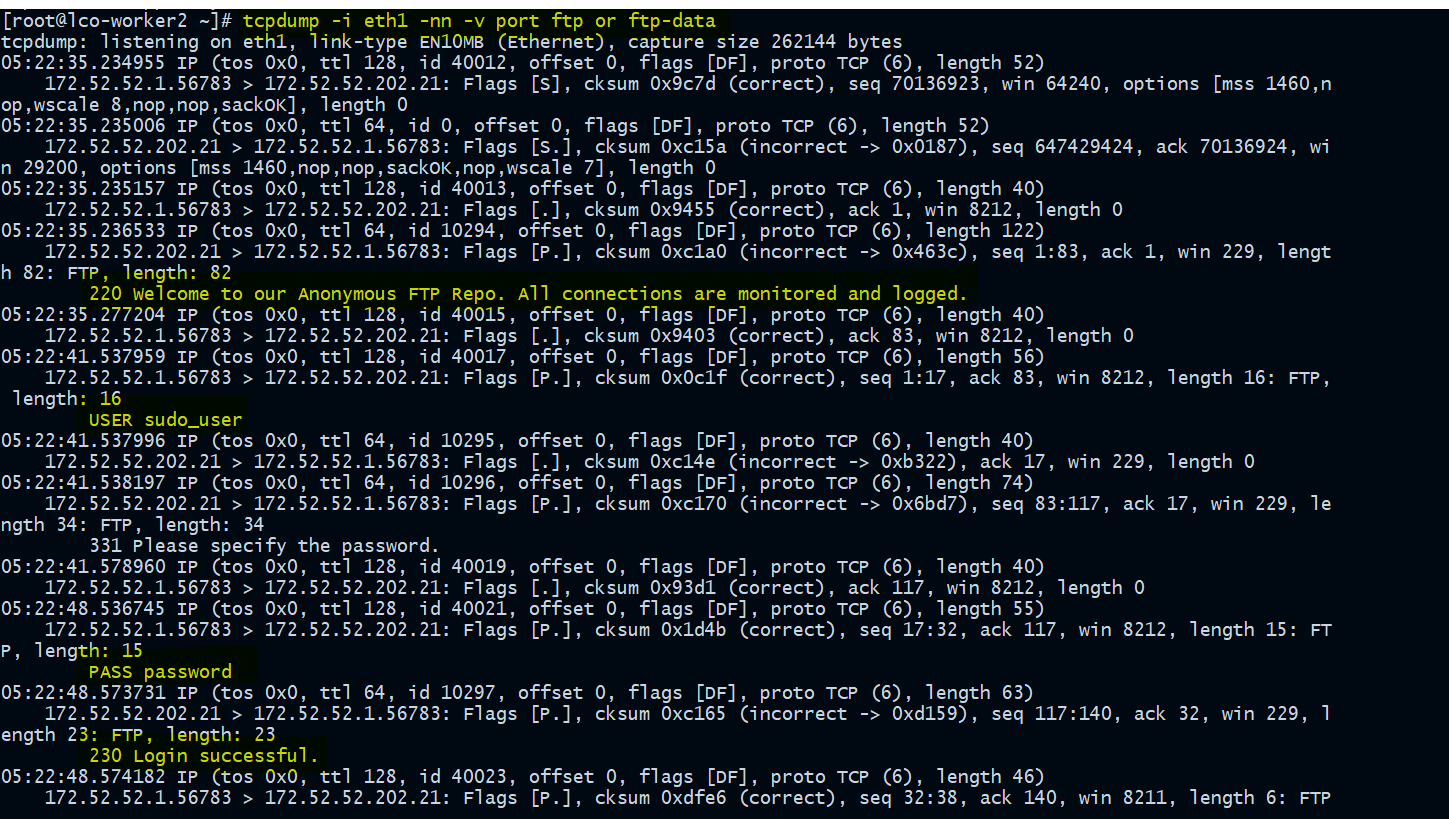
We can clearly see the password in clear text there. It must be avoided.
We can use SSH (Secure Shell), rsync, SCP (Secure Copy) and SFTP (SSH File Transfer Protocol) instead for remote access and file transfer requirements.
To Capture all plaintext passwords you can run the following command. Here I am capturing packets on interface
eth1, yours could be different.
[root@lco-worker2 ~]# tcpdump -i eth1 port http or port ftp or port smtp or port imap or port pop3 or port telnet -l -A | egrep -i -B5 'pass=|pwd=|log=|login=|user=|username=|pw=|passw=|passwd=|password=|pass:|user:|username:|password:|login:|pass |user '
Always take backups
One should regularly take offsite backups of their critical data loads.
In case of any intrusion or disaster you can recover back from the backups available. Linux has native backup programs such as dump and restore as well.
Having external encrypted backup solutions such as NAS server or FreeNAS server or cloud backups are highly recommended.
Make sure Disk Partitions are separated
It's highly recommended to have different partitions in order to avail higher data security in case if any disaster event.
Always implement Mandatory Access Controls (SELinux/Apparmor)
Using Mandatory Access Controls like SELinux is strongly recommended. It protects the system from malicious or flawed applications that can damage or destroy the system.
Use IDS solutions such as fail2bean
Fail2ban scans the system log files for excessive failed login attempts and accordingly blocks the malicious/suspecious IP addresses.
On Ubuntu:
root@lco-linux-master:~# apt-get install fail2ban
On CentOS:
[root@lco-worker2 ~]# yum install fail2ban
Stop or Disable unused services
You must stop or disable the services which you never going to use. For example:
root@lco-linux-master:~# systemctl stop vsftpd

root@lco-linux-master:~# systemctl disable vsftpd
Turn Off IPv6 if not used
If you are not using IPv6, disable it. I will show both the methods of doing it (changing grub file /etc/default/grub and changing kernel parameters file /etc/sysctl.conf)
On Ubuntu:
Update the grub configuration file /etc/default/grub and append ipv6.disable=1 as below.
root@lco-linux-master:~# cat /etc/default/grub | grep -i ipv6
GRUB_CMDLINE_LINUX_DEFAULT="ipv6.disable=1"
GRUB_CMDLINE_LINUX="net.ifnames=0 biosdevname=0 ipv6.disable=1"

root@lco-linux-master:~# update-grub
On CentOS:
Append below lines in /etc/sysctl.conf and run sysctl -p command. This doesn't require any reboot to take effect.
[root@lco-worker2 ~]# cat  /etc/sysctl.conf | grep -i ipv6
net.ipv6.conf.all.disable_ipv6 = 1
net.ipv6.conf.default.disable_ipv6 = 1

[root@lco-worker2 ~]# sysctl -p
net.ipv6.conf.all.disable_ipv6 = 1
net.ipv6.conf.default.disable_ipv6 = 1
That's all for this detailed guide which covers different aspects of Securing your Linux system.
Hope you like the article. Stay Tuned for more.
Thank you. Happy learning!