Have you ever thought to improve performance i.e, stop/start services when an app is in the background/foreground respectively?
Then you should know, how to handle Flutter Application LifeCycle. For LifeCycle, you need to implement the abstract class WidgetsBindingObserver it works when the app goes on foreground and background.
WidgetsBindingObserver
WidgetsBindingObserver should be used to get default behaviors for all of the handlers. In our case, when we want to listen to the AppLifecycleState and call stop/start on our services.
So, We need to add WidgetsBindingObserver to our Stateful Widget. Some Stateful Widget methods we use here are:
- When the Framework is instructed to build a StatefulWidget, it immediately calls createState()
- initState(): This is the first method called when the widget is created (after the class constructor, of course.) initState is called once and only once. It must call super.initState().
- dispose():iscalledwhentheStateobjectisremoved, which is permanent. This method is where you should unsubscribe and cancel all animations, streams, etc
AppLifecycleState
Simply The States that an application can be in
- inactive: The application is in an inactive state and is not receiving user input.
- paused: The application is not currently visible to the user, not responding to user input, and running in the background.
- resumed: The application is visible and responding to user input.
- detached: The application is still hosted on a flutter engine but is detached from any host views. (Android 10 & above only)
Although Flutter behaves identically in both Android and iOS there is an actual difference when it comes to AppLifeCycleState's
Enough theory, now we will create a simple app that displays the LifeCycle Process in a form of a List.
Getting Started
You can find the code for the starter project here
import 'package:flutter/cupertino.dart';
import 'package:flutter/material.dart';
class LifeCycle extends StatefulWidget {
  @override
  _LifeCycleState createState() {
    return _LifeCycleState();
  }
}
class _LifeCycleState extends State<LifeCycle> with
WidgetsBindingObserver {
  @override
  Widget build(BuildContext context) {
    return Material(
      child: CupertinoPageScaffold(
        backgroundColor: kBackgroundColor,
        child: NestedScrollView(
            headerSliverBuilder:
                (BuildContext context, bool innerBoxIsScrolled) {
  return <Widget>[
    CupertinoSliverNavigationBar(
      largeTitle: Text("App LifeCycle"),
      trailing: logo(),
    )
]; },
body: Placeholder()),
 ), );
} }
Here’s how the app will look when you’re done
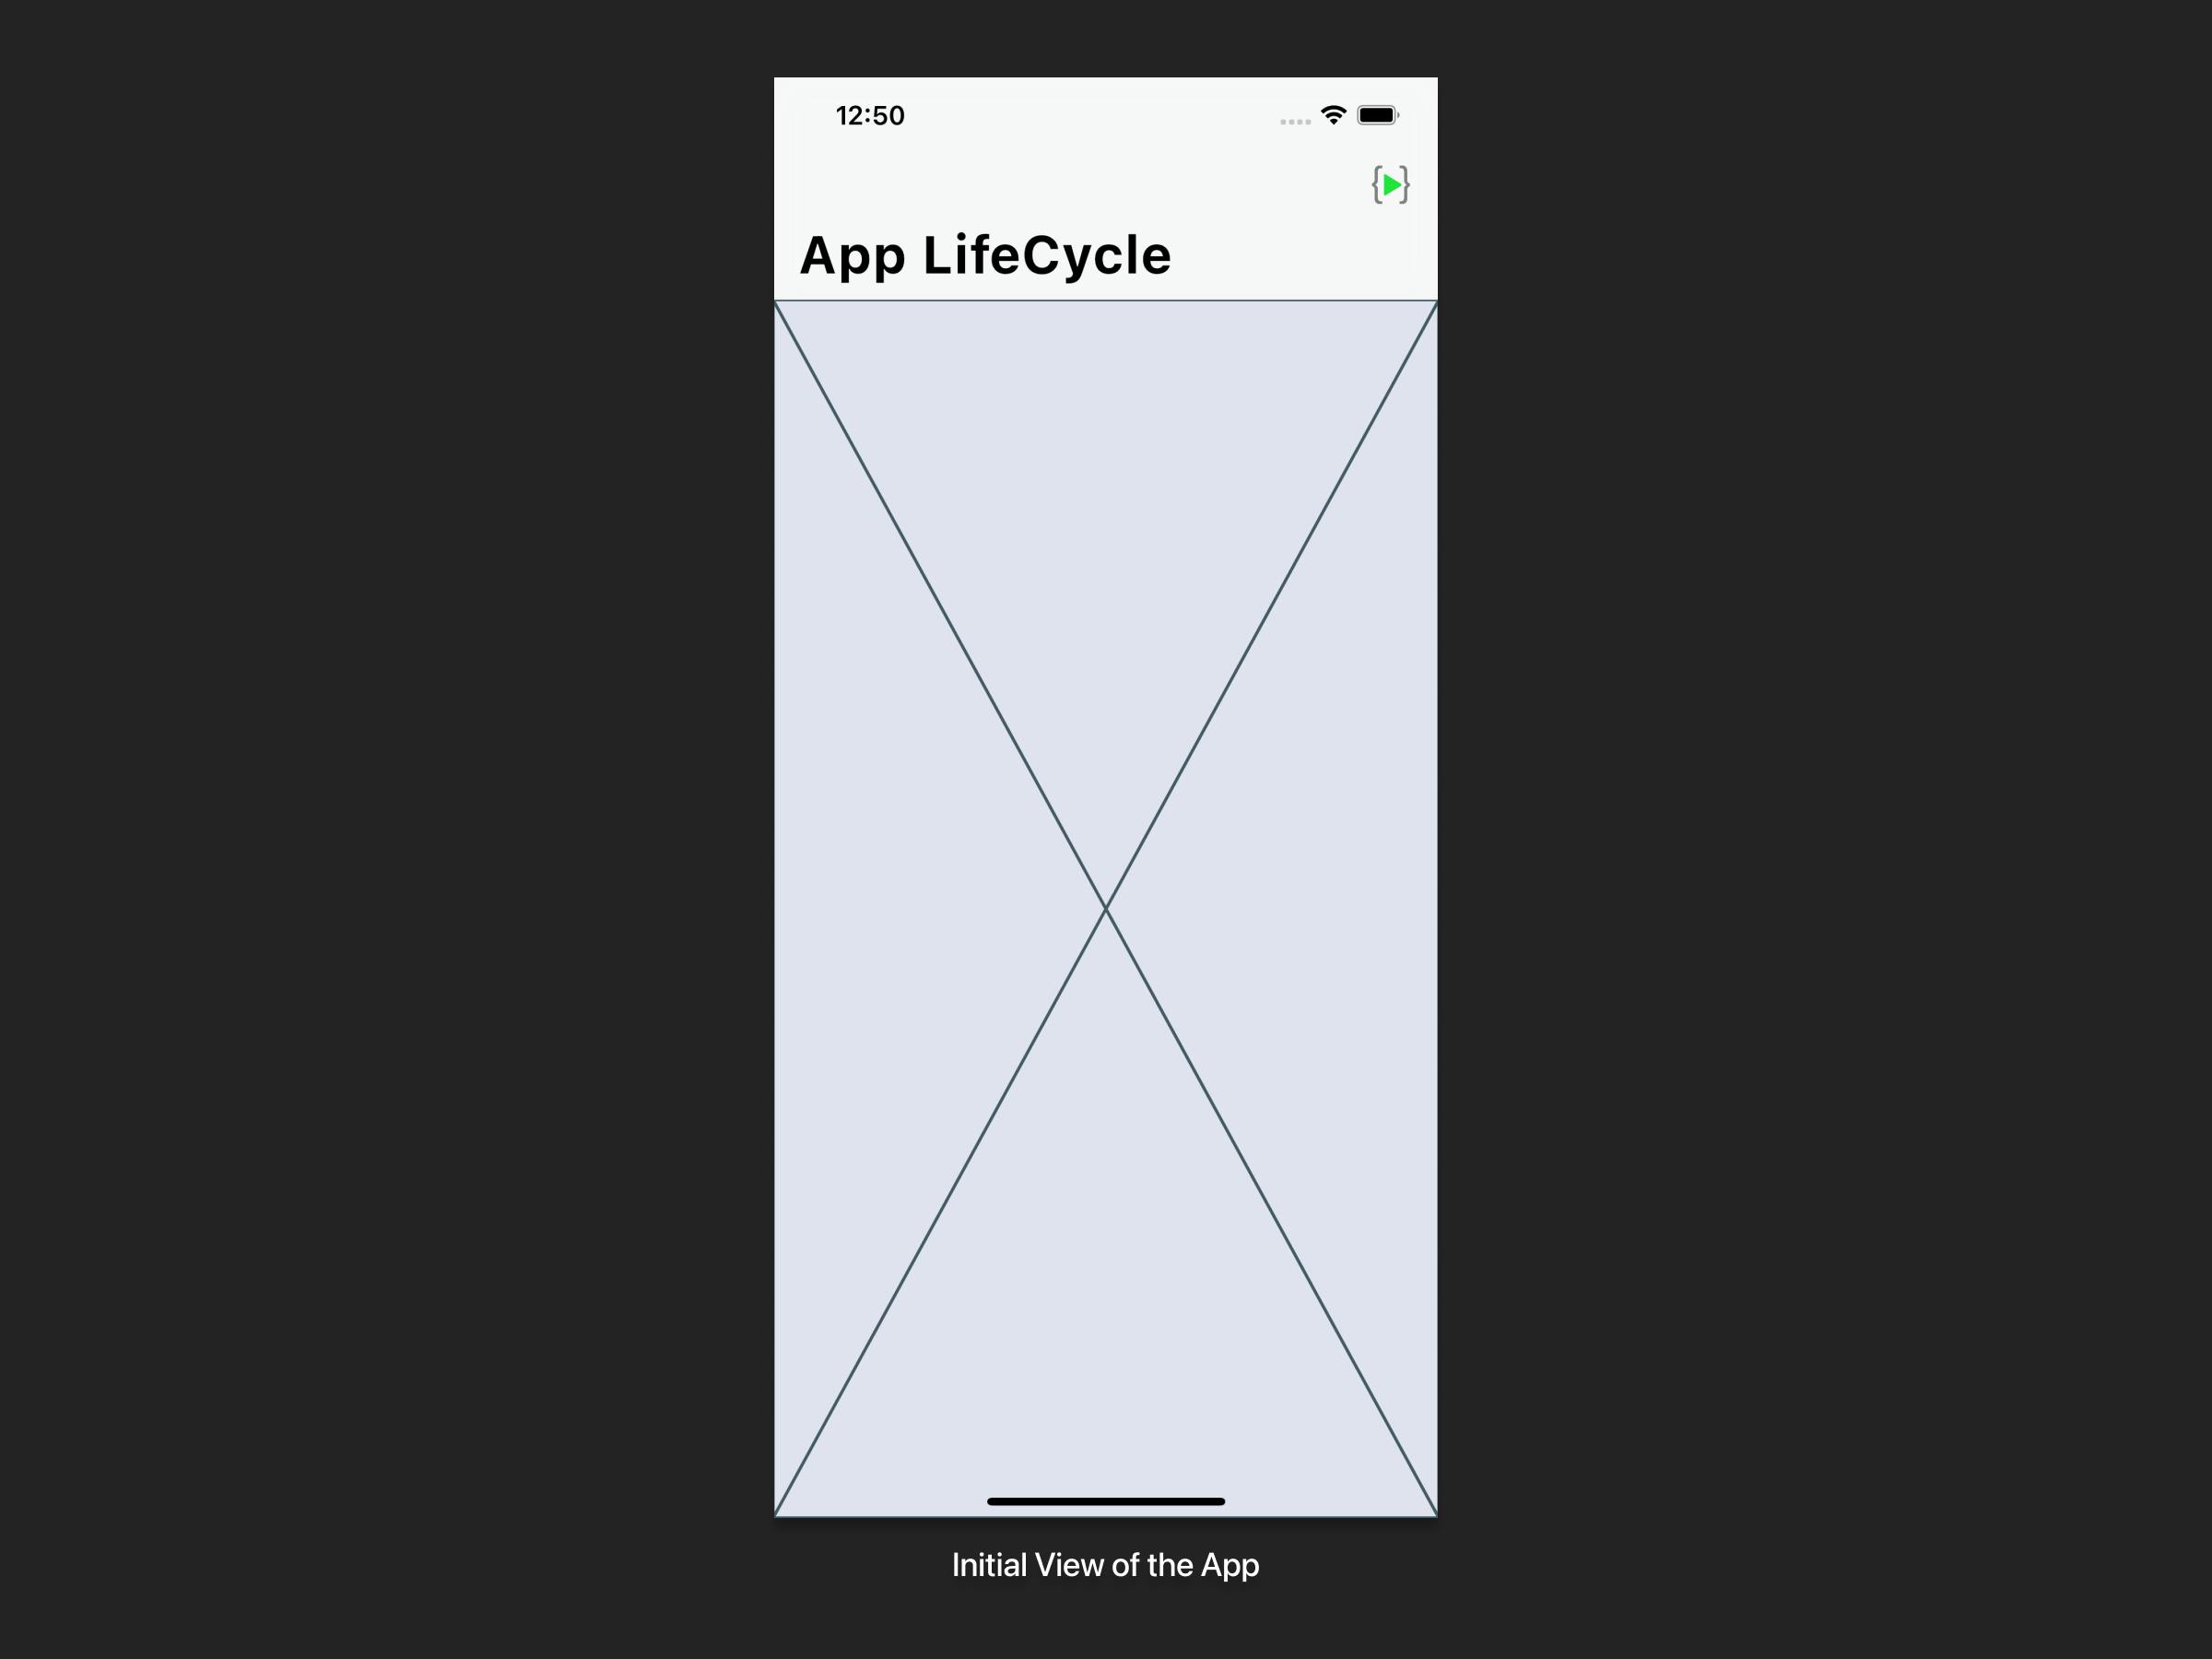
As of now, If you look into the code you can understand the App which as Title and body property with a placeholder()
To display the list of processes happening when moving background and foreground We need to create a List of Widgets
int step = 0;
List<Widget> _processes = [];
step value tracks the process number and updates the value by one in each state.
Create a Tile
When we pass the step value and location of the current state then the ListTile widget is created using this method.
Widget _createTile({int stepNo, String location}) {
    return Padding(
      padding: const EdgeInsets.only(top: 8.0),
      child: Container(
        color: kContainercolor,
        child: ListTile(
          leading: CircleAvatar(
            backgroundColor: kPrimaryColor,
            radius: 20.0,
            child: Text(
              stepNo.toString(),
              style: kHeadlineLabelStyle
            ),
           ),
          title: Text(location),
        ),
), );
}
Update State’s
when the app reaches each state then update the step value, location, and add them to the _processes list.
Make sure you have implemented the abstract class WidgetsBindingObserver. After that, we have to observe the changes of the AppLifecycleState
initState():
Add the following inside our initState
WidgetsBinding.instance.addObserver(this);

// After updating the step value, location and add that to the _processes list then code looks like

@override
  void initState() {
    print("Init State");
    super.initState();
    setState(() {
step += 1;
      _processes.add(_createTile(stepNo: step, location: "Init
State"));
});

WidgetsBinding.instance.addObserver(this); }

// Similarly, for dispose():

@override
  void dispose() {
    print("Dispose");
    setState(() {
step += 1;
      _processes.add(_createTile(stepNo: step, location:
"Dispose"));
});
    WidgetsBinding.instance.removeObserver(this);
    super.dispose();
  }
// We just added observer but we need to listen to those changes using didChangeAppLifecycleState():

  @override
  void didChangeAppLifecycleState(AppLifecycleState state) {
    print("$state");
    setState(() {
step += 1;
      _processes.add(_createTile(stepNo: step, location:
"$state"));
}); }
Create a ListView
ListView.builder(
padding: const EdgeInsets.all(0.0),
itemCount: _processes.length,
itemBuilder: (context, index) {
return _processes[index];
}, ),
Build App
Now, Replace the Placeholder() with ListView Builder. Now when you run the app its should look like this
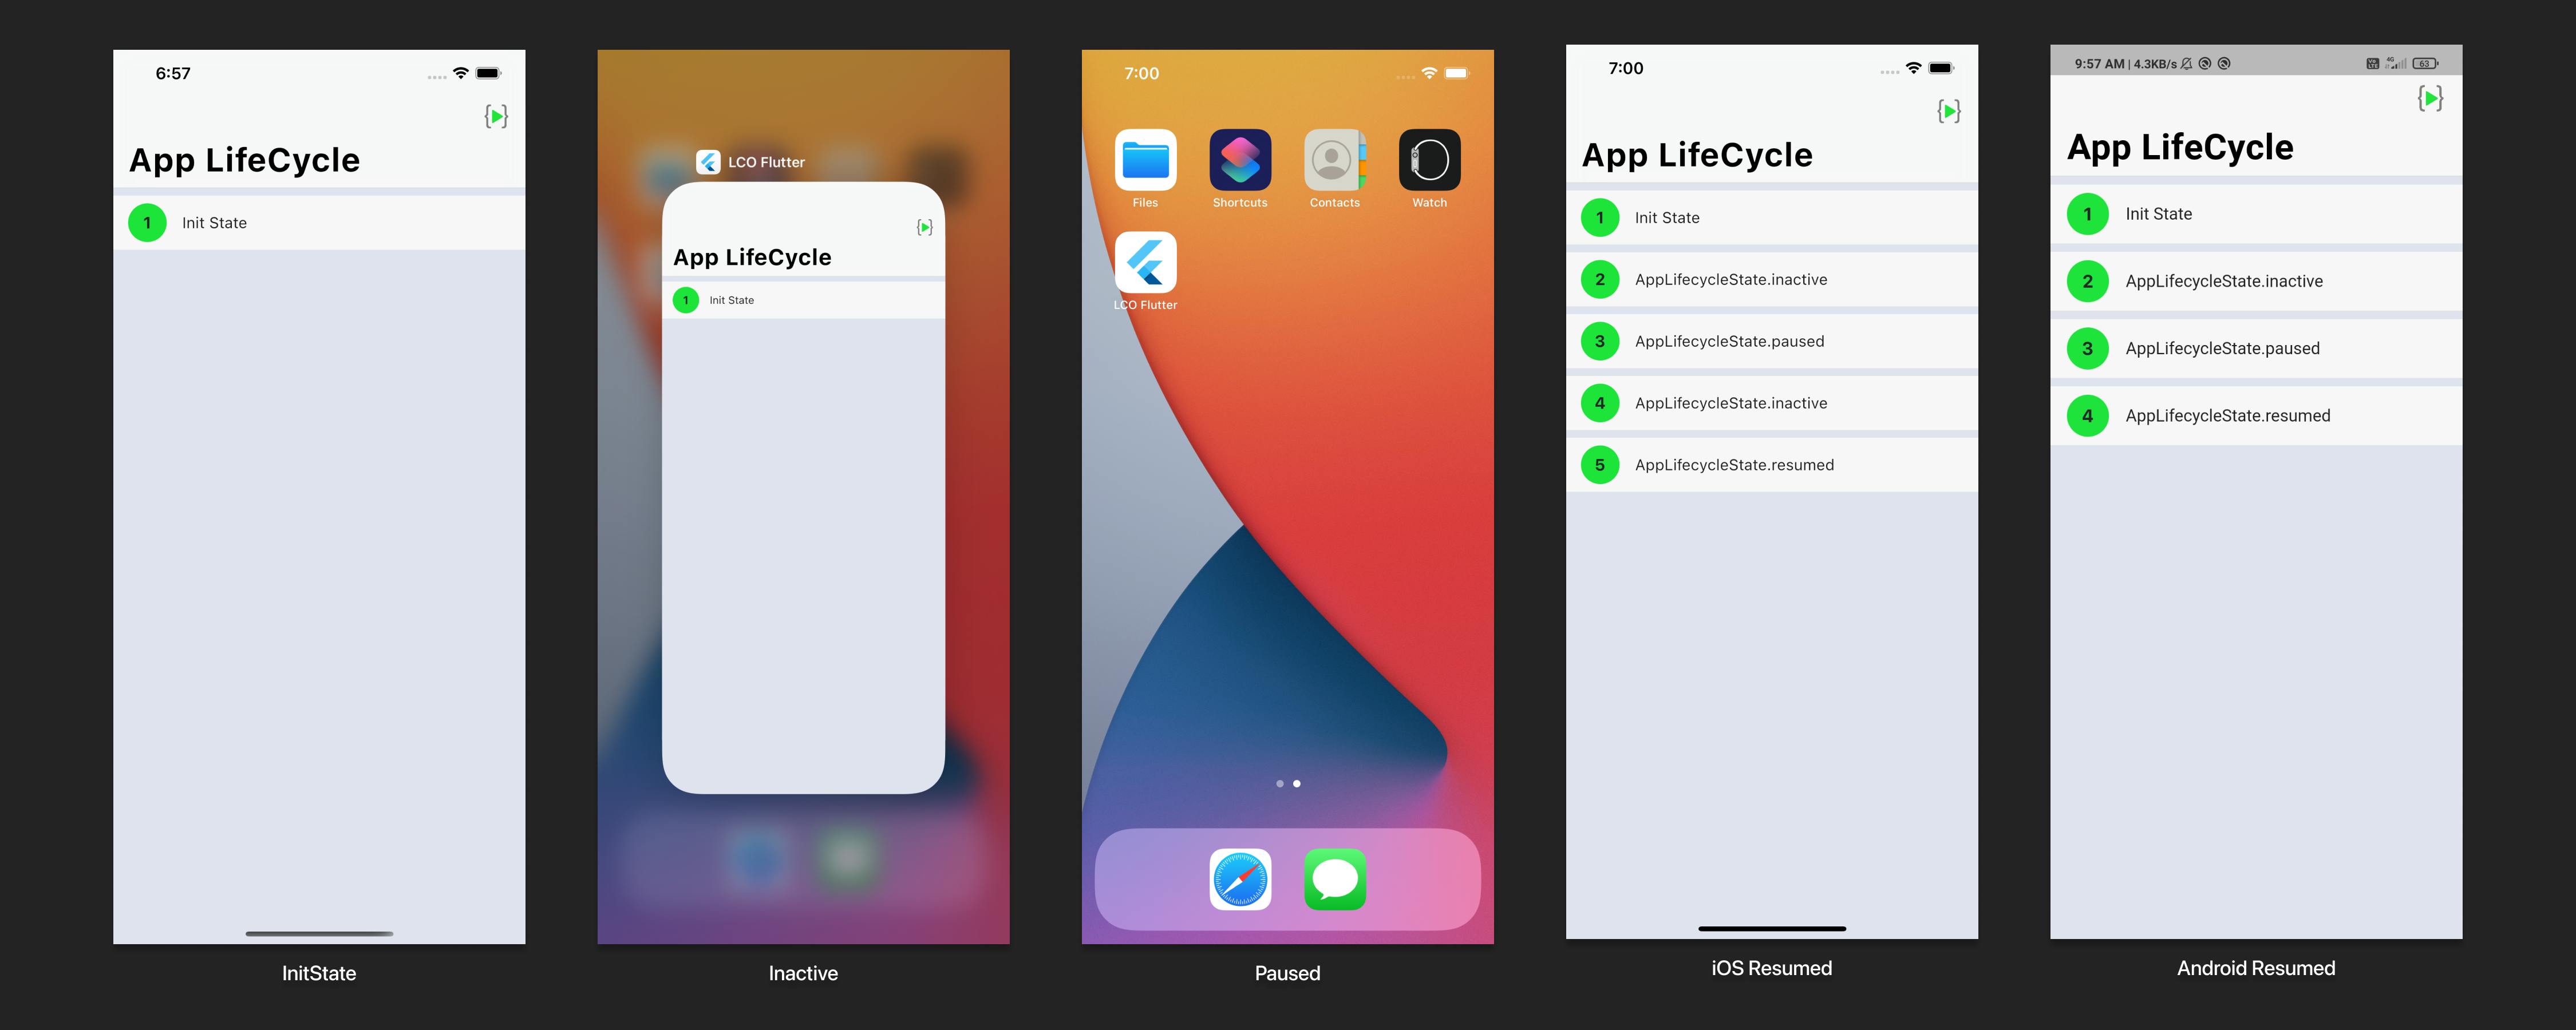
Referencing the screens
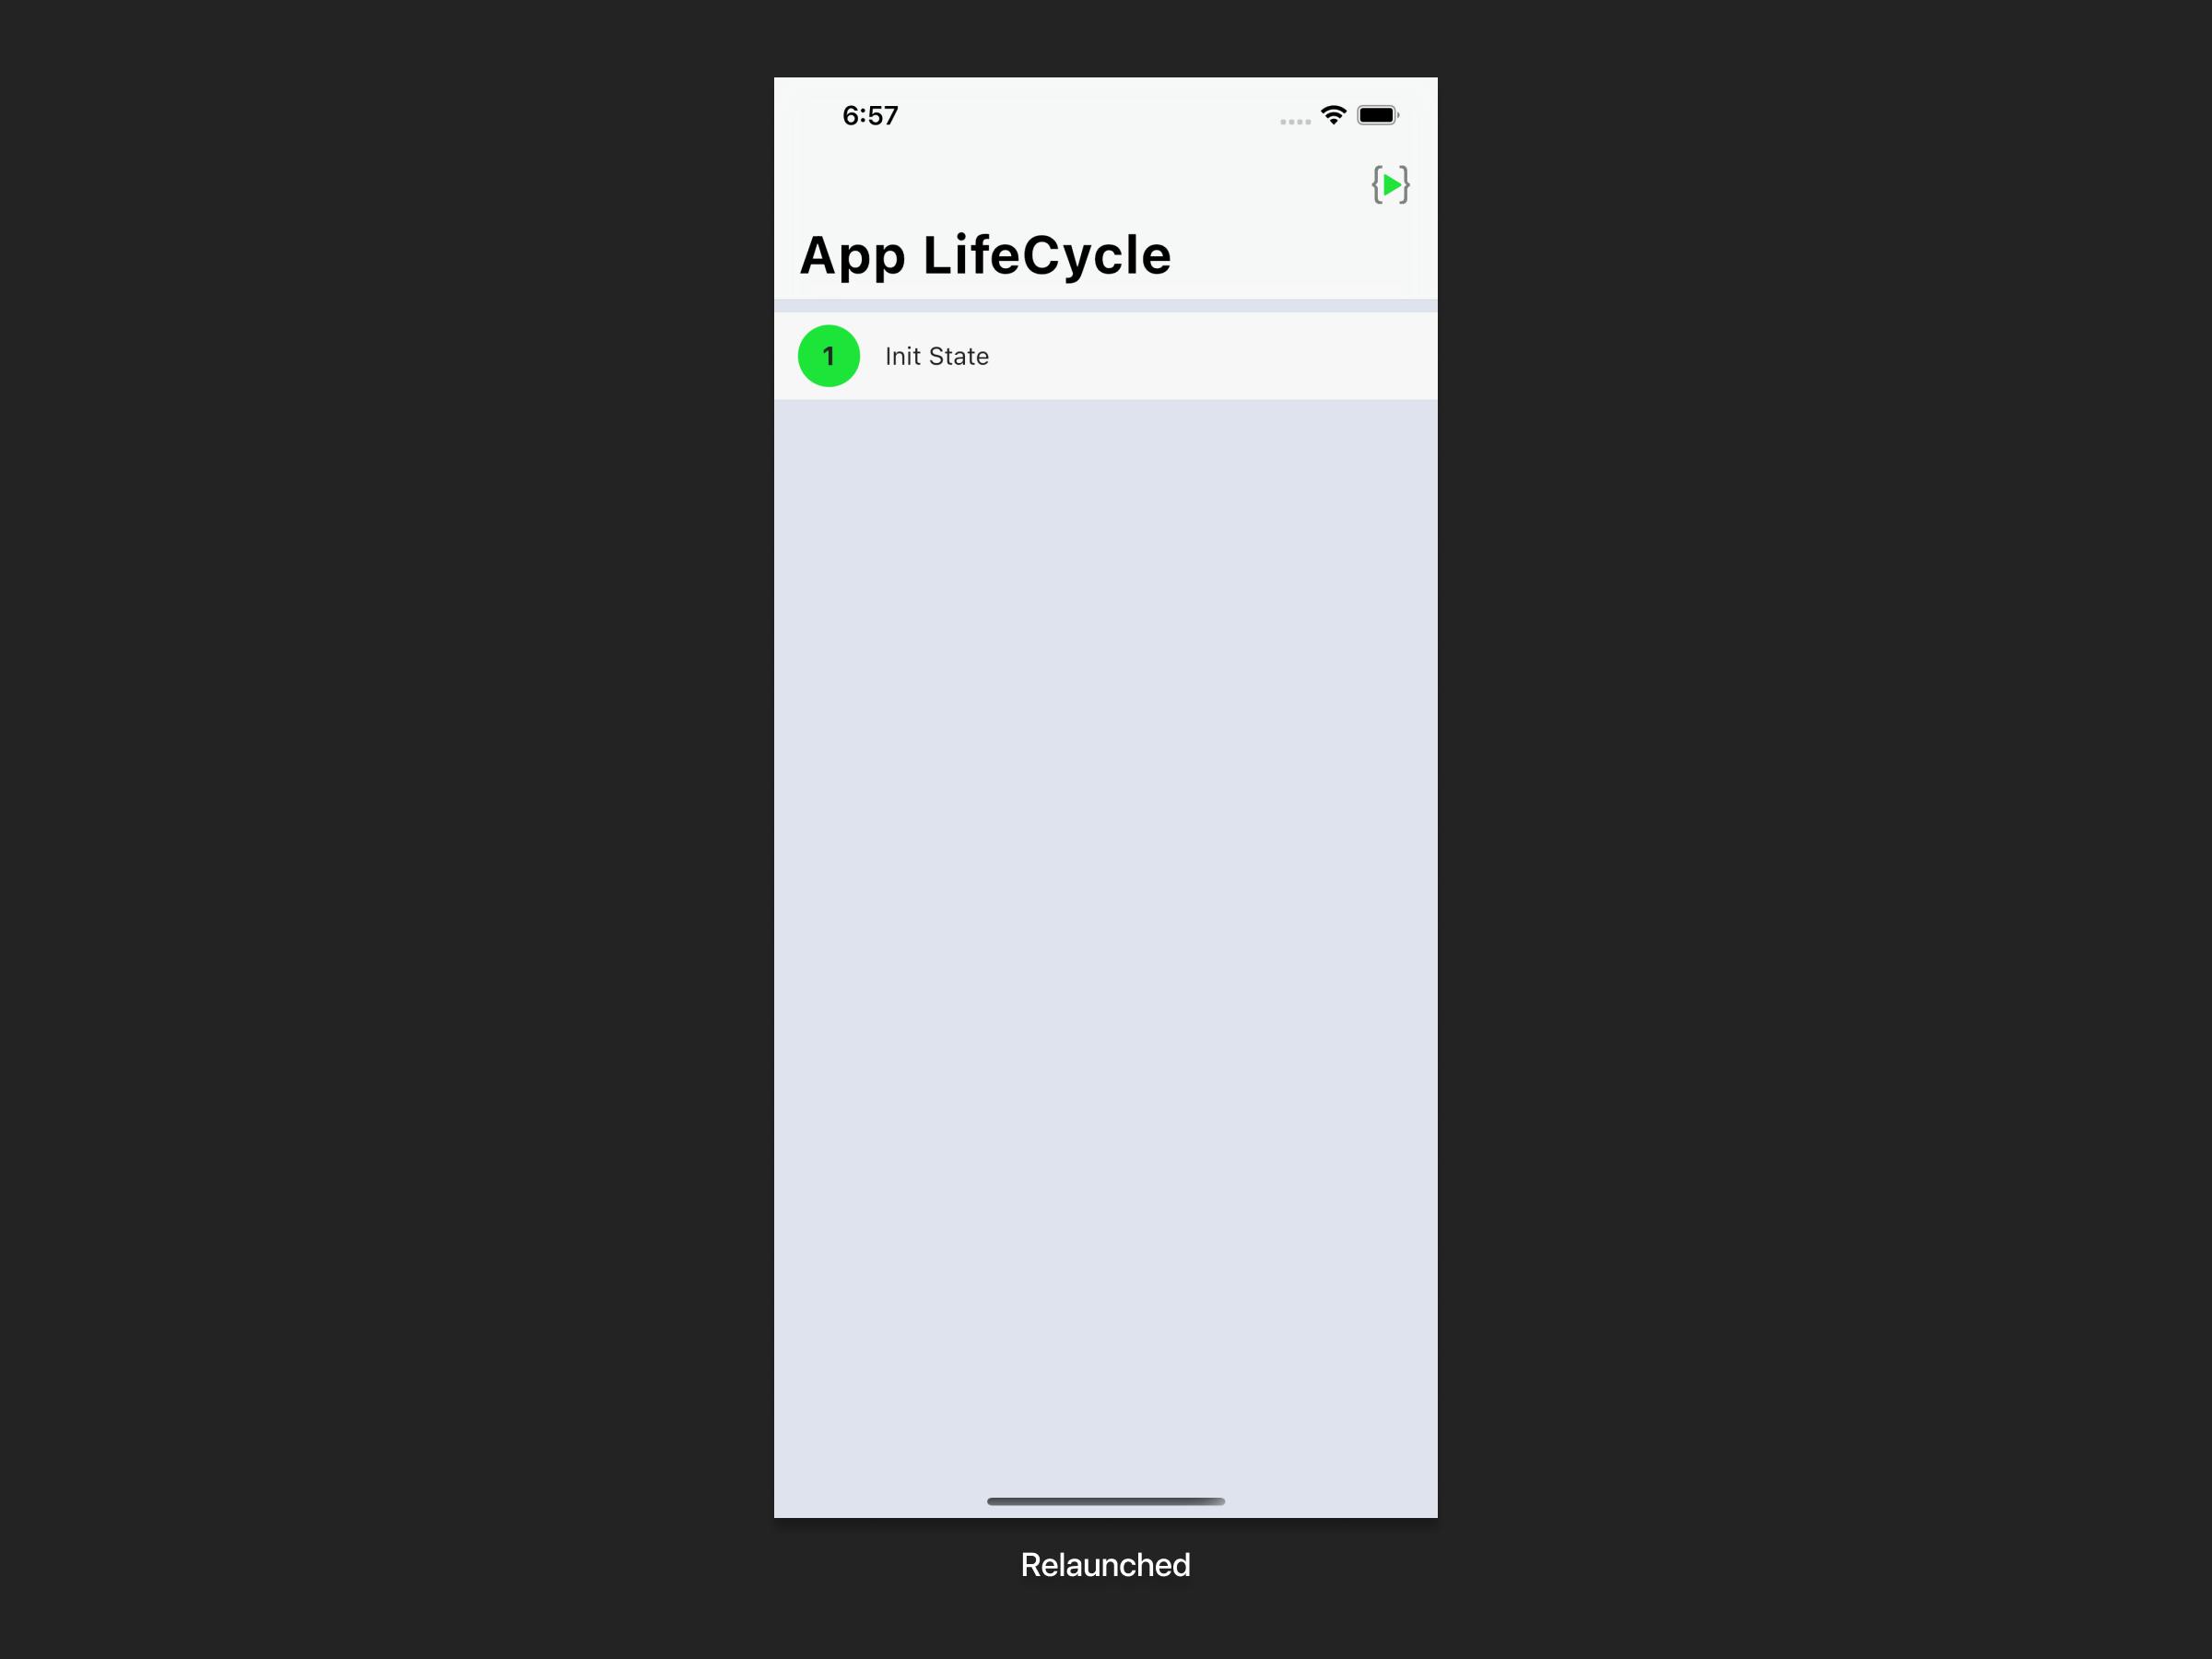
- The first process you will witness when you build the app is InitState.
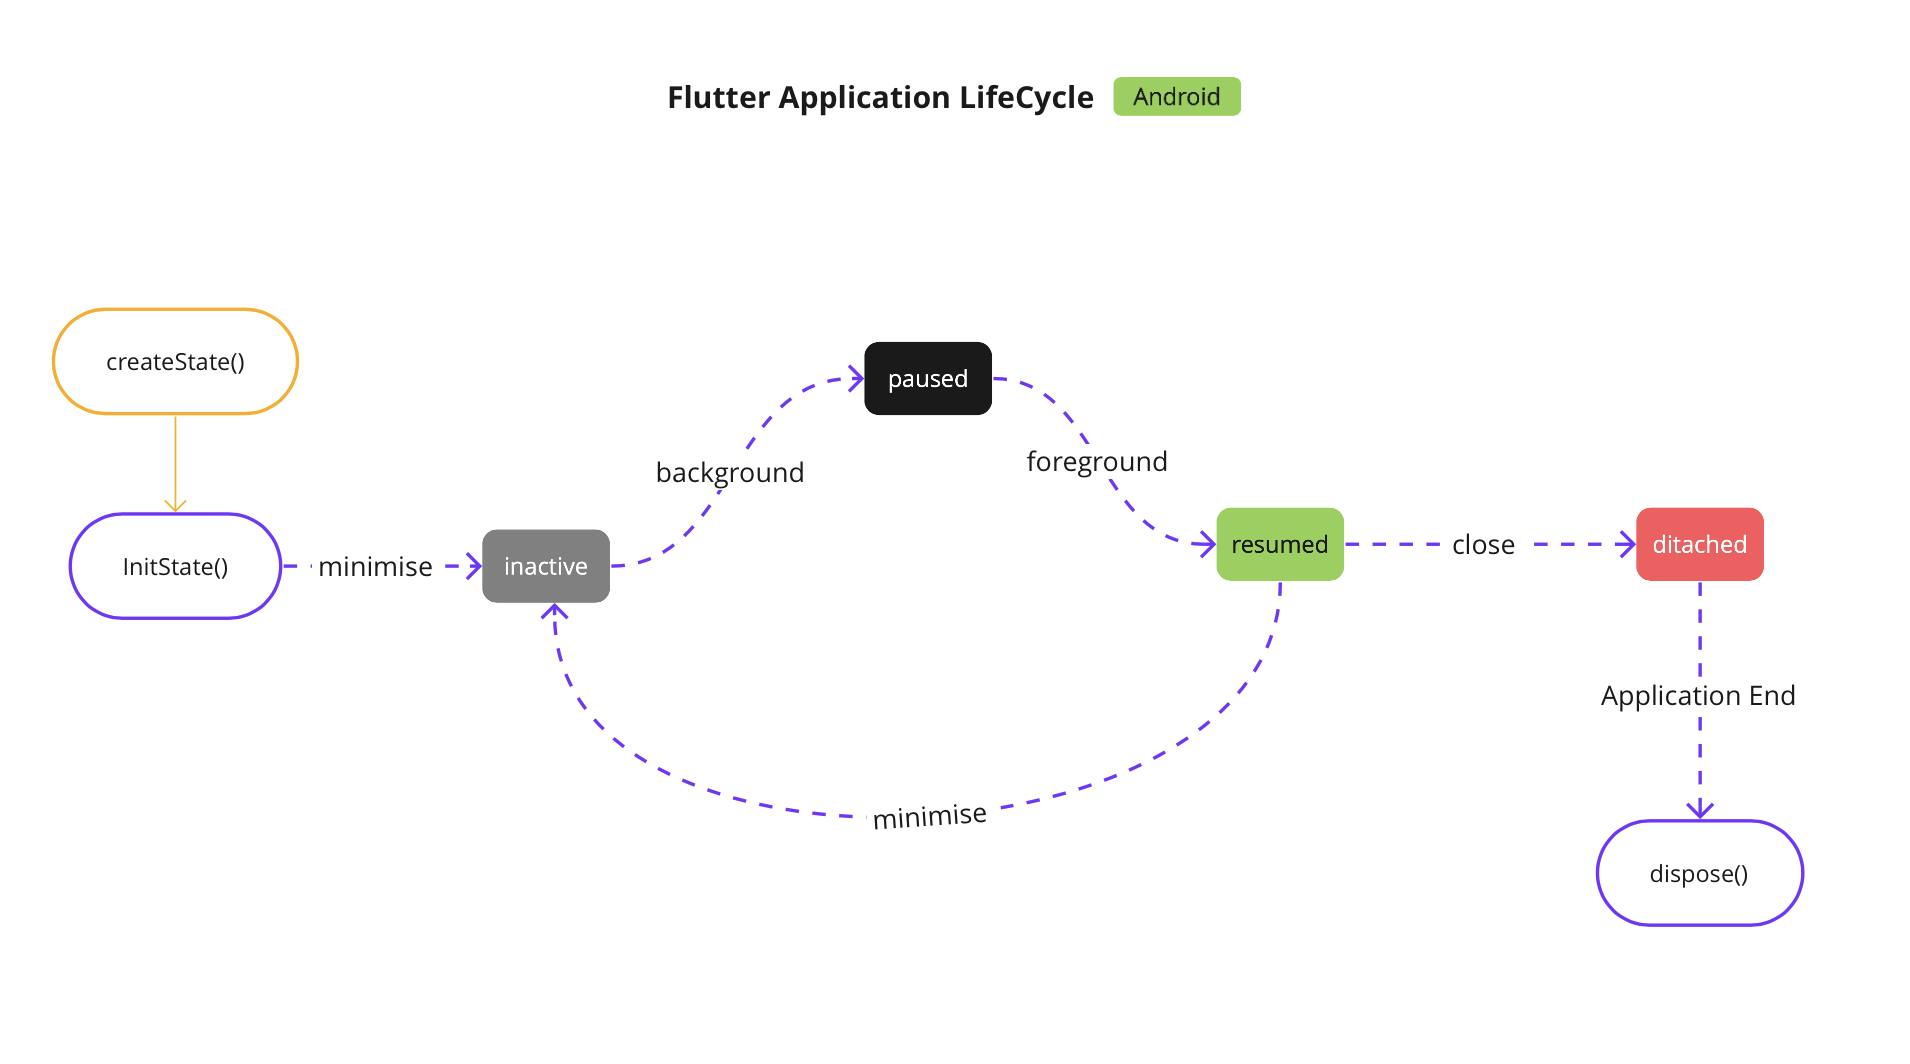
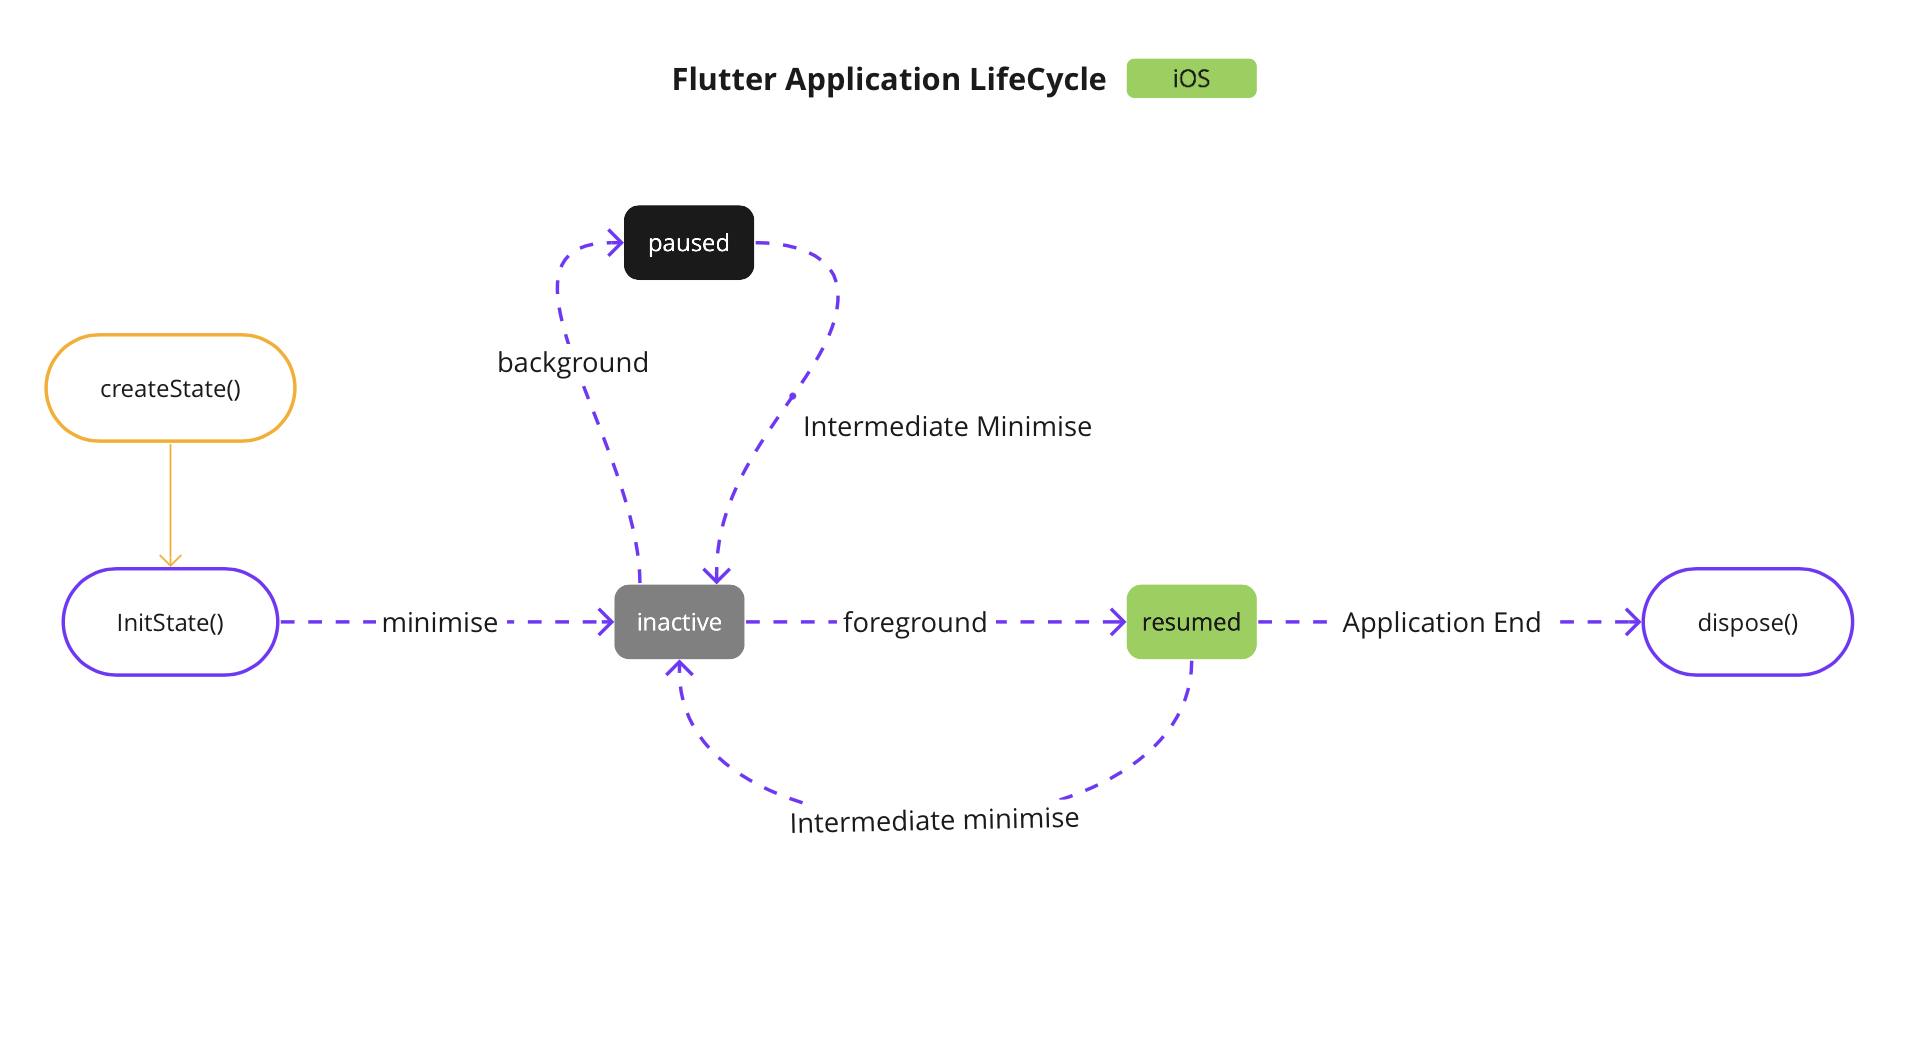
- When you minimize the App then AppLifecycleState transitioned to an inactive state and when the app moves in to complete background then AppLifecycleState transitioned to a paused state.
- When you resume the iOS App, you can see the list consist is added four items. In iOS AppLifecycleState transitioned to 2x inactive, paused, and resumed. (iOS Resumed)
- When you resume the Android App, you can see the list is added with only three items. In Android, AppLifecycleState transitioned to inactive, paused, and resumed states respectively. (Android Resumed)
Intermediate Minimised State’s
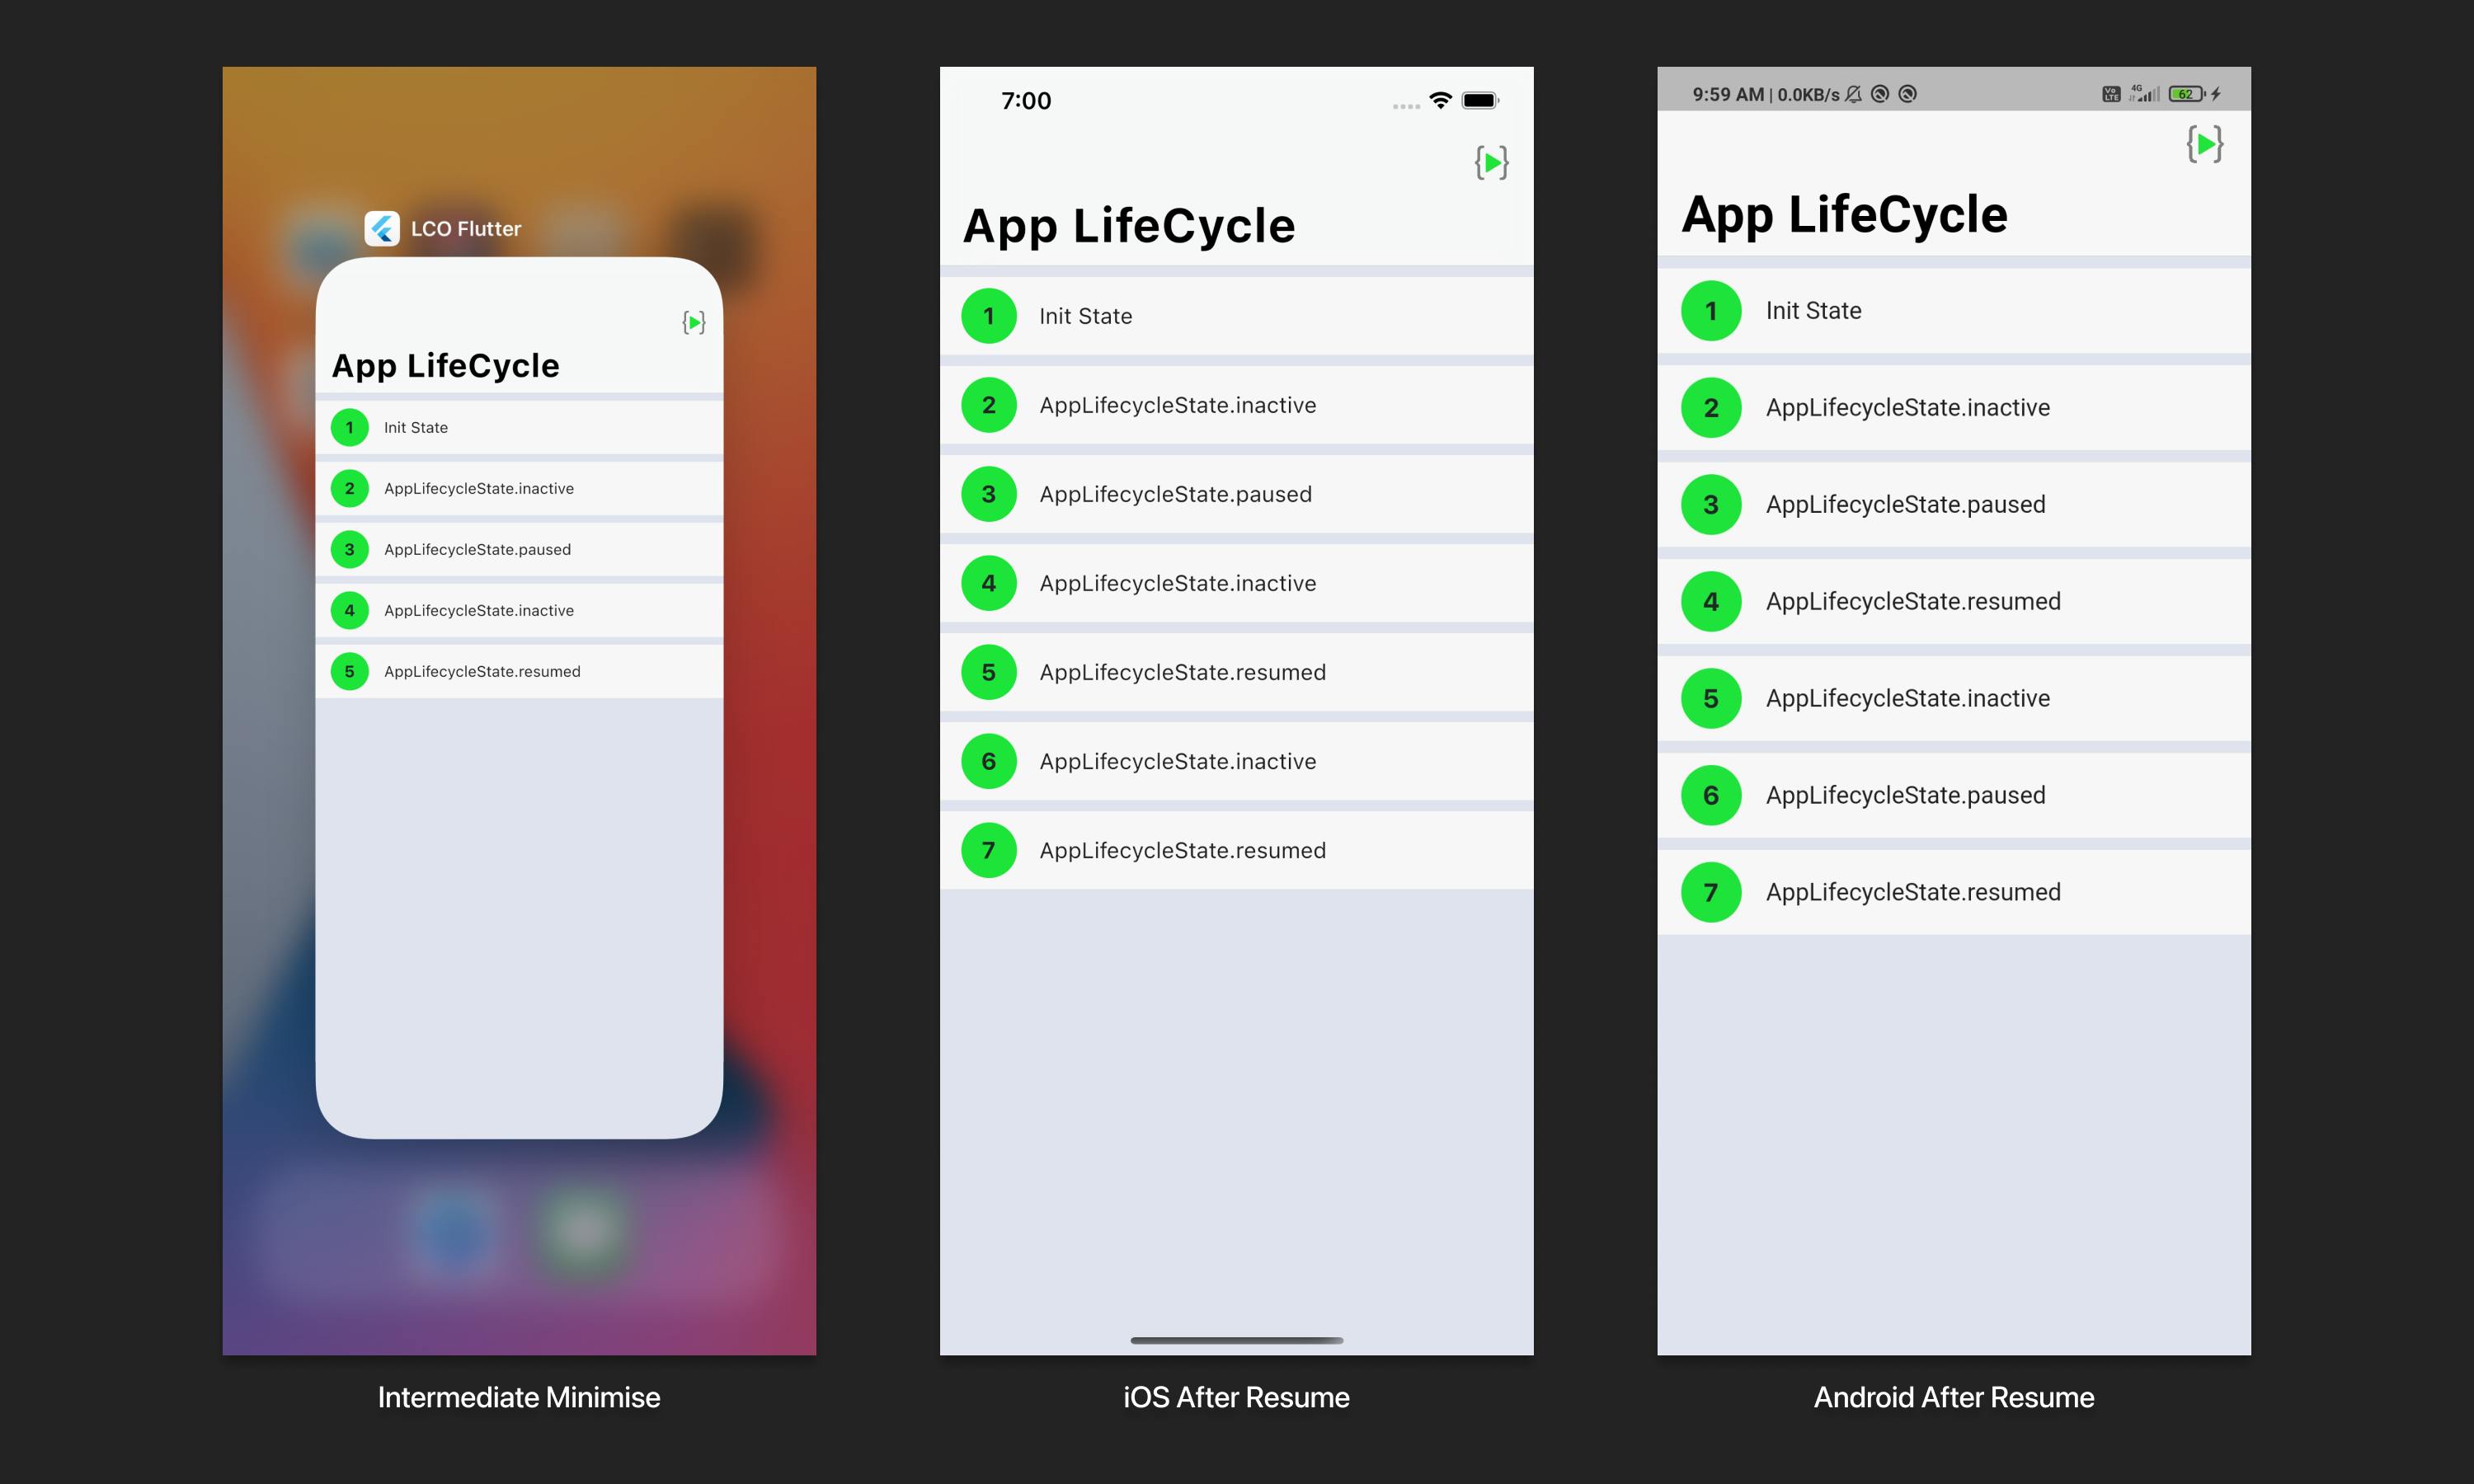
You will be transitioned to these states when the app is intermediately minimised and returns back to the foreground again. For examples like iOS Apps transition to this state when in a phone call, responding to a TouchID request, and Android Apps transition to this state when another activity is focused, such as a split-screen app, a phone call, a picture-in-picture app, a system dialog, or another window. iOS Application will reach inactive and resumed states only but, Android Application will acts as it was in the background.
Relaunch
When you relaunch the app, then the App transition to initState() as first but, you will not see any print statement on the console from the disposed() in both Android and iOS because disposed() only unsubscribe the events, streams. Even setState() does work.
Have you remembered, still we didn’t talk about detached state in AppLifecycleState? You can only transition to this state in only when the app gets closed on Android Devices(10 & above only)
We can print this statement as of now but, if you want to add this to the list then persist the data before the app terminates.
These are all the state's you will be transitioned to when your app is moving background and foreground.
Flow Analysis (Optional)
Android:
iOS:
Here’s the final code just in case you need it
Conclusion
It’s been a long road and we’ve seen quite a lot. You can use this concept when a Flutter Application wants to load/store data in the background and show alerts when the app is in the foreground again and also for notifications.
Hope you’ve enjoyed this and Thanks for reading!

